> For the complete documentation index, see [llms.txt](https://docs.ibexa.ai/llms.txt). Markdown versions of documentation pages are available by appending `.md` to page URLs; this page is available as [Markdown](https://docs.ibexa.ai/manual/knowledge-base.md).
# Knowledge Base
This guide explains how to use the Knowledge Base on the Ibexa Agentic Marketing Platform - how to navigate it, create and organise content, manage document versions, and connect documents to agents.
## Before You Begin
Any member of your organisation can read, create, and edit content in the Knowledge Base. Structural changes - updating, moving, or deleting a node, and rolling back or restoring a document version - are restricted to the node's **creator**, or an organisation **Owner** or **Administrator**.
## What is the Knowledge Base?
The Knowledge Base is a central repository of documents and folders that your AI agents can draw on when answering questions or generating content. Documents you add here are indexed and made available for retrieval by any agent that is linked to them.
## Navigating the Knowledge Base
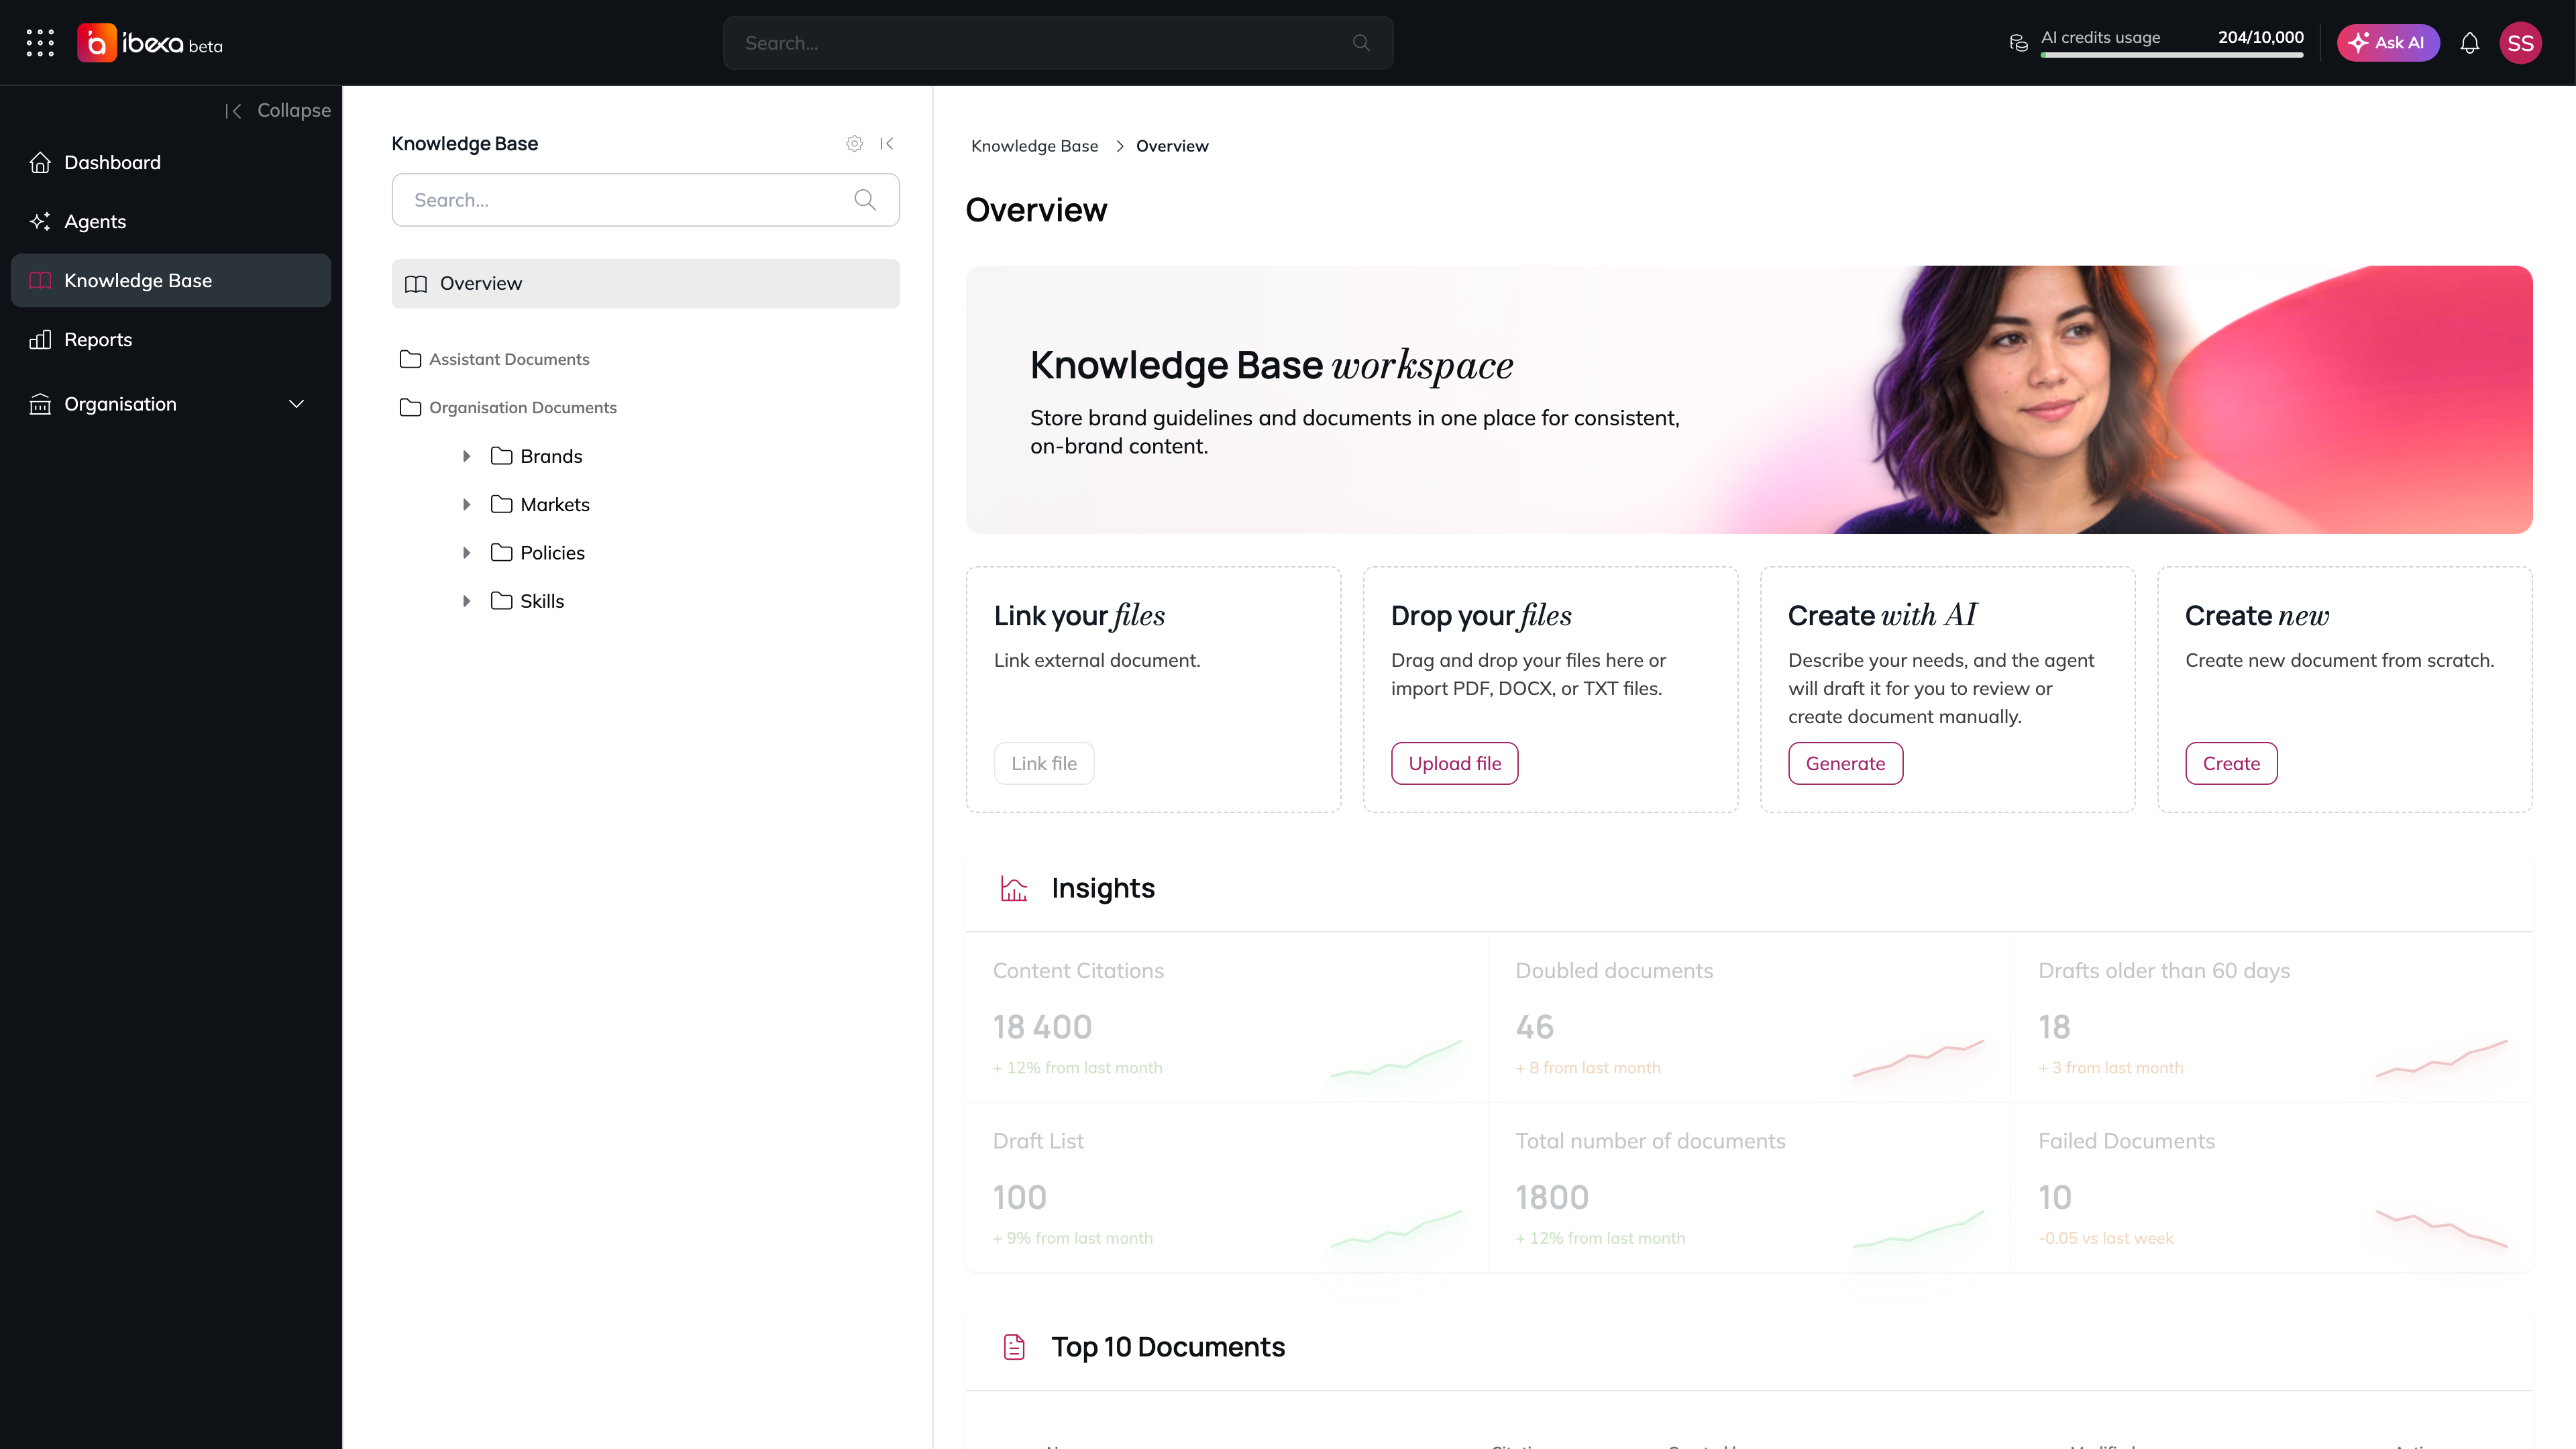
In the main menu, go to **Knowledge Base**. The page is split into two areas:
* **Sidebar (left)** - shows the content tree. Use it to browse folders and documents, or search for specific content.
* **Content panel (right)** - shows the selected folder or document.
The Knowledge Base: sidebar on the left, content panel on the right
### Sidebar contents
The sidebar contains:
* **Overview** - the landing view, showing a summary of the Knowledge Base.
* **Organisation Documents** - the main content tree for your organisation's own content.
* **Assistant Documents** - the folder the AI Assistant reads its own documentation from.
Both top-level folders are created by the platform. They are shown as greyed-out section headings rather than ordinary rows: they are always expanded, have no actions menu, and cannot be renamed, moved, or deleted. Everything you add lives inside one of them - select any folder or document below a heading to open it in the content panel. In French, German, and Spanish interfaces the two headings appear translated.
### Searching
Use the **search bar** at the top of the sidebar to find documents and folders by name. Type at least 3 characters to start a search. Matching items are highlighted in the tree.
### Collapsing the sidebar
Select the collapse arrow button at the top of the sidebar to hide it and give the content panel more space. Select it again to expand the sidebar.
## Folders
Folders help you organise documents into a logical structure.
### Creating a folder
1. In the sidebar, select **Organisation Documents**, or select an existing folder inside it where you want the new folder to appear.
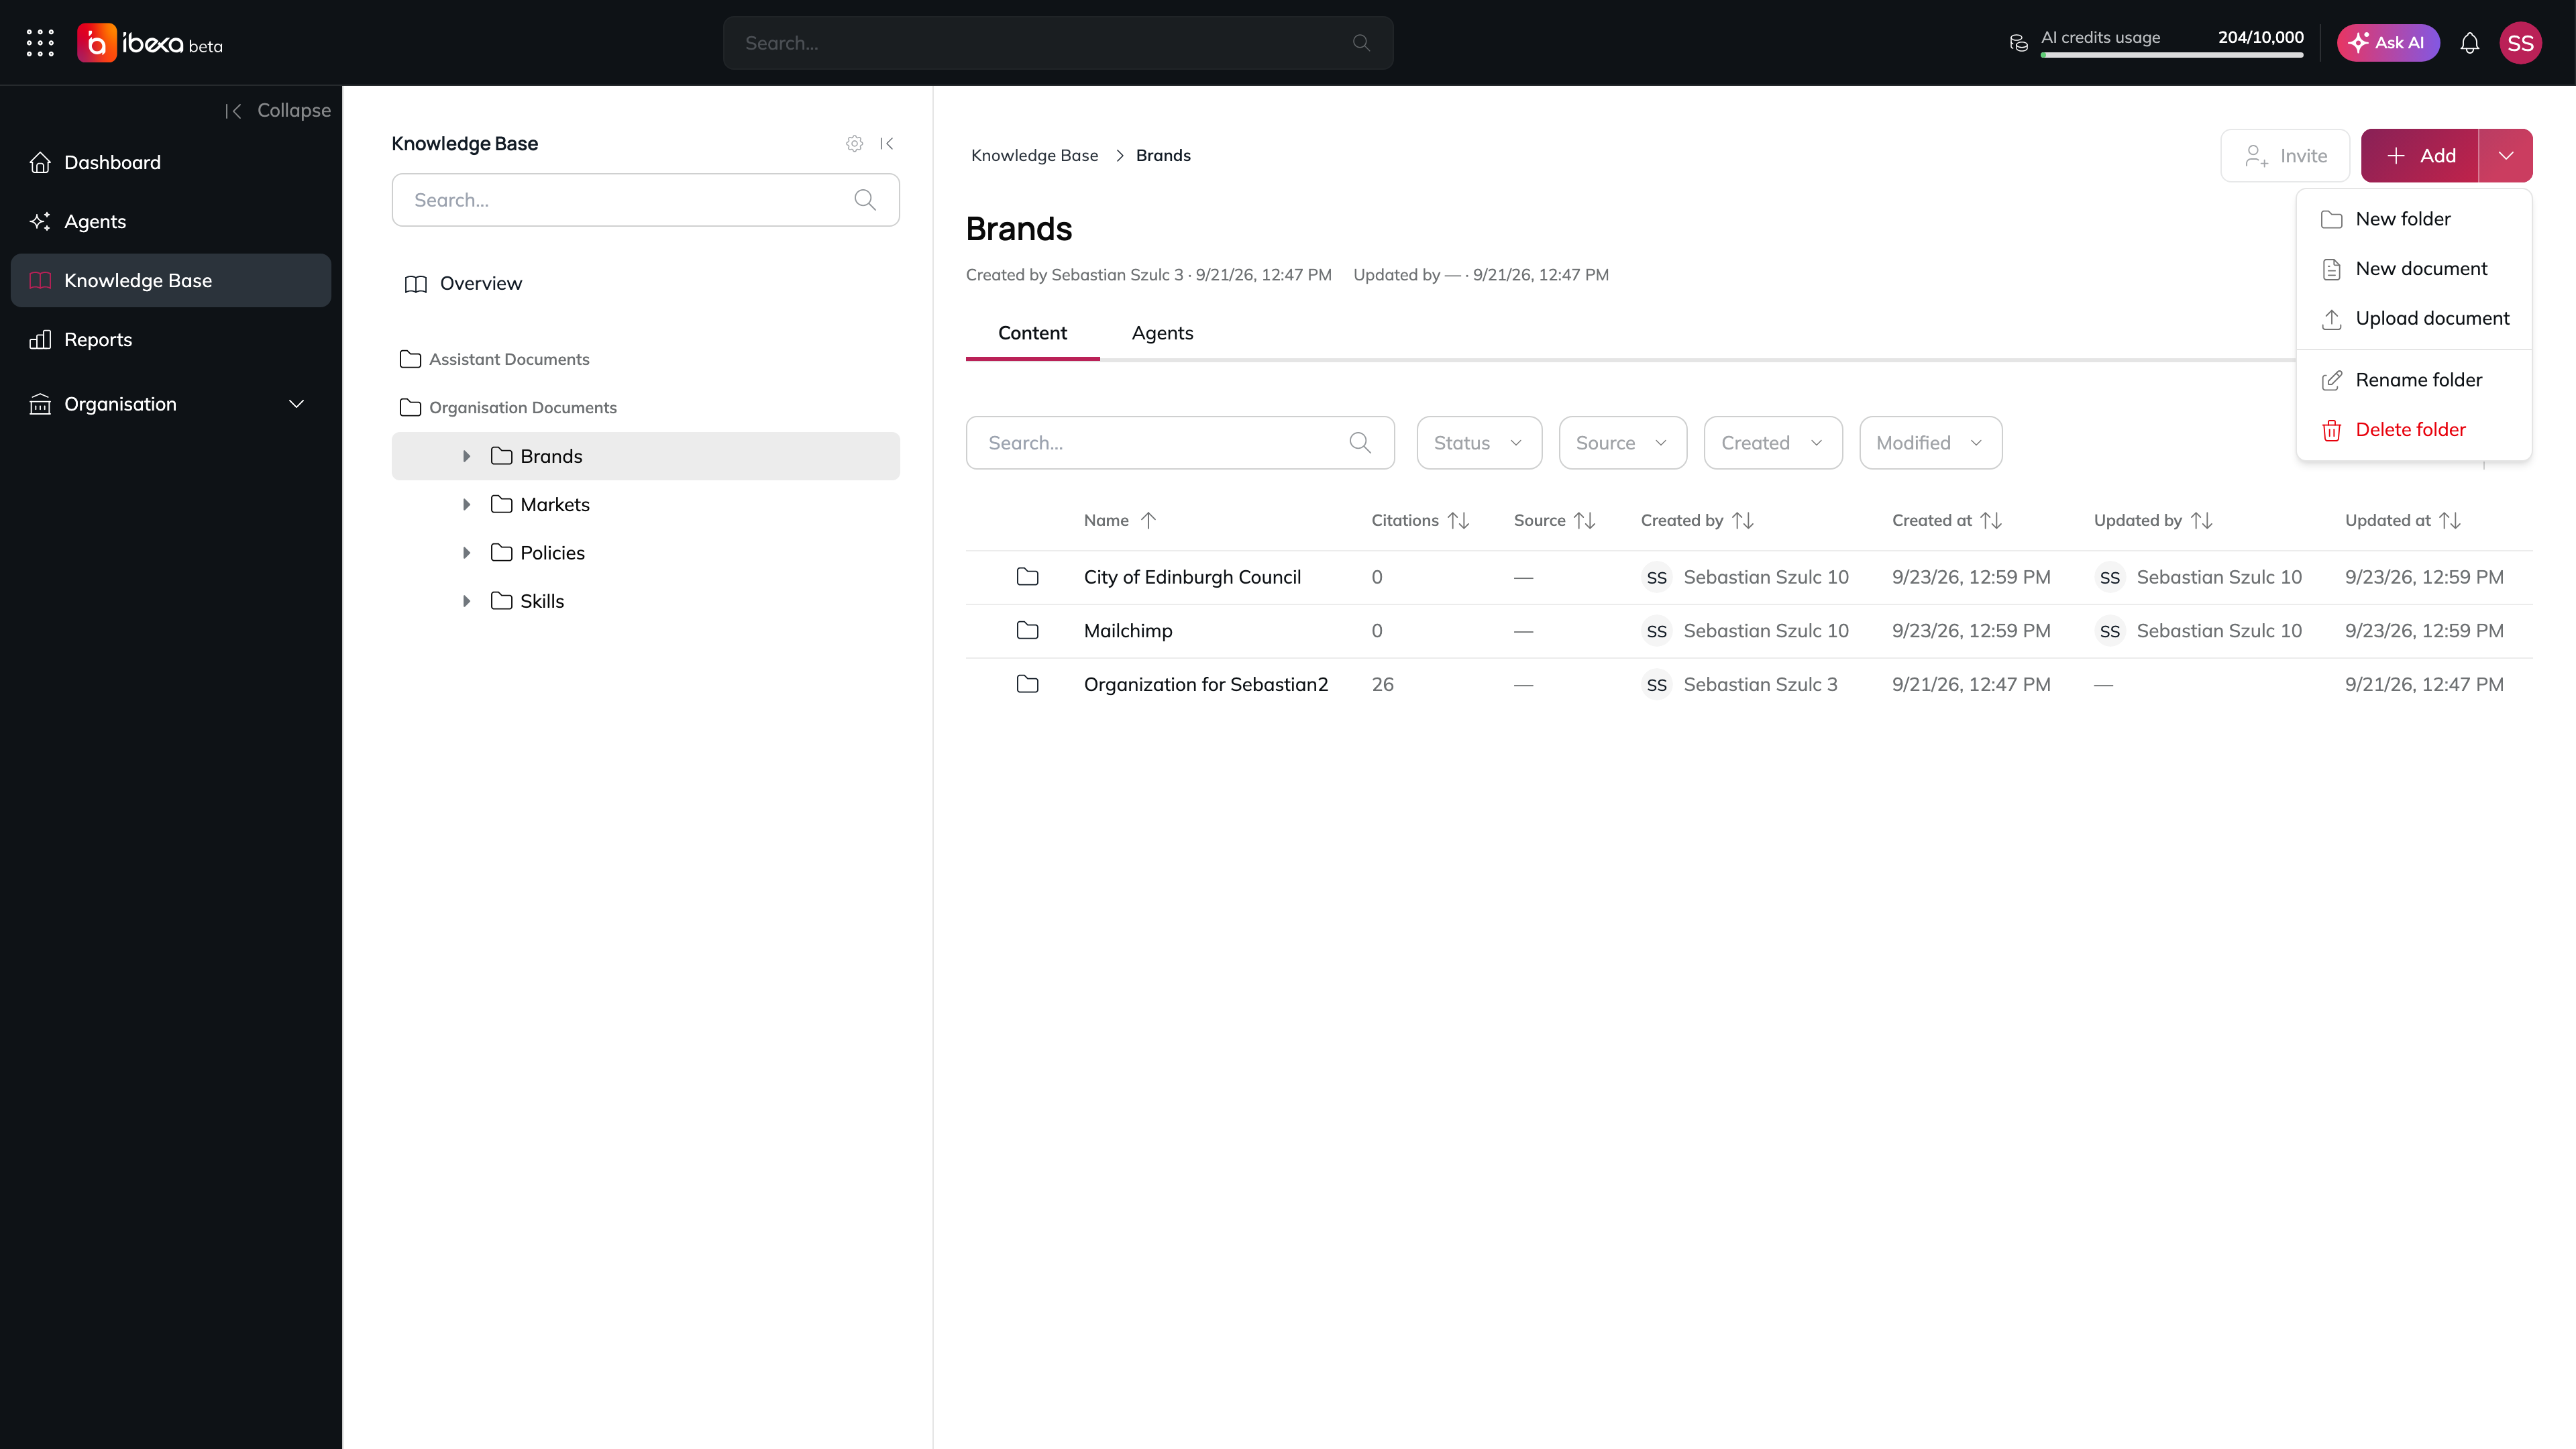
2. In the top-right area of the content panel, open the **Add** split button's dropdown and select **New folder**.
3. A new folder row appears in the content panel. Type the folder name and press **Enter** to confirm, or press **Escape** to cancel.
The Add dropdown of a folder
### Renaming or deleting a folder
Open a folder in the content panel. The folder's actions are available via its actions menu. Deleting a folder removes it and all its contents permanently.
The two top-level folders - **Organisation Documents** and **Assistant Documents** - are managed by the platform and cannot be renamed, moved, or deleted.
## Documents
### Creating a new document
1. Select the folder where you want to add the document.
2. In the top-right area of the content panel, select **Add** (this opens the document editor directly), or open the dropdown and select **New document**.
3. The **Document Editor** opens in full-screen mode.
4. Enter a **title** at the top of the editor.
5. Write or paste your content in the editor area. The editor supports **Markdown** formatting.
6. Select **Save** to save the document as a new draft, or **Discard** to cancel without saving. After saving, you are returned to the Knowledge Base with the new document selected.
### Uploading a document
You can upload an existing file instead of writing content from scratch.
1. Select the folder where you want to upload the document.
2. Open the **Add** dropdown and select **Upload document**.
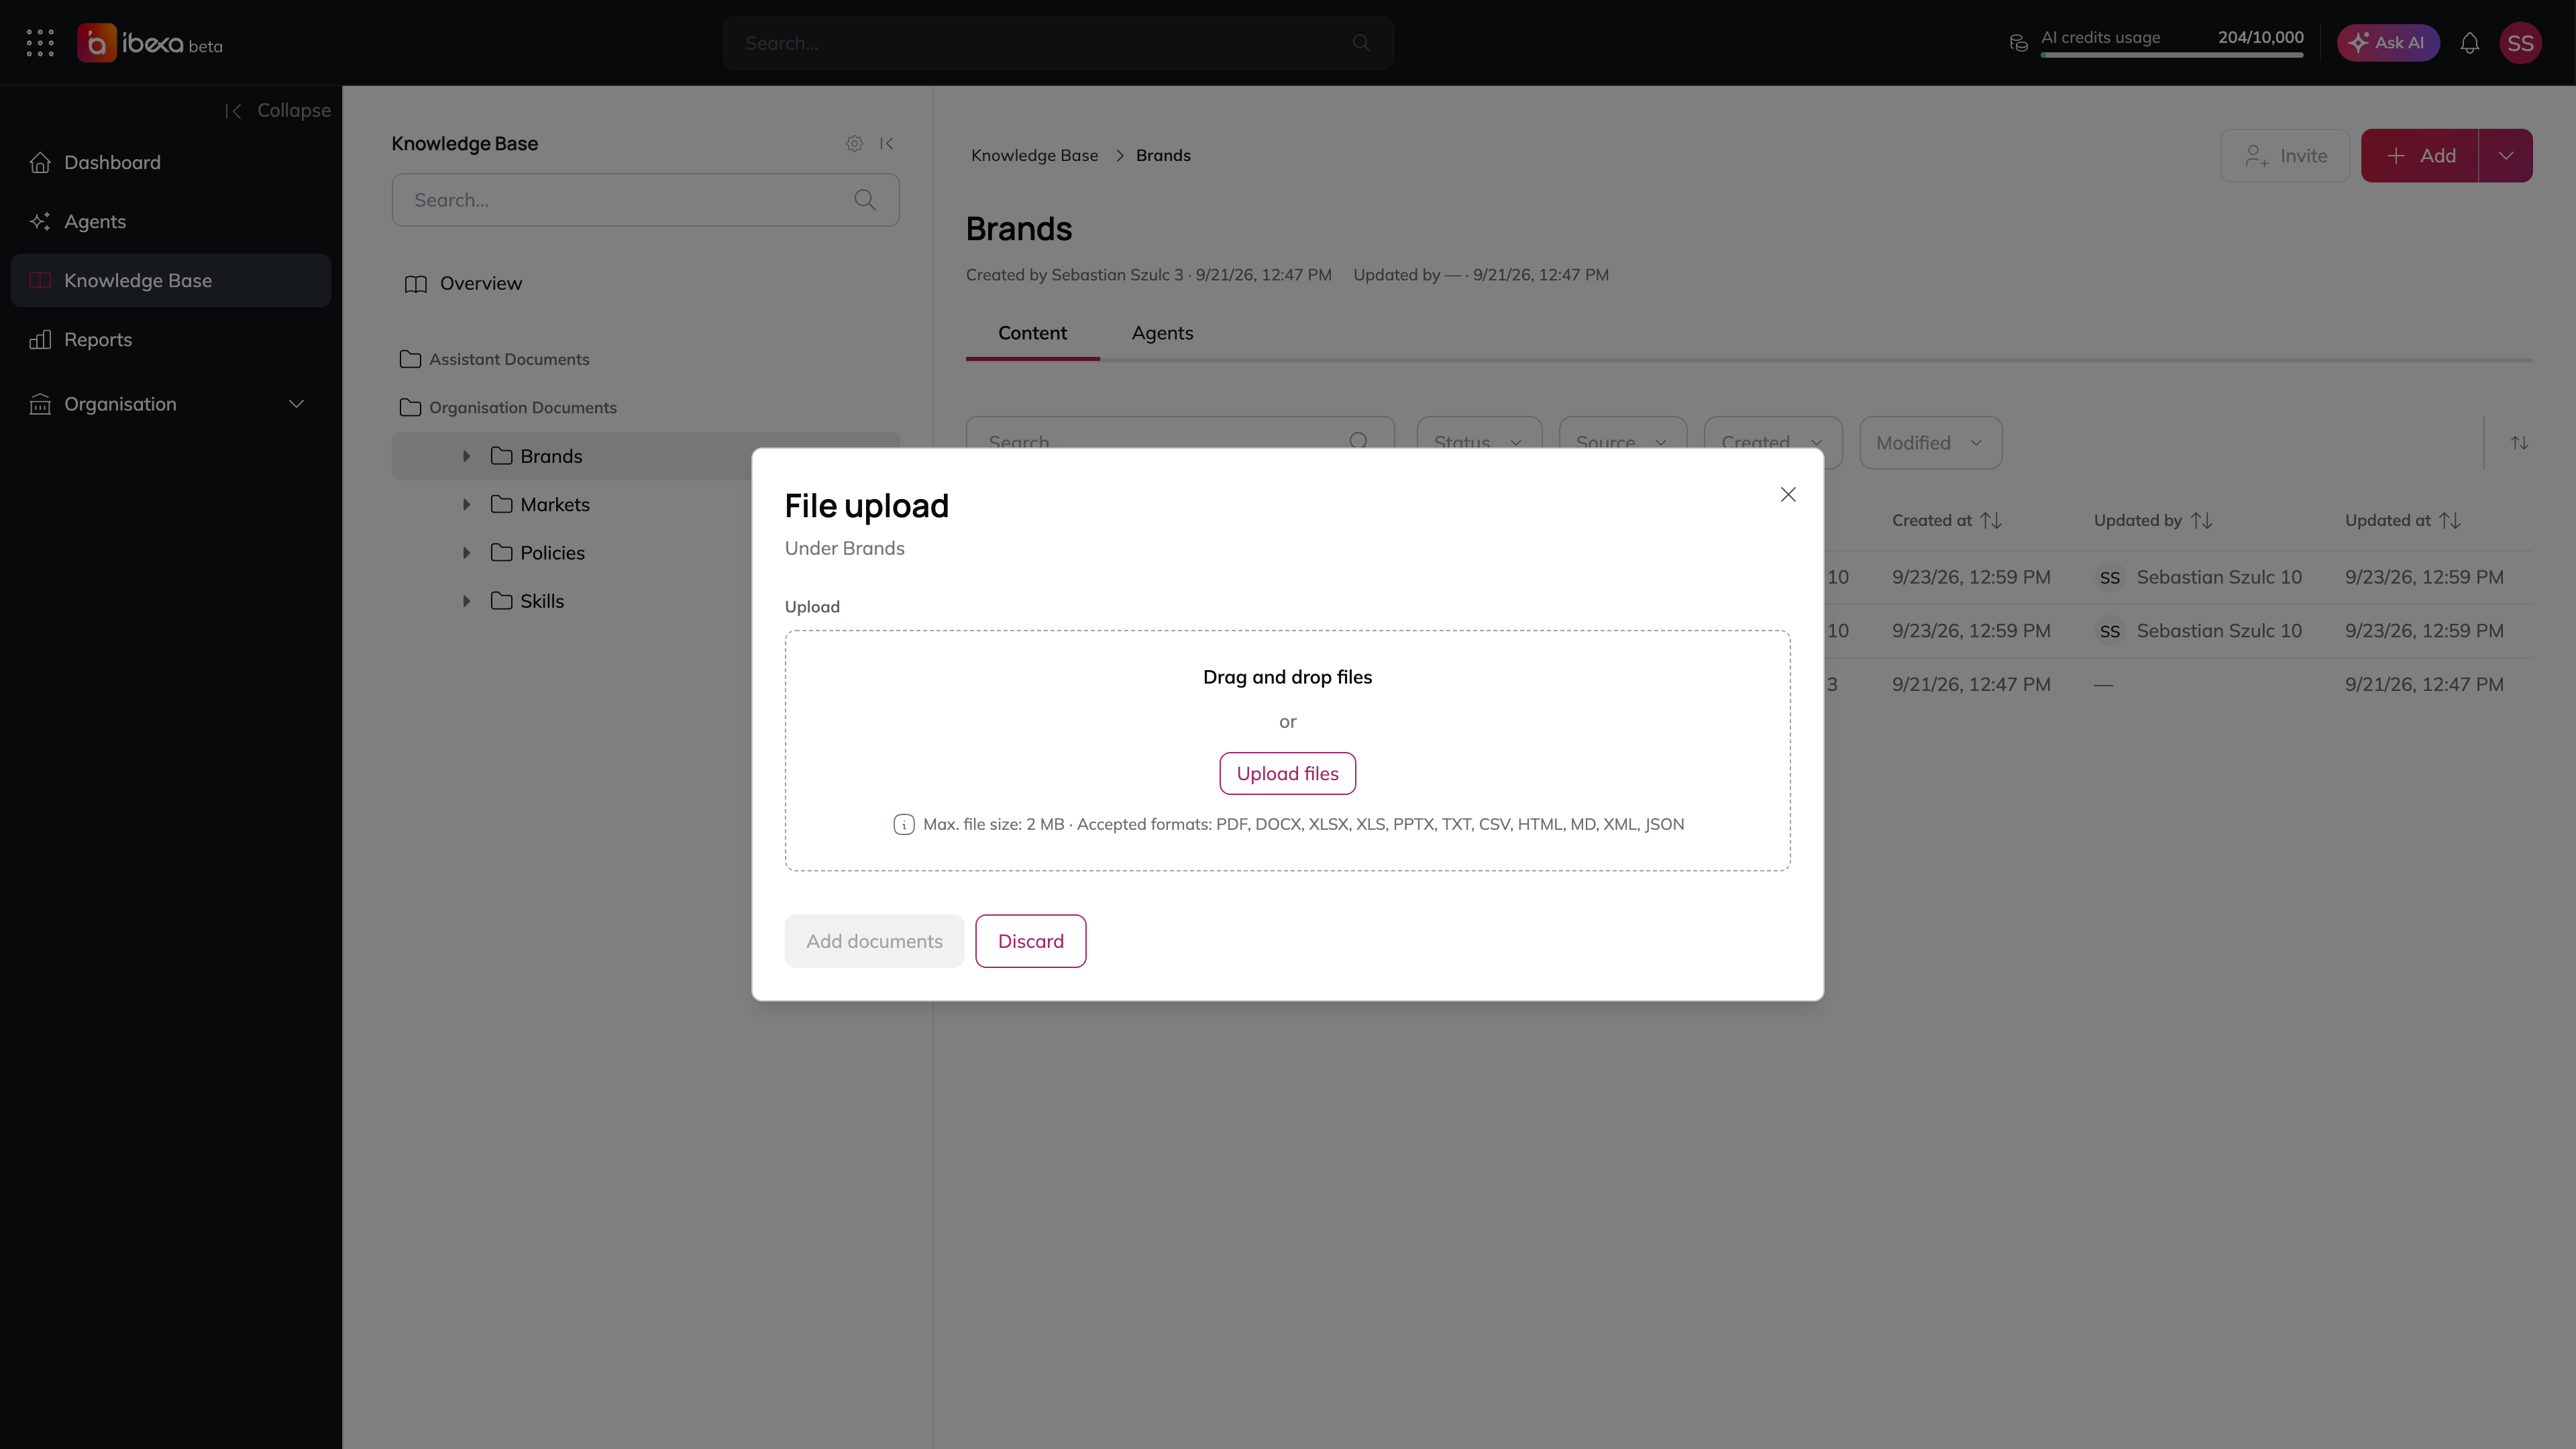
3. The **File upload** dialog opens. Drag and drop your file onto the upload area, or select it to browse your computer.
4. You can add multiple files at once. Each file is listed with its name and size.
5. To remove a file from the list before uploading, select the trash icon on that row.
6. Select **Add documents** to upload. Select **Discard** to cancel. **Accepted file formats:** PDF, DOCX, XLSX, XLS, PPTX, TXT, CSV, HTML, MD, XML, JSON **Maximum file size:** 2 MB per file
The File upload dialog
> After uploading, the platform extracts the file's content automatically. A banner on the document panel reads *"Still processing this document"* while this is in progress. The page updates automatically once the content is ready. If processing fails, an error banner is shown with details.
### Viewing a document
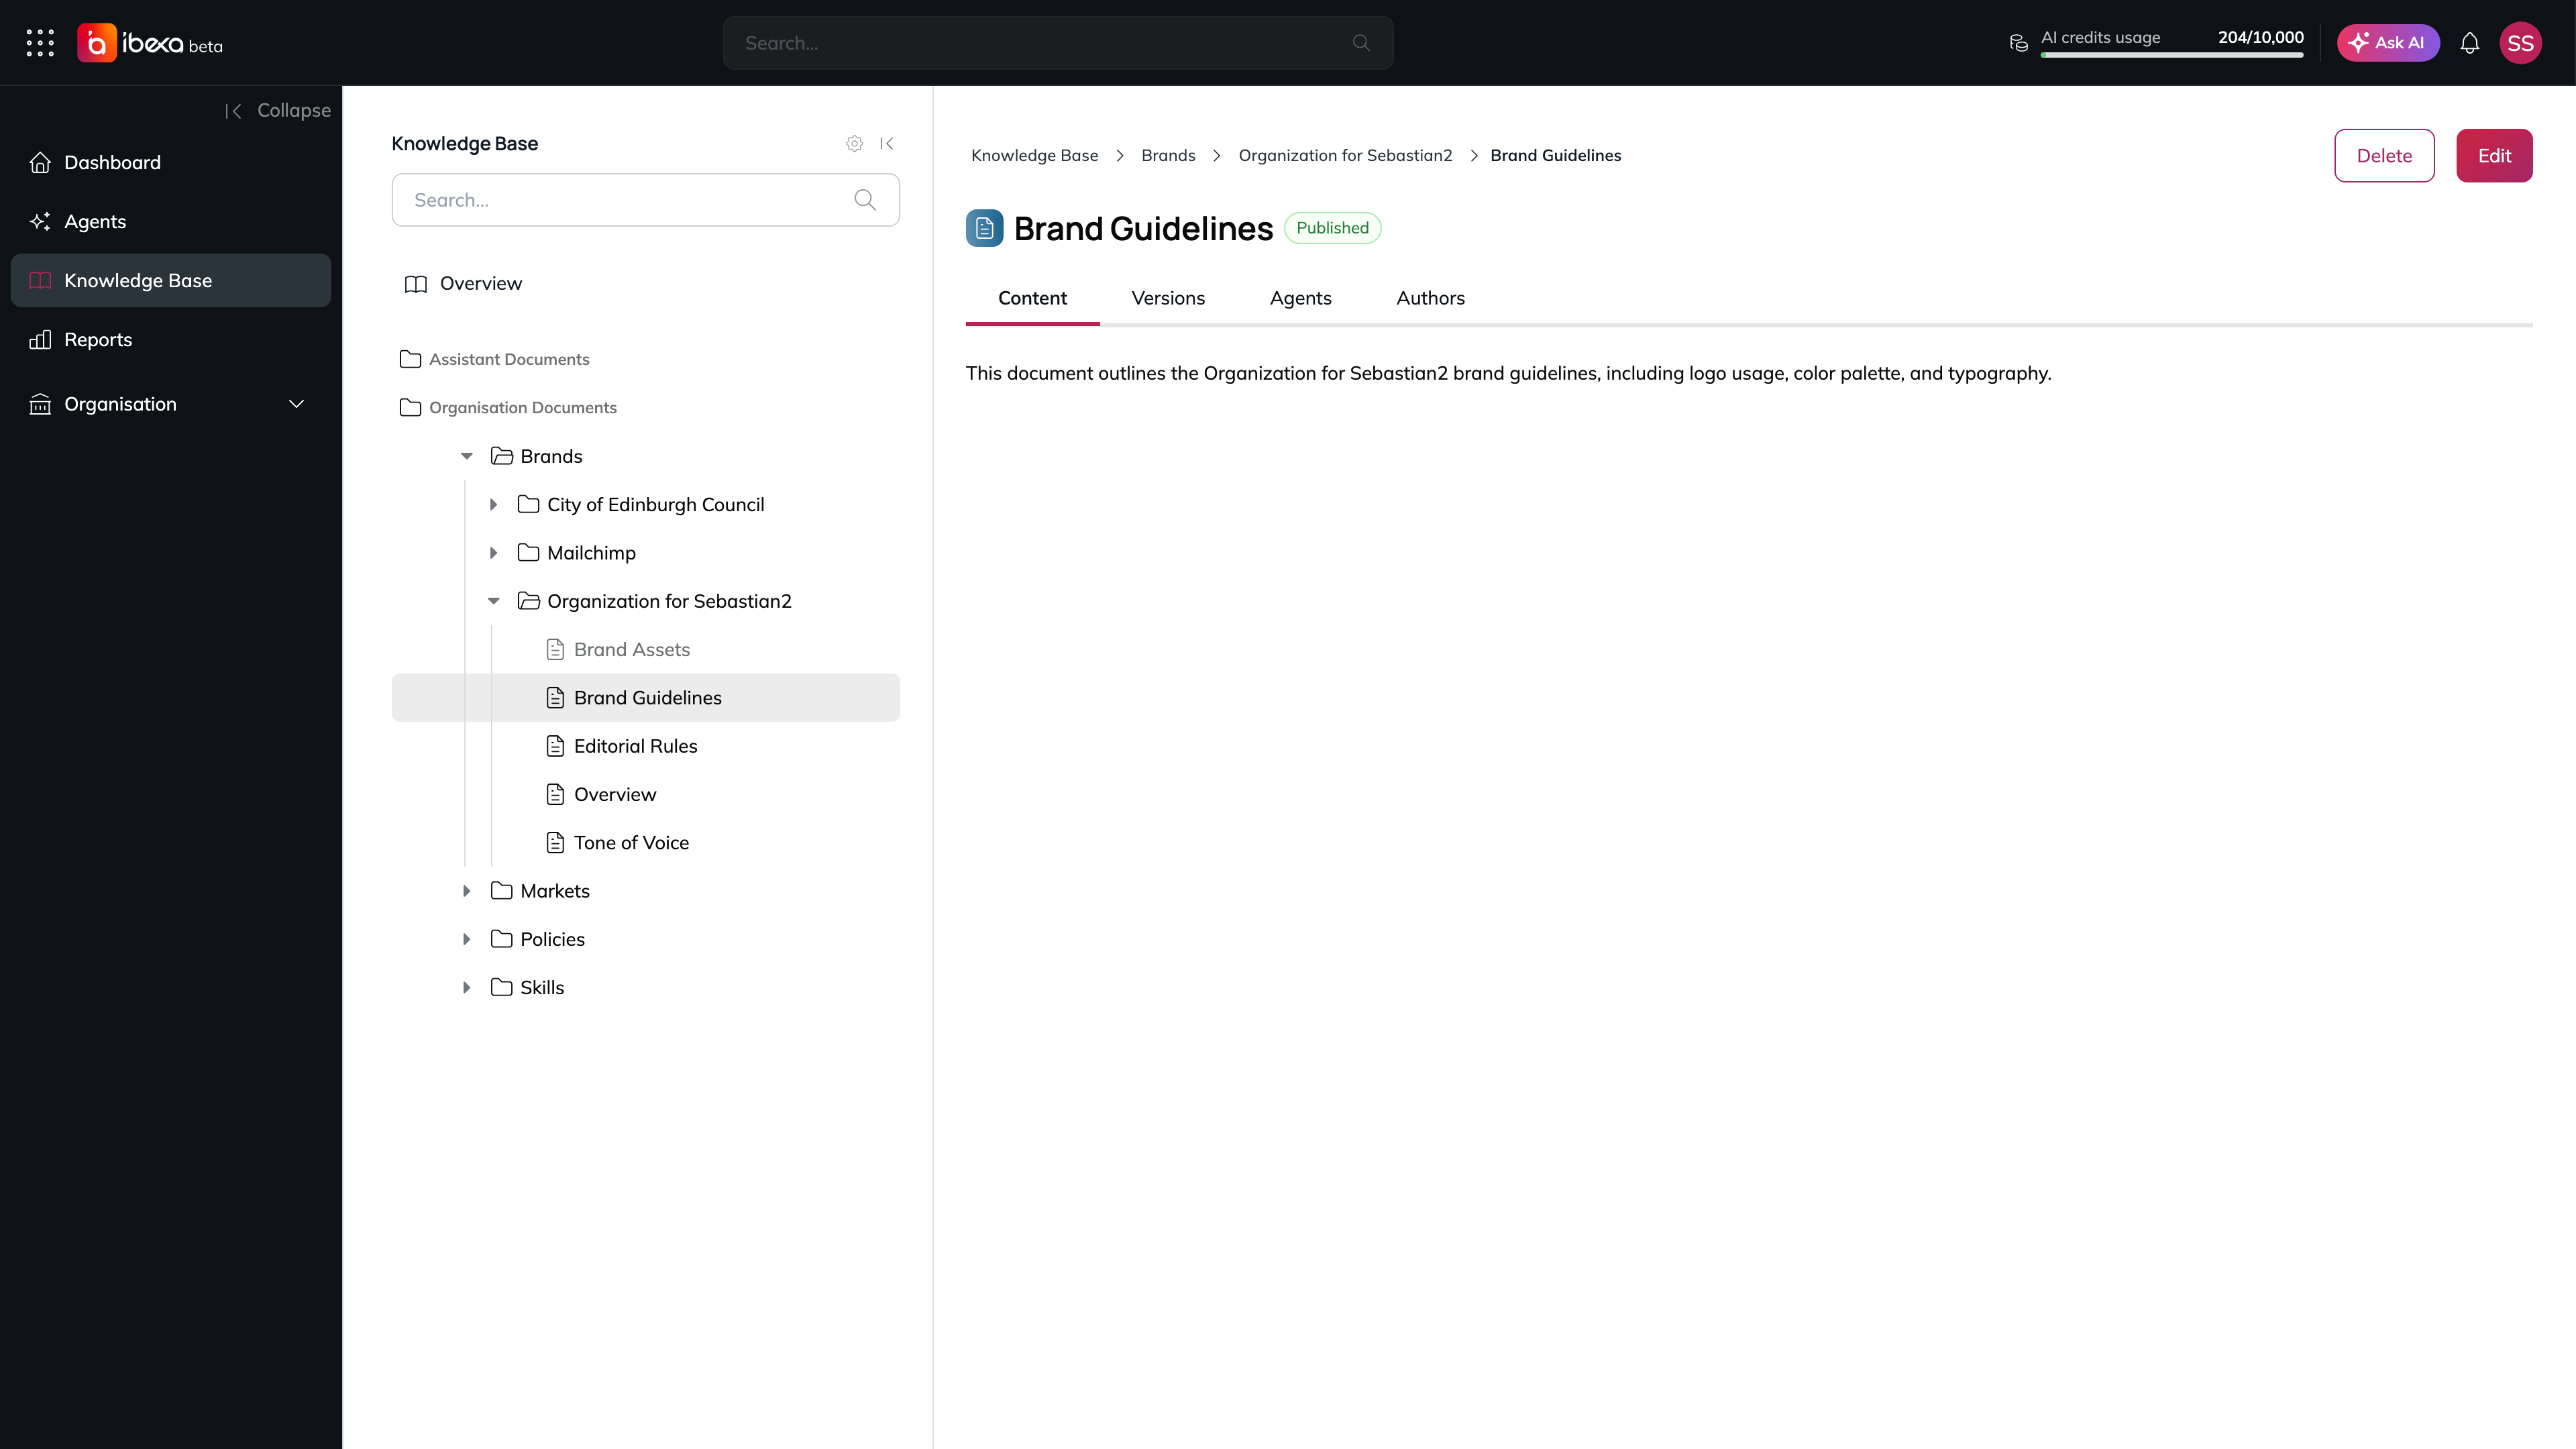
Select any document in the sidebar tree to open it in the content panel. The document panel contains four tabs:
A document open on its Content tab
| Tab | What it shows |
| ------------ | ---------------------------------------------------------------------------------------------------------------------------- |
| **Content** | The full text of the currently published version. If the document is an unpublished draft, a note at the top indicates this. |
| **Versions** | The full version history - see [Managing Versions](#managing-versions) below. |
| **Agents** | The agents this document is linked to for retrieval. |
| **Authors** | Publication date, last modified date, creator, and last contributor. |
### Editing a document
1. Open the document in the content panel.
2. Select **Edit** in the top-right area of the page.
3. The **Document Editor** opens in full-screen mode with the current content pre-filled.
4. Make your changes and select **Save** to save as a new draft, or **Discard** to return without saving.
> Editing always creates a new **draft** version. The live content does not change until you publish the draft - see [Managing Versions](#managing-versions).
### Deleting a document
1. Open the document in the content panel.
2. Select **Delete** in the top-right area of the page.
3. A confirmation dialog opens. Select **Delete** to confirm the permanent deletion, or **Cancel** to go back.
> ⚠️ Deletion is permanent and cannot be undone.
## Managing Versions
Every time a document is saved, a new version is created. You can view and manage all versions from the **Versions** tab of the document panel.
### Understanding version statuses
| Status | Meaning |
| -------------- | ------------------------------------------------------------------------------------------------------- |
| **Draft** | A saved version that is not yet live. Agents cannot retrieve draft content. |
| **Publishing** | The version is currently being processed and indexed. |
| **Published** | The live version. This is the content agents can retrieve. Only one version can be published at a time. |
| **Archived** | A previous published version that has since been superseded. |
### Versions tab layout
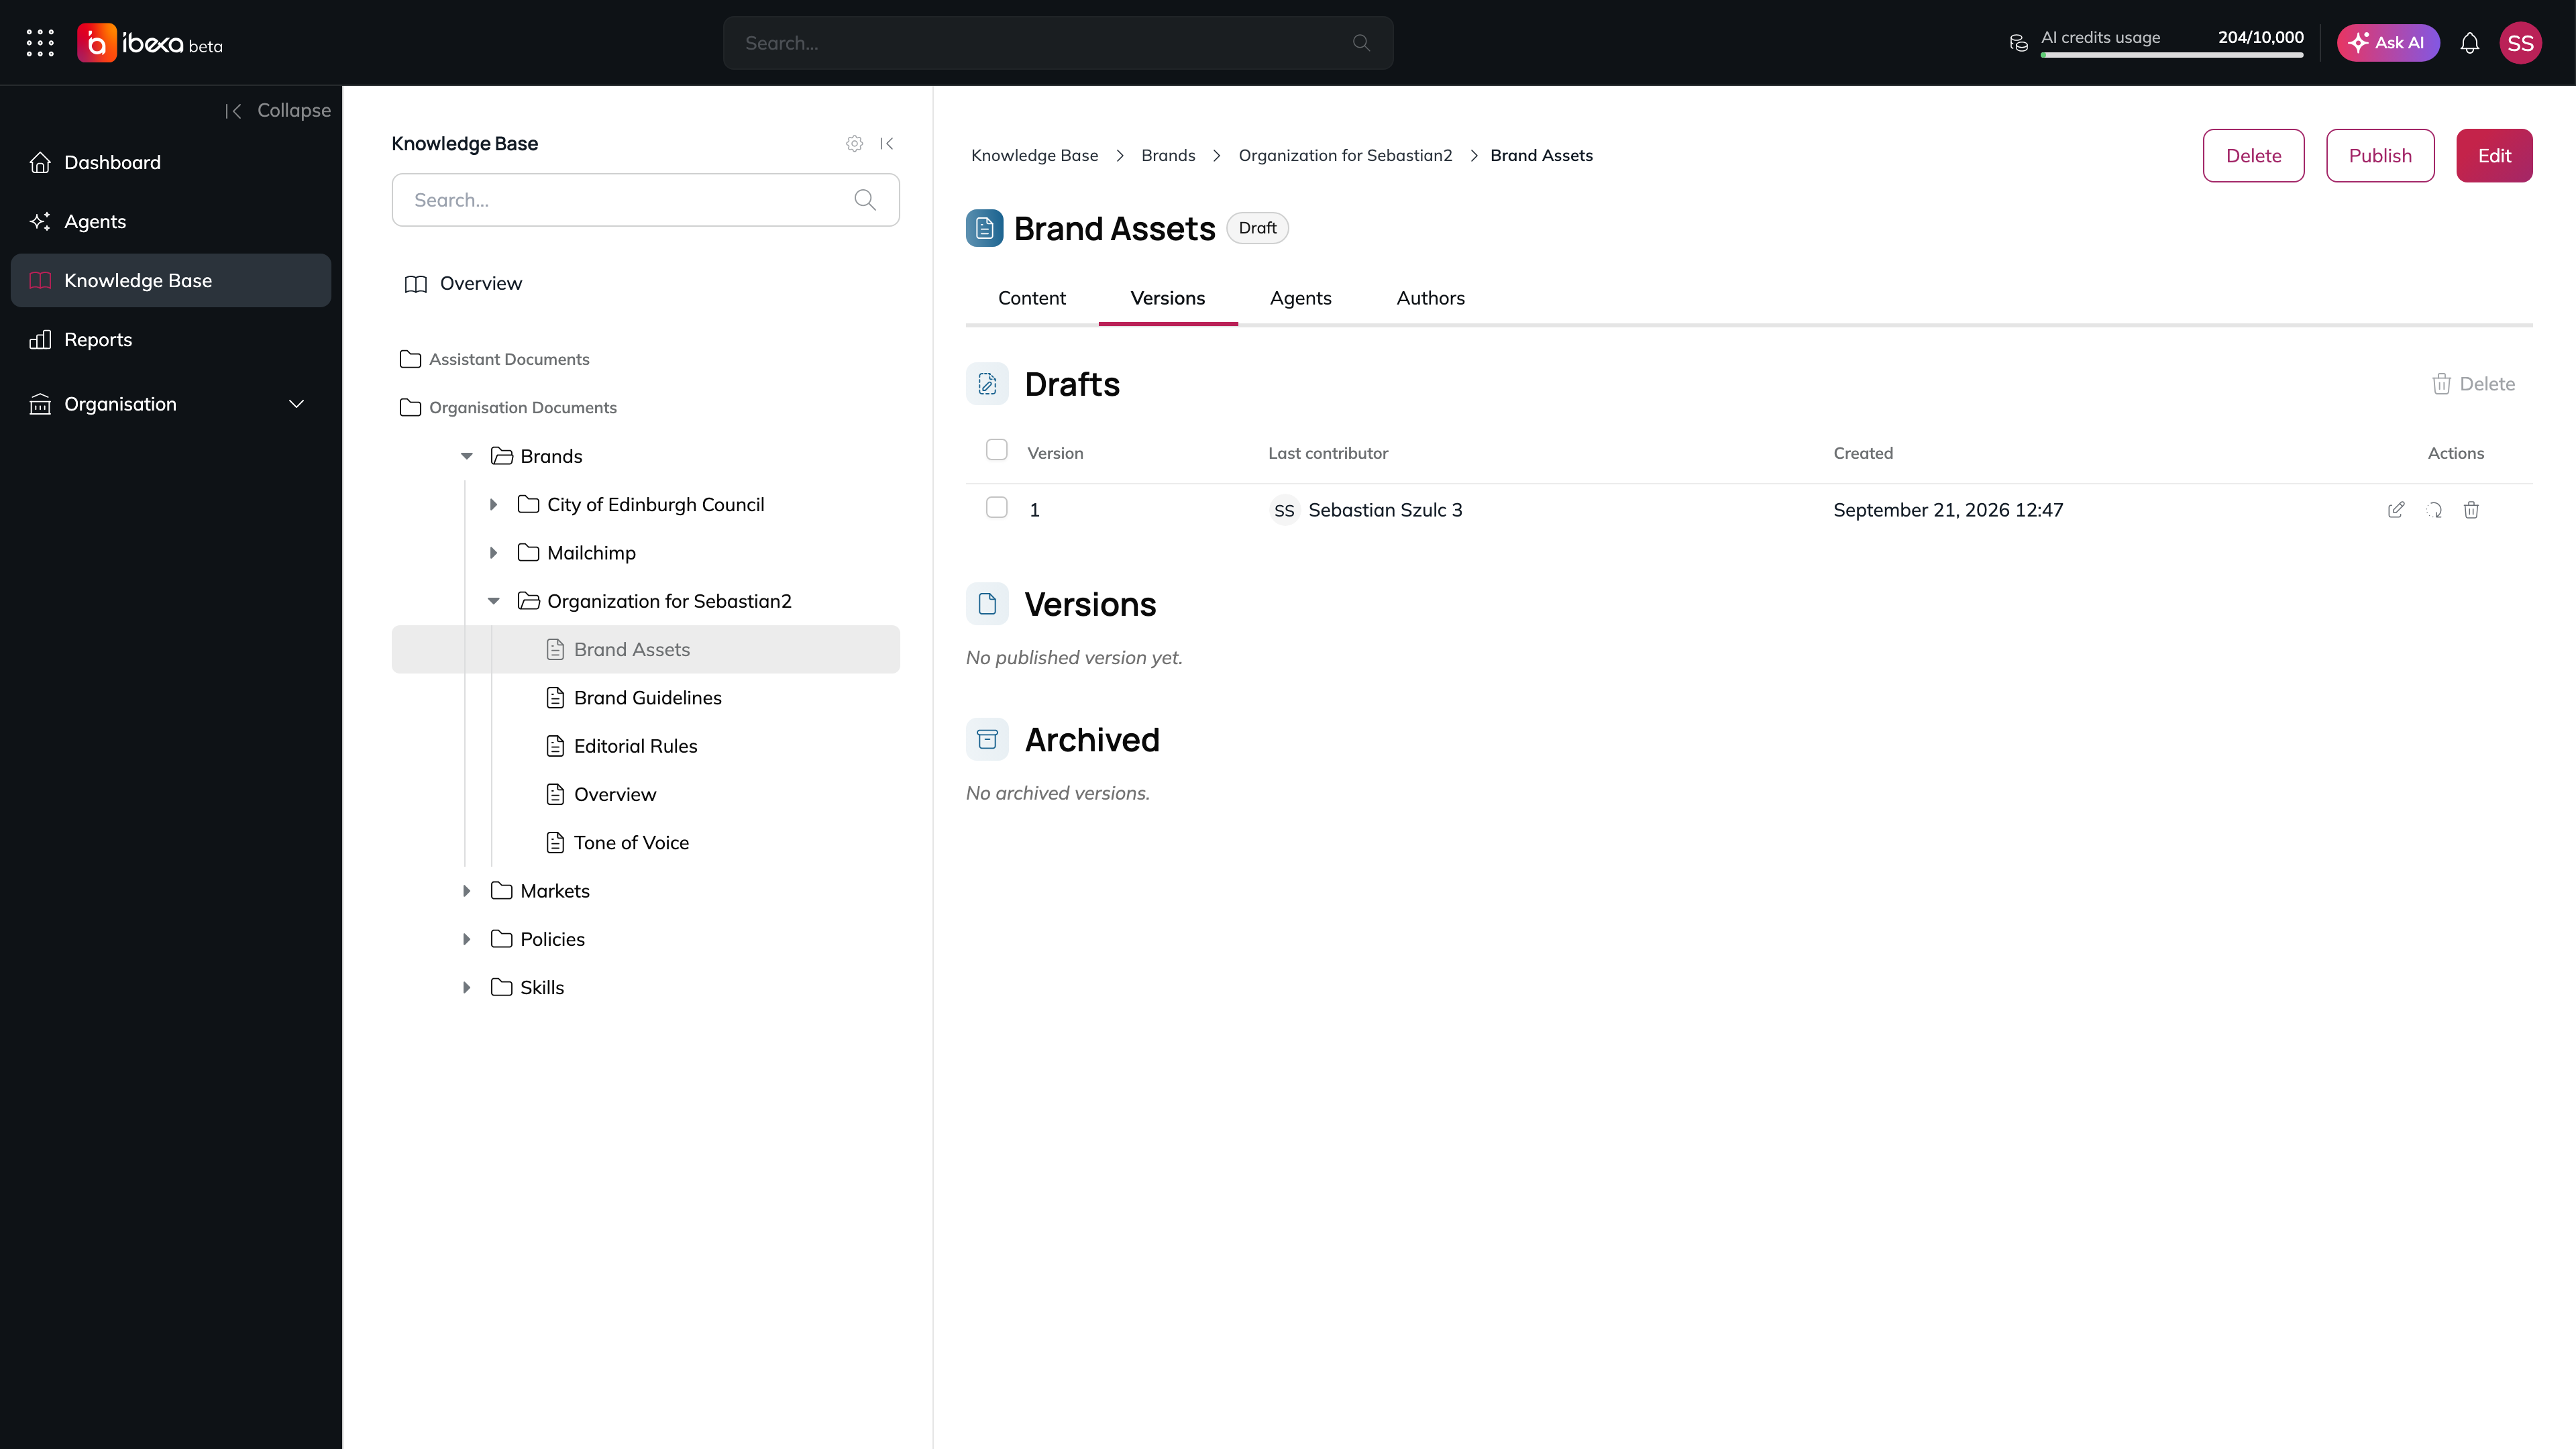
The Versions tab is divided into two sections:
* **Drafts** - lists all draft versions awaiting review or publishing.
* **Versions** - lists all published and archived versions, newest first. Each row shows the version number, the last contributor, the date, and available actions.
The Versions tab
### Viewing a version's content
Select the **version number** (shown as a link) in any row to open a read-only preview of that version's content in a dialog.
### Available version actions
| Action | Available for | What it does |
| -------------------- | ----------------- | ------------------------------------------------------------------------------------------------------ |
| **Edit** | Drafts | Opens the draft in the Document Editor for further editing. |
| **Publish** | Drafts | Makes this draft the live version. The previous published version is archived. |
| **Roll back** | Published version | Makes a previously published (archived) version live again, archiving the current one. |
| **Restore as draft** | Archived versions | Copies the archived version's content into a new draft. Nothing goes live until you publish the draft. |
| **Discard** | Drafts | Permanently deletes the draft. This cannot be undone. |
### Discarding multiple drafts at once
In the **Drafts** section, select the checkboxes on one or more draft rows, then select the **Delete** button that appears in the section header. Confirm the deletion in the dialog that opens.
## Troubleshooting
| Issue | What to do |
| -------------------------------------------------- | --------------------------------------------------------------------------------------------------------------------------------------------------------------------------------- |
| **Knowledge Base** is not visible in the main menu | Contact your organisation owner - your account may not have access. |
| The **Add** button is not visible | You can only add content when a folder is selected in the sidebar. |
| The **Edit** button is greyed out on a document | The document is still being processed after upload. Wait for the processing banner to disappear, then try again. |
| A file upload fails | Check that the file is within the 2 MB size limit and is one of the accepted formats. |
| Document content is not found by an agent | Ensure the document has a **Published** version. Draft content is not available to agents. Also check the **Agents** tab to confirm the document is linked to the relevant agent. |
| Processing fails after upload | The platform could not extract content from the file. Try uploading again. If the problem persists, try converting the file to a different supported format (e.g. PDF or TXT). |