> For the complete documentation index, see [llms.txt](https://docs.ibexa.ai/llms.txt). Markdown versions of documentation pages are available by appending `.md` to page URLs; this page is available as [Markdown](https://docs.ibexa.ai/manual/organisation/mcp-servers.md).
# MCP Servers
This guide explains how to manage MCP (Model Context Protocol) Servers on the Ibexa Agentic Marketing Platform. MCP Servers extend the capabilities of AI agents by providing them with access to external tools and services, can be added from a curated catalog or configured manually, and can be secured with different authentication schemes.
## Before You Begin
You must be logged in as the **Owner** or an **Administrator** of your organisation to manage MCP Servers. Requesting a new tool (see [MCP Server Requests](#mcp-server-requests) below) is available to all organisation members from the Dashboard.
## What Is an MCP Server?
An MCP Server is an external service that exposes a set of tools that your AI agents can use - for example, searching the web, querying a database, or calling an external API. Once an MCP Server is connected and enabled, its tools become available to agents in your organisation. Each MCP Server has a **status** displayed on its card:
| Status | Meaning |
| ------------ | ----------------------------------------------------------------------------------- |
| **Enabled** | The server is active and its tools are available to agents. |
| **Disabled** | The server is connected but its tools are not available to agents until re-enabled. |
## Servers Your Organisation Starts With
A new organisation is provisioned with a set of MCP Servers already connected and enabled, so its agents have tools from day one:
* The platform's [built-in MCP servers](/manual/organisation/built-in-mcp-servers.md) - agents, reports, knowledge base, management, and the content-validation servers used by the built-in agents.
* **IAMP Documentation** - a remote server (`https://docs.ibexa.ai`) that exposes the product documentation to agents through the `searchDocumentation`, `getPage`, and `sendFeedback` tools. It is attached to the General Assistant out of the box, which is how the Assistant can answer questions about the platform itself.
They appear on the MCP Servers page like any server you add yourself, and can be disabled or edited if you do not want them.
## How to Add an MCP Server ?
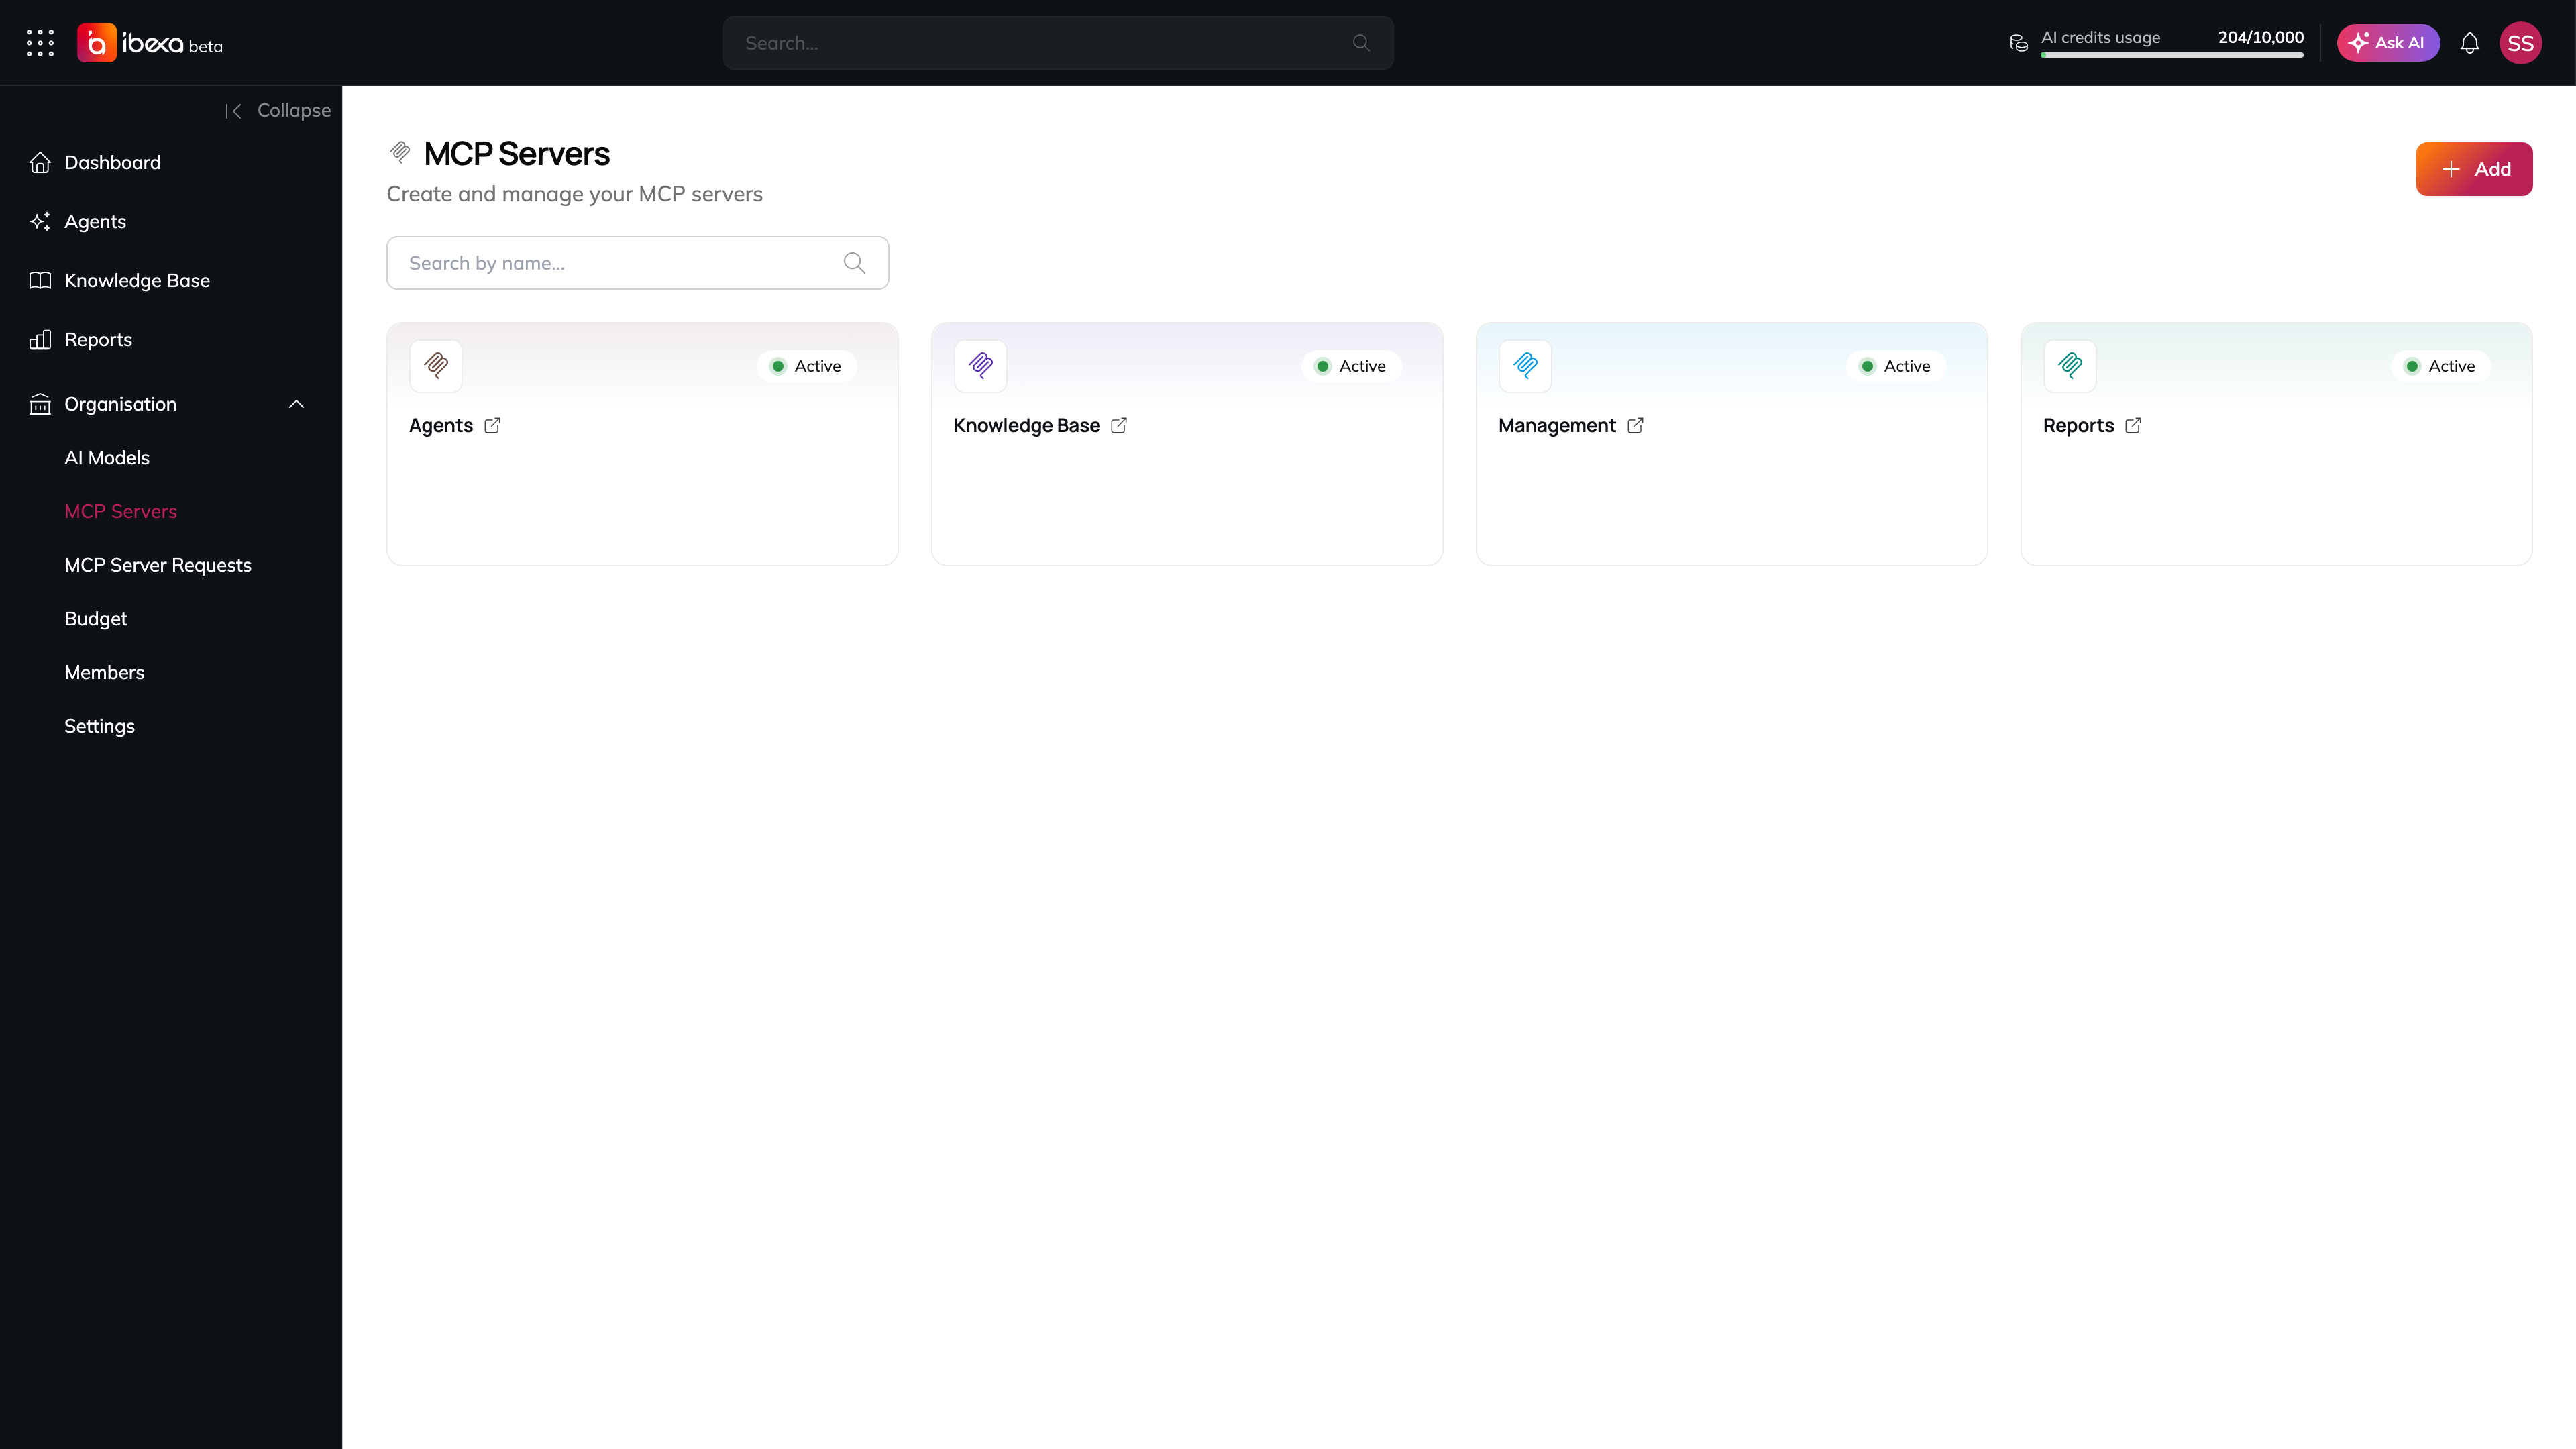
### 1. Go to the MCP Servers page
In the main menu, go to **MCP Servers**.
The MCP Servers page
### 2. Open the MCP Browser
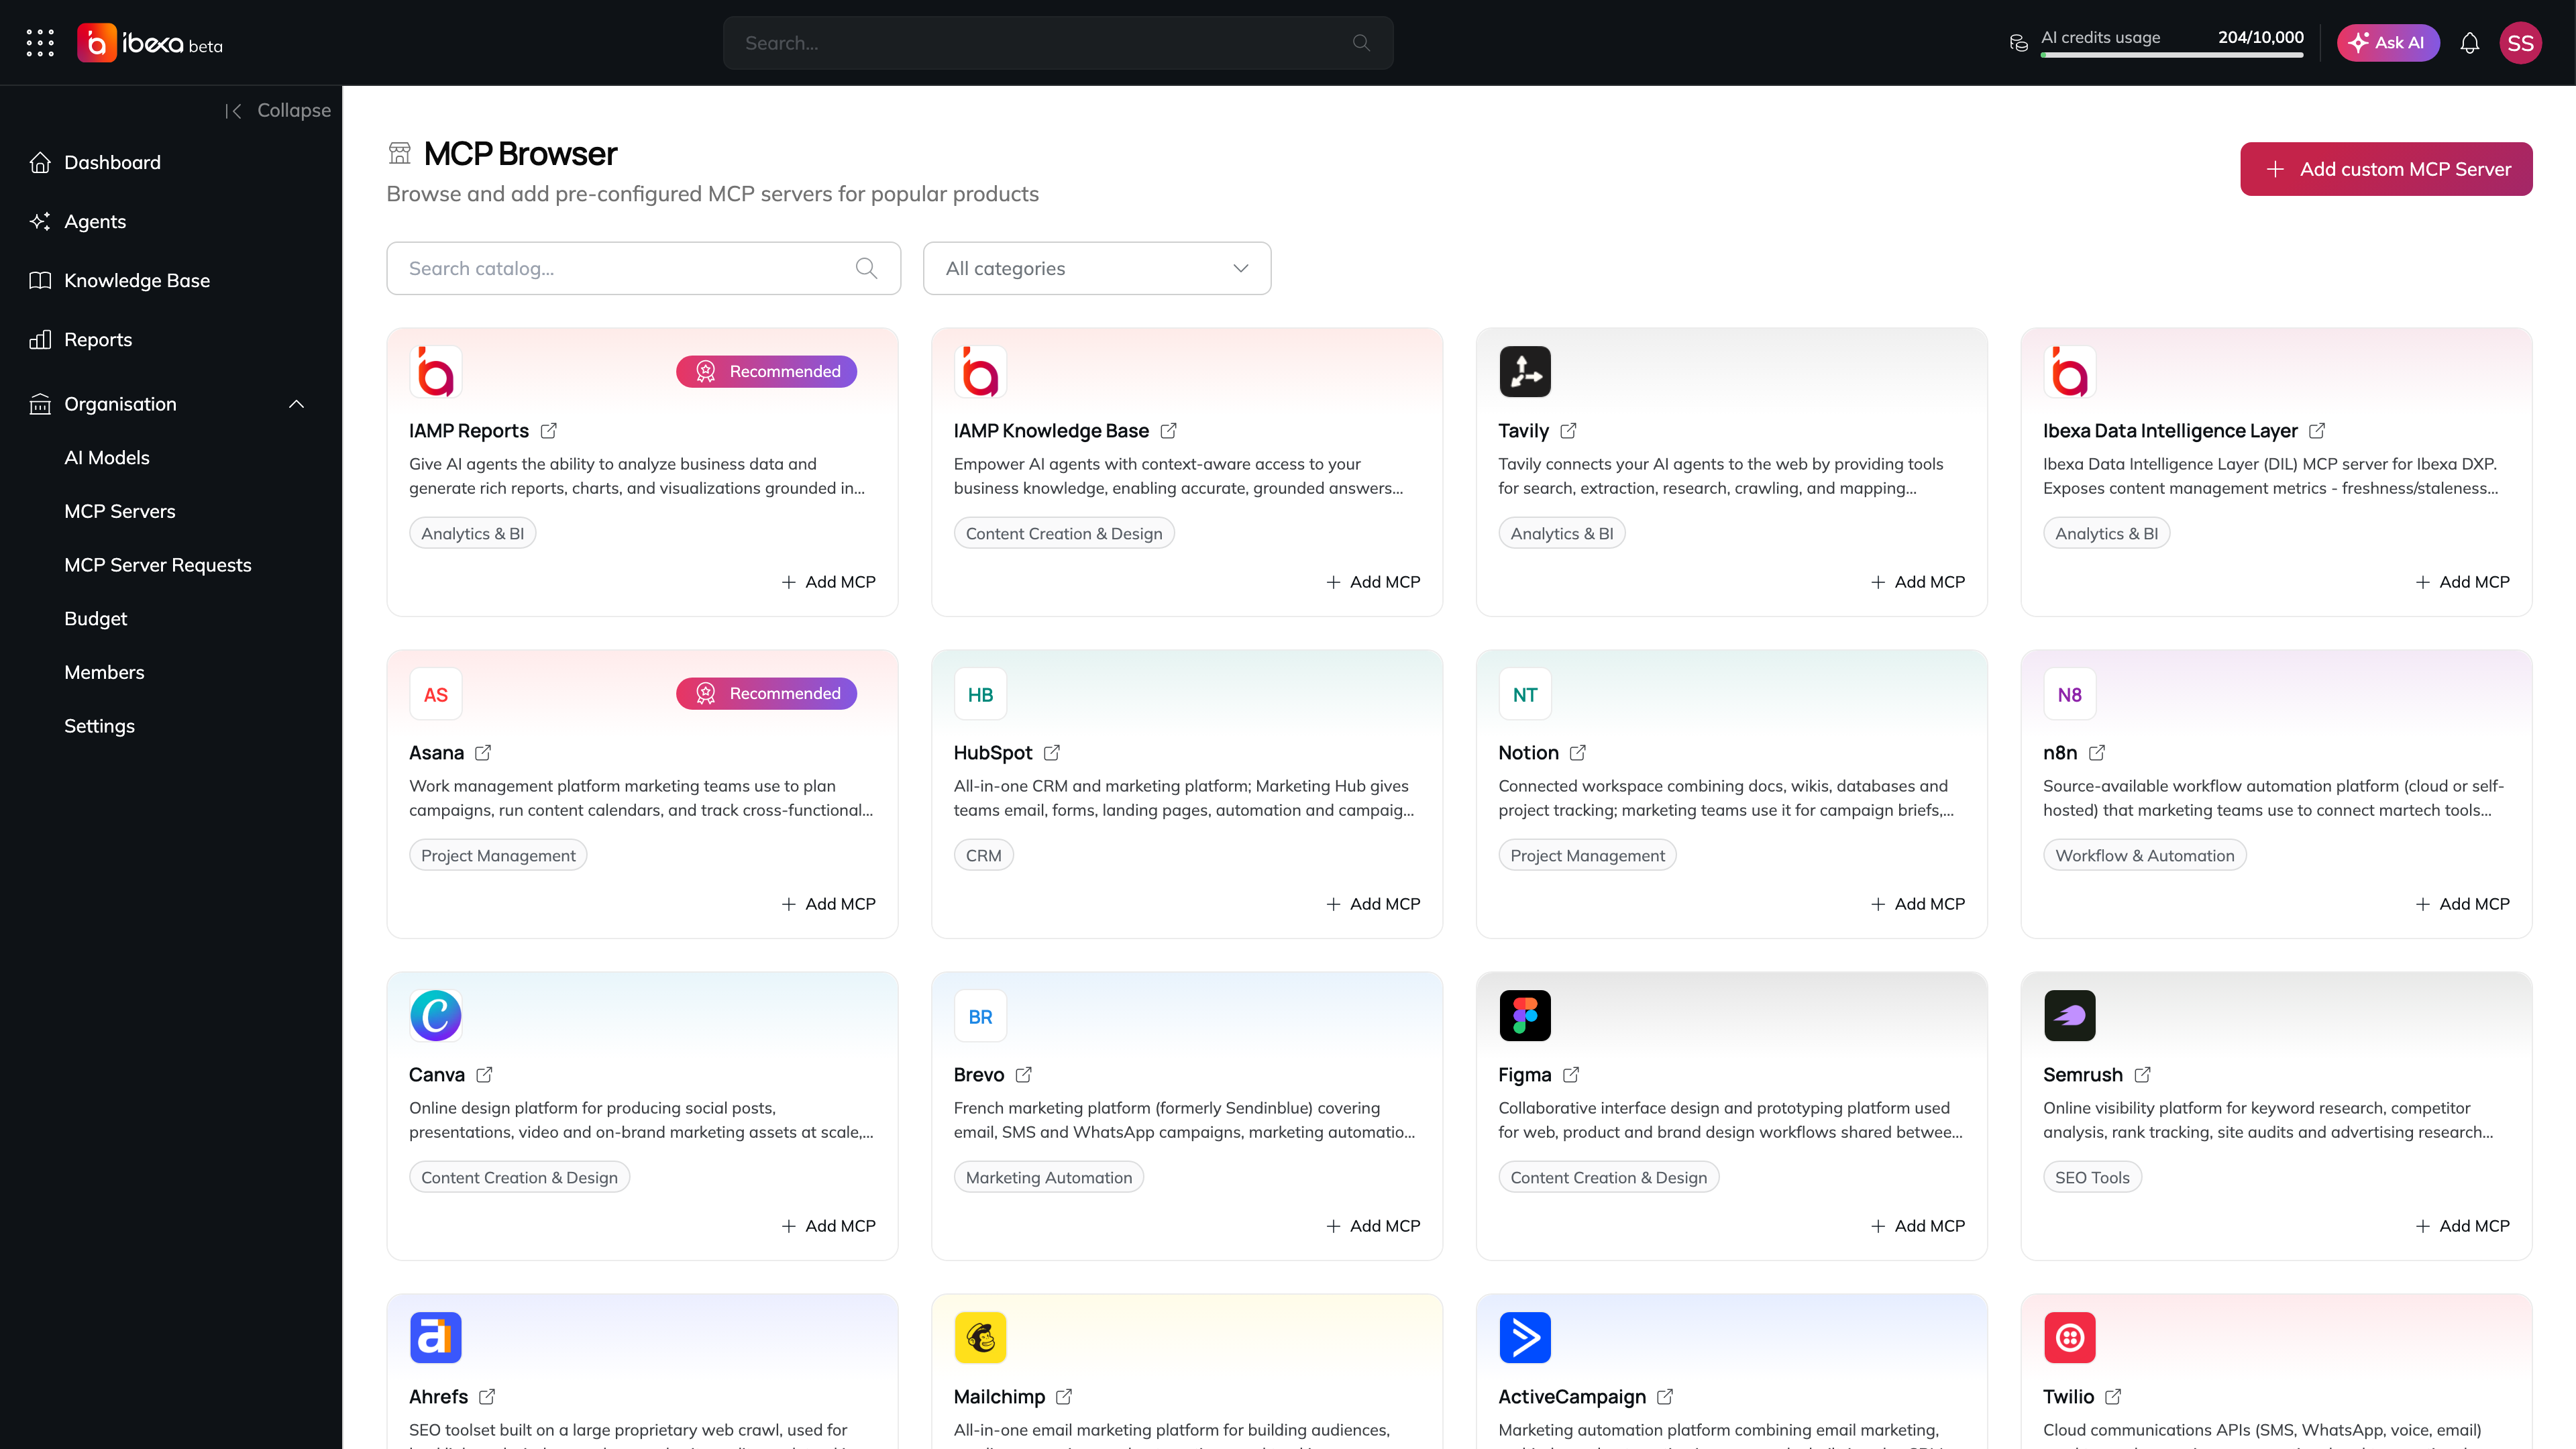
Select **Add MCP Server**. You are taken to the **MCP Browser** page, where you can either add a pre-configured server from the catalog or add a custom server manually.
The MCP Browser catalog
## How to Add an MCP Server from the Catalog ?
The **MCP Browser** page lists a curated catalog of pre-configured MCP servers for popular products, maintained by your platform administrator.
### 1. Browse or search the catalog
Use the **search box** to find a server by name, or the **category filter** (default: **All categories**) to narrow the list down to a specific category. Catalog entries that are marked as recommended by your platform administrator show a **Recommended** badge.
### 2. Preview a catalog entry (optional)
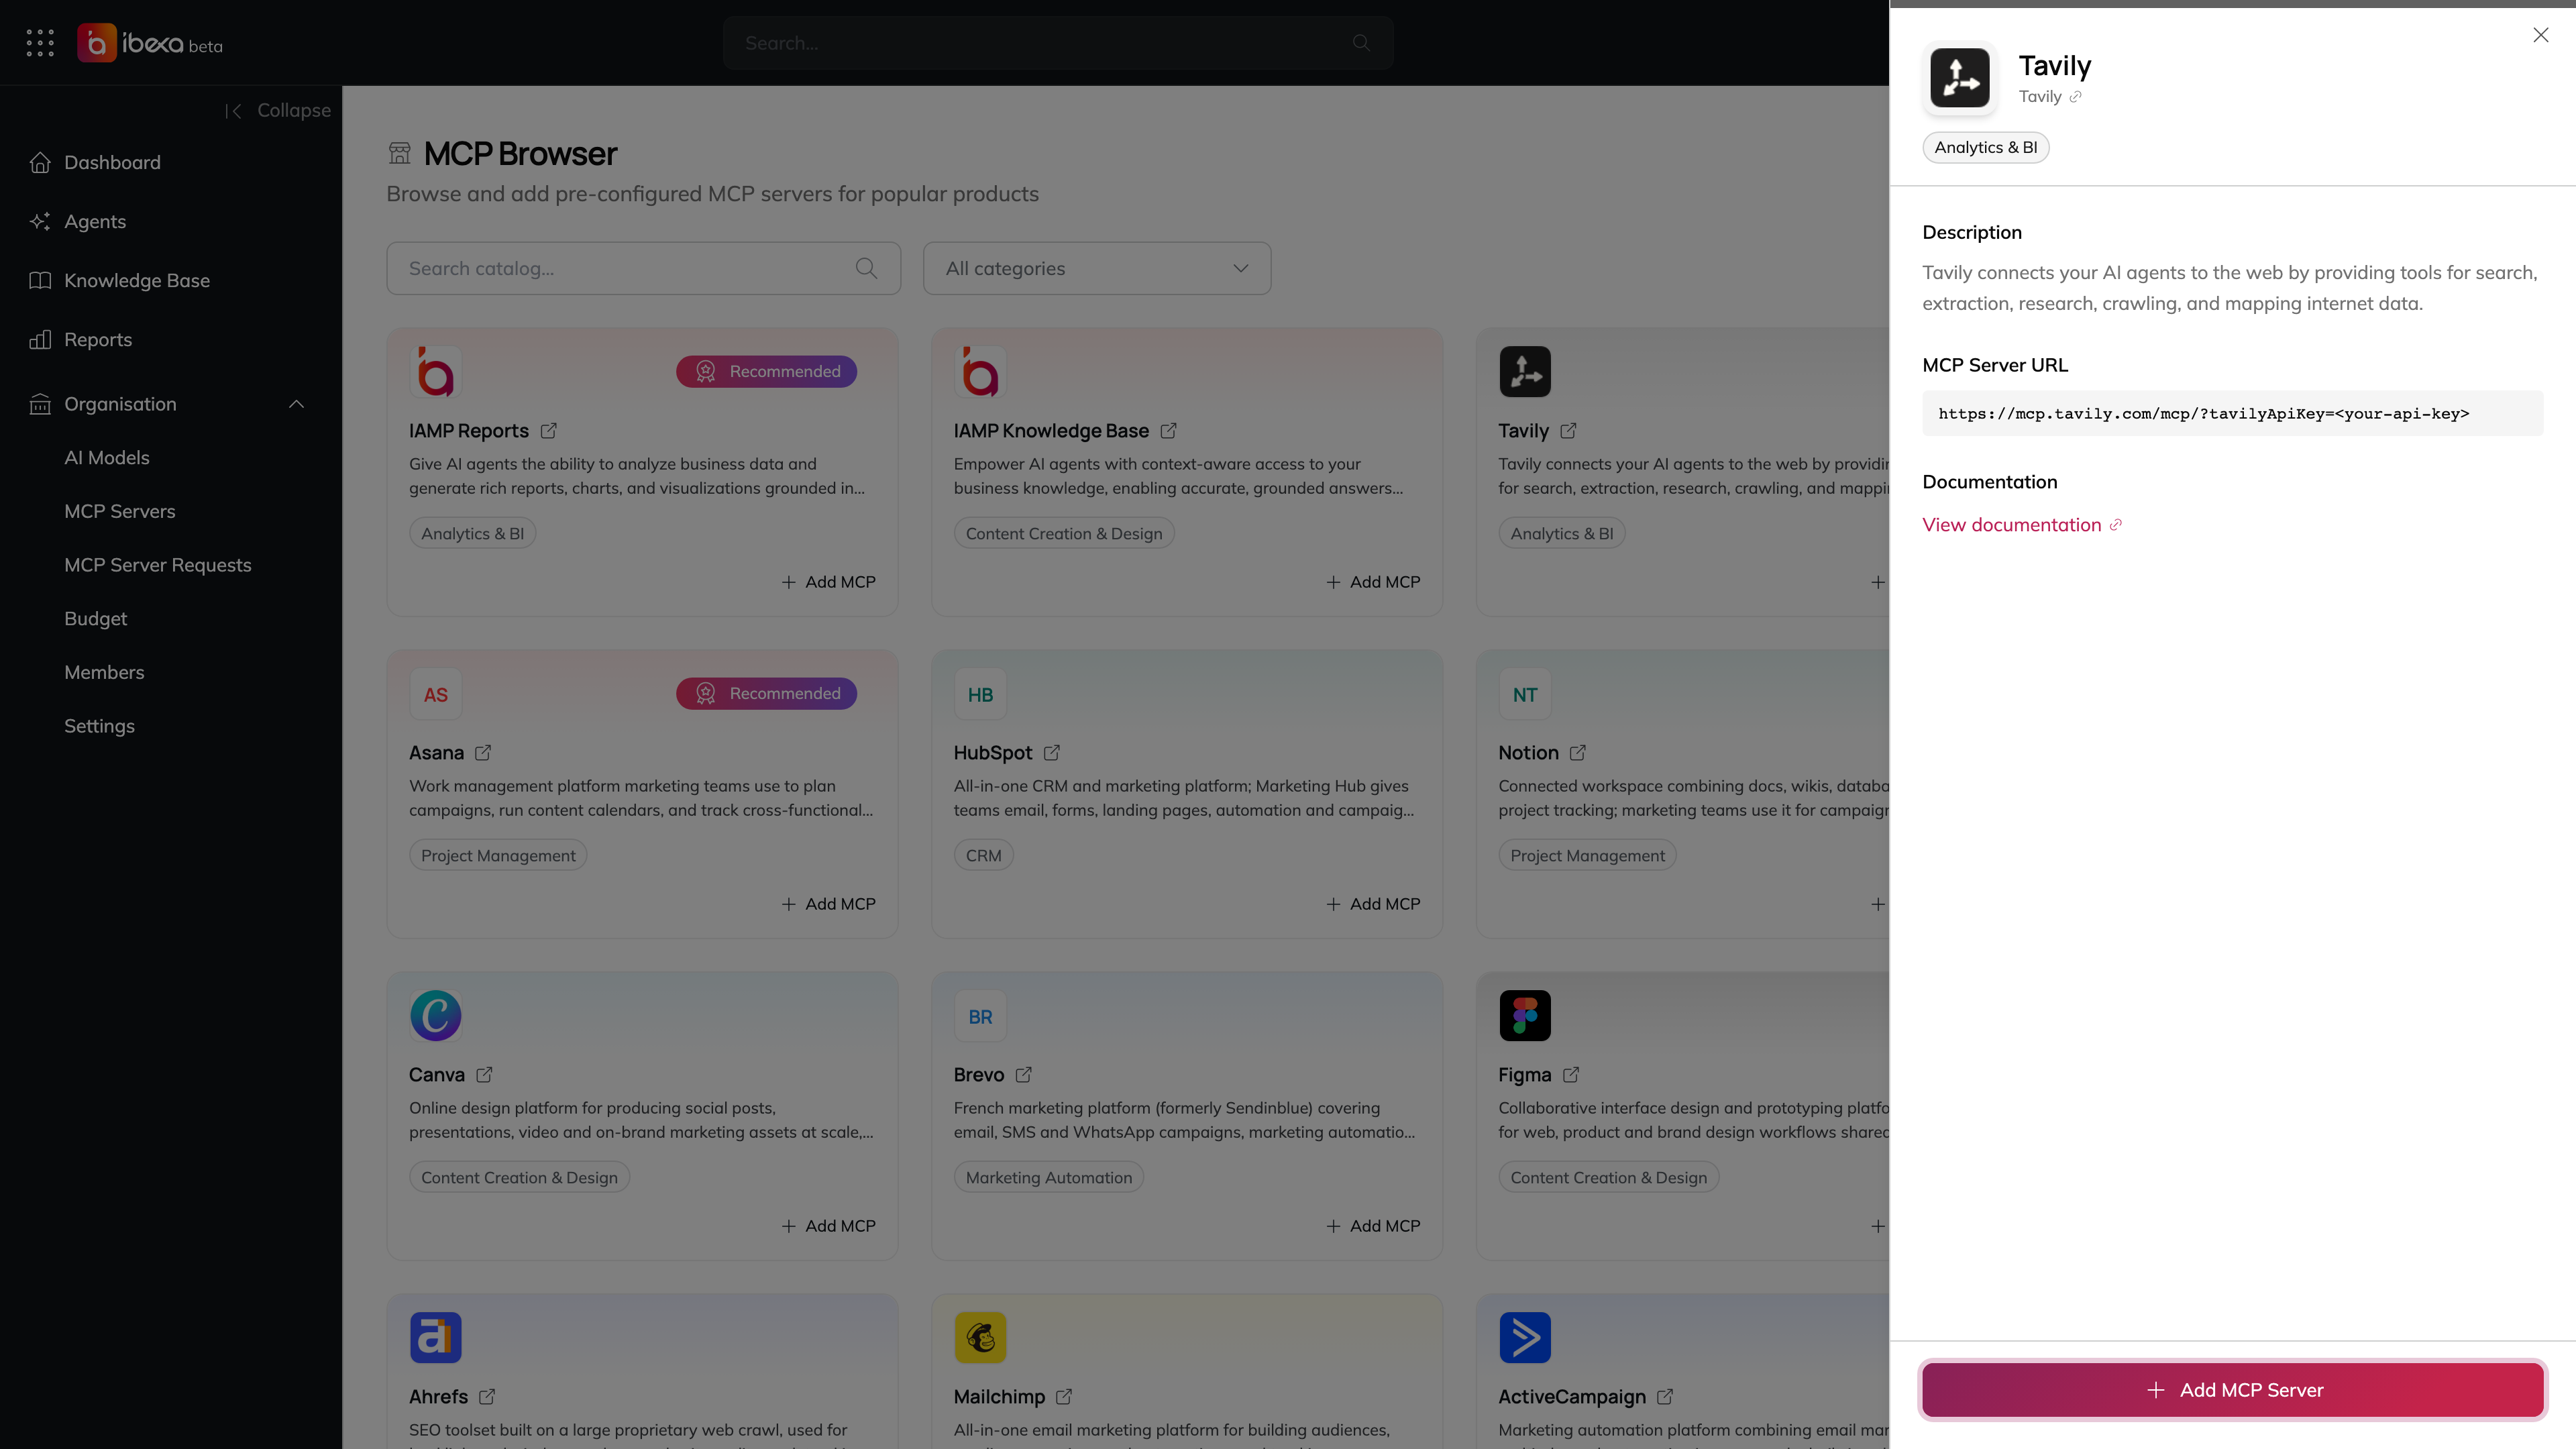
Select a catalog entry's name to open a detail panel with more information: its description, category, data residency country (with an EU flag indicator when applicable), the MCP **Server URL**, and a link to the vendor's **Documentation**, if available.
A catalog entry opened in the detail panel
### 3. Add the server
Select **Add MCP Server** on the entry's card (or **Add MCP Server** in the detail panel). The **Add {name}** dialog opens, pre-filled with the entry's **Name**, **URL**, and, if the catalog entry defines one, its **Authentication** scheme. You can adjust:
* **Name** *(required)*
* **Identifier** *(required)* - automatically generated from the name; you can edit it.
* **URL** - pre-filled from the catalog entry; change it only if you need to point to a different endpoint.
* **Authentication** - pre-selected from the catalog entry's template when it defines one (e.g. **API Key** with the key **Name** and **Location** already filled in); otherwise defaults to **None**. See [Configuring Authentication](#configuring-authentication) below. Non-secret template values are pre-filled, but you must still enter any secret value yourself (e.g. the password, token, API key value, or cookie value) - catalog entries never carry secret values.
* **Headers** - see [Managing Headers](#managing-headers) below.
Select **Add MCP Server** to save it, or **Cancel** to close the dialog without saving. A confirmation message will appear and you will be taken to the new server's detail page.
> **Note:** If the catalog entry uses an authentication scheme this dialog does not yet support, the **Authentication** field defaults to **None** and you can configure it manually after adding the server (see [How to Edit an MCP Server](#how-to-edit-an-mcp-server-) below).
### If the catalog has no matching entries
If your search or category filter does not match any catalog entries, the message *"No catalog entries match your filters."* is shown. Adjust or clear your filters, or add the server manually instead (see below).
## How to Add a Custom MCP Server ?
Use this to connect a server that is not available in the catalog, or when you need full control over authentication.
### 1. Go to the MCP Servers page
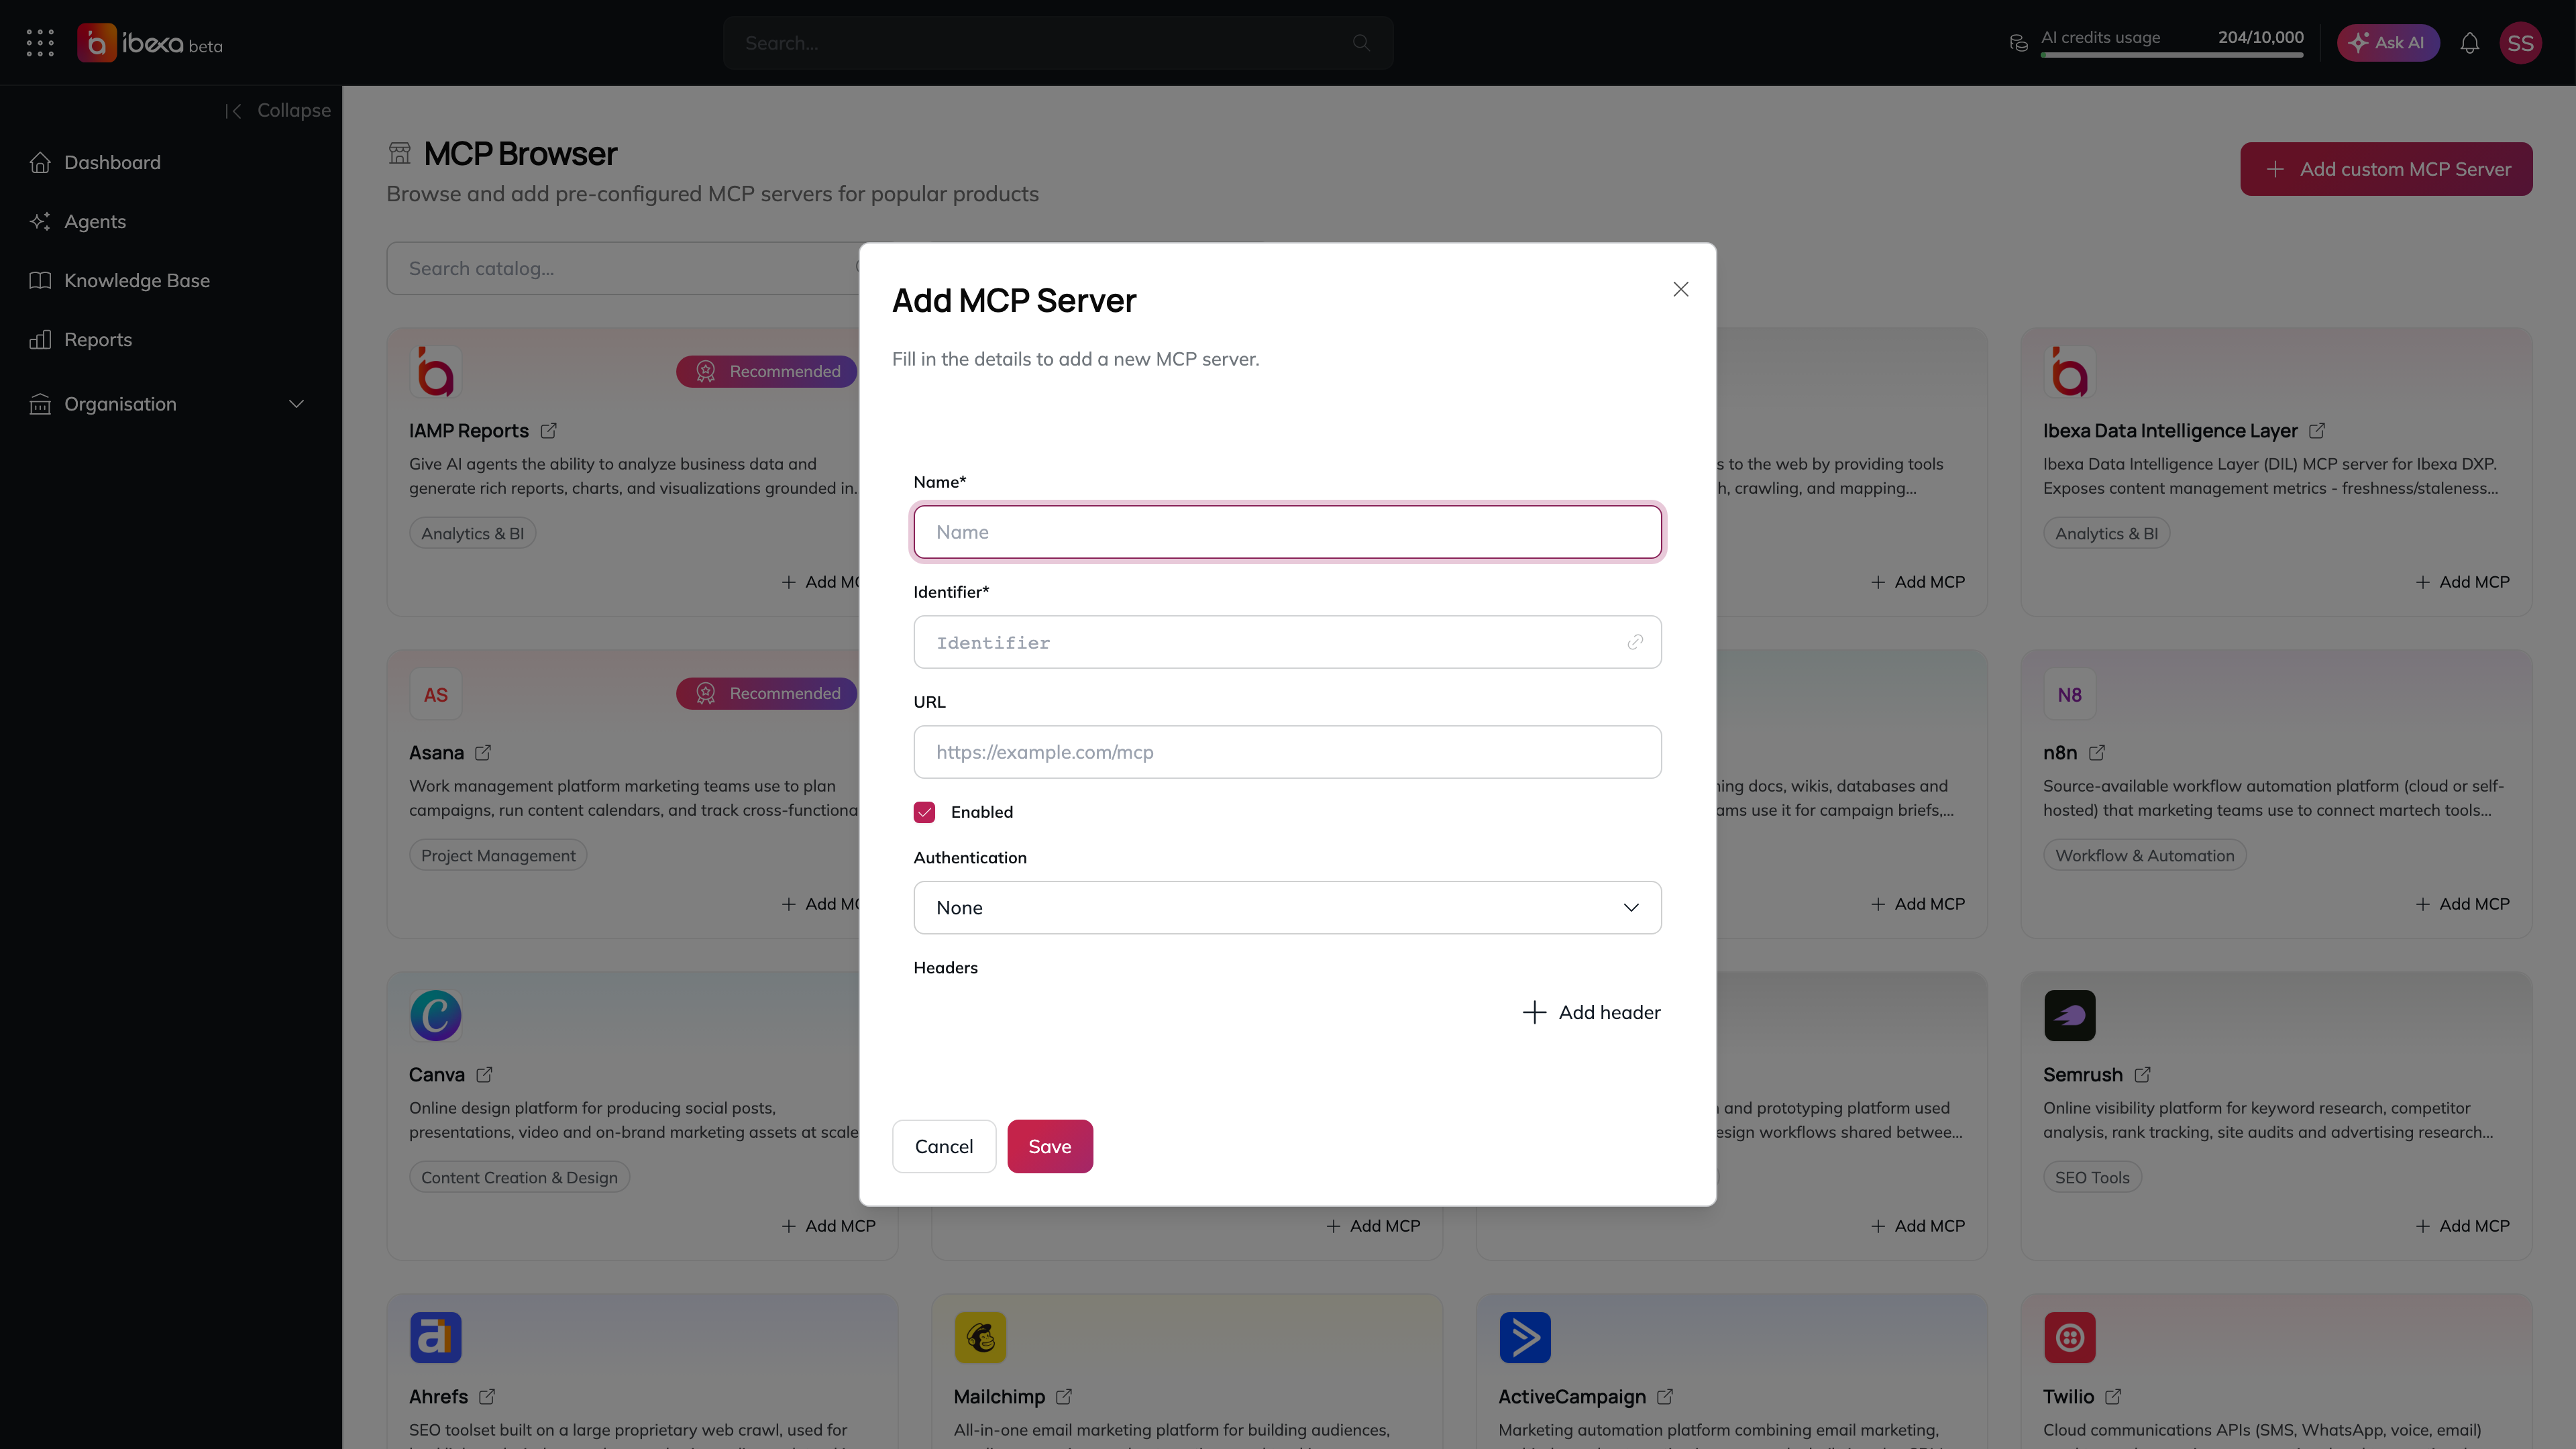
In the main menu, go to **MCP Servers**, select **Add MCP Server**, then, on the **MCP Browser** page, select **Add custom MCP Server**. The **Add MCP Server** dialog opens.
### 2. Fill in the server details
| Field | Required | Description |
| ------------------ | -------- | ----------------------------------------------------------------------------------------------------------------------------------------- |
| **Name** | Yes | A human-readable label for this server (e.g. "Web Search Tools"). |
| **Identifier** | Yes | A unique system identifier, automatically generated from the name. You can edit it if needed. |
| **URL** | No | The address of the MCP server endpoint (e.g. ` |
| **Enabled** | - | Checked by default. Uncheck this if you want to add the server but keep it inactive for now. |
| **Authentication** | No | The auth scheme used to authenticate with the server. See [Configuring Authentication](#configuring-authentication) below. |
| **Headers** | No | HTTP headers sent with every request to the server (e.g. for additional custom headers). See [Managing Headers](#managing-headers) below. |
The Add MCP Server dialog for a custom server
### 3. Save the server
Select **Save** to create the server. A confirmation message will appear and you will be taken to the new server's detail page. Select **Cancel** to close the dialog without saving.
## Managing Headers
Headers are key-value pairs sent with every request to the MCP server. They are commonly used for authentication (e.g. passing an API key in an `Authorization` header). To add a header:
1. In the **Headers** section, select **Add header**.
2. Enter the **Header name** (e.g. `Authorization`) and its **Value** (e.g. `Bearer your-token`).
3. Repeat for each additional header needed.
4. To remove a header row, select the trash icon on that row.
> **Note:** The value field for sensitive headers such as `Authorization` is automatically masked (shown as a password field) to protect your credentials.
## Configuring Authentication
Many MCP servers require credentials before they will accept requests. The **Authentication** field lets you select an **auth scheme** and provide the corresponding credentials, instead of manually building an `Authorization` header. Available schemes:
| Scheme | Required fields | Typical use case |
| ----------- | ------------------------------------------------------------------------------------------ | ------------------------------------------------------------------------------ |
| **None** | - | Public servers that do not require authentication (the default). |
| **Basic** | **Username**, **Password** | Servers protected with HTTP Basic authentication. |
| **Bearer** | **Token** | Servers that accept a bearer token in the `Authorization` header. |
| **API Key** | **Name**, **API Key value**, **Location** (**Header**, **Query parameter**, or **Cookie**) | Servers that expect a named API key sent in a header, query string, or cookie. |
| **Cookie** | **Cookie name**, **Cookie value** | Servers that authenticate based on a specific session cookie. |
To configure authentication:
1. In the **Authentication** dropdown, select a scheme (or **None** to skip authentication).
2. Fill in the **Authentication Configuration** fields shown for the selected scheme. Sensitive values (passwords, tokens, API key values, cookie values) are entered as masked password fields.
3. If the scheme is not **None**, you can additionally check **Use per-user authentication instead of shared credentials** so each user connects with their own credentials rather than one shared set of credentials for the whole organisation.
> **Note:** When editing a server, previously saved secret values are shown as a masked placeholder (e.g. a row of asterisks). Leave a masked value unchanged to keep the existing secret, or overwrite it to replace it with a new one.
## How to Edit an MCP Server ?
Use this to update a server's name, identifier, URL, authentication, headers, or enabled status.
### 1. Find the server
In the main menu, go to \*\*MCP Servers and locate the server you want to update.
### 2. Open the Edit dialog
In the server's actions menu (or overflow **"…"** menu), select **Edit**.
### 3. Update the details
The **Edit MCP Server** dialog opens pre-filled with the current values. Update any fields as needed (Name, Identifier, URL, Enabled, Authentication, Headers). Select **Save** to apply the changes, or **Cancel** to discard them.
## How to Enable or Disable an MCP Server ?
Disabling a server makes its tools unavailable to agents without permanently removing the server configuration.
### To disable a server
1. In the server's actions menu, select **Disable**.
2. Select **Disable** to confirm, or **Cancel** to go back.
### To enable a server
1. In the server's actions menu, select **Enable**.
2. The server is enabled immediately - no confirmation dialog is shown. A confirmation message will appear briefly on screen after either action.
## How to Verify an MCP Server ?
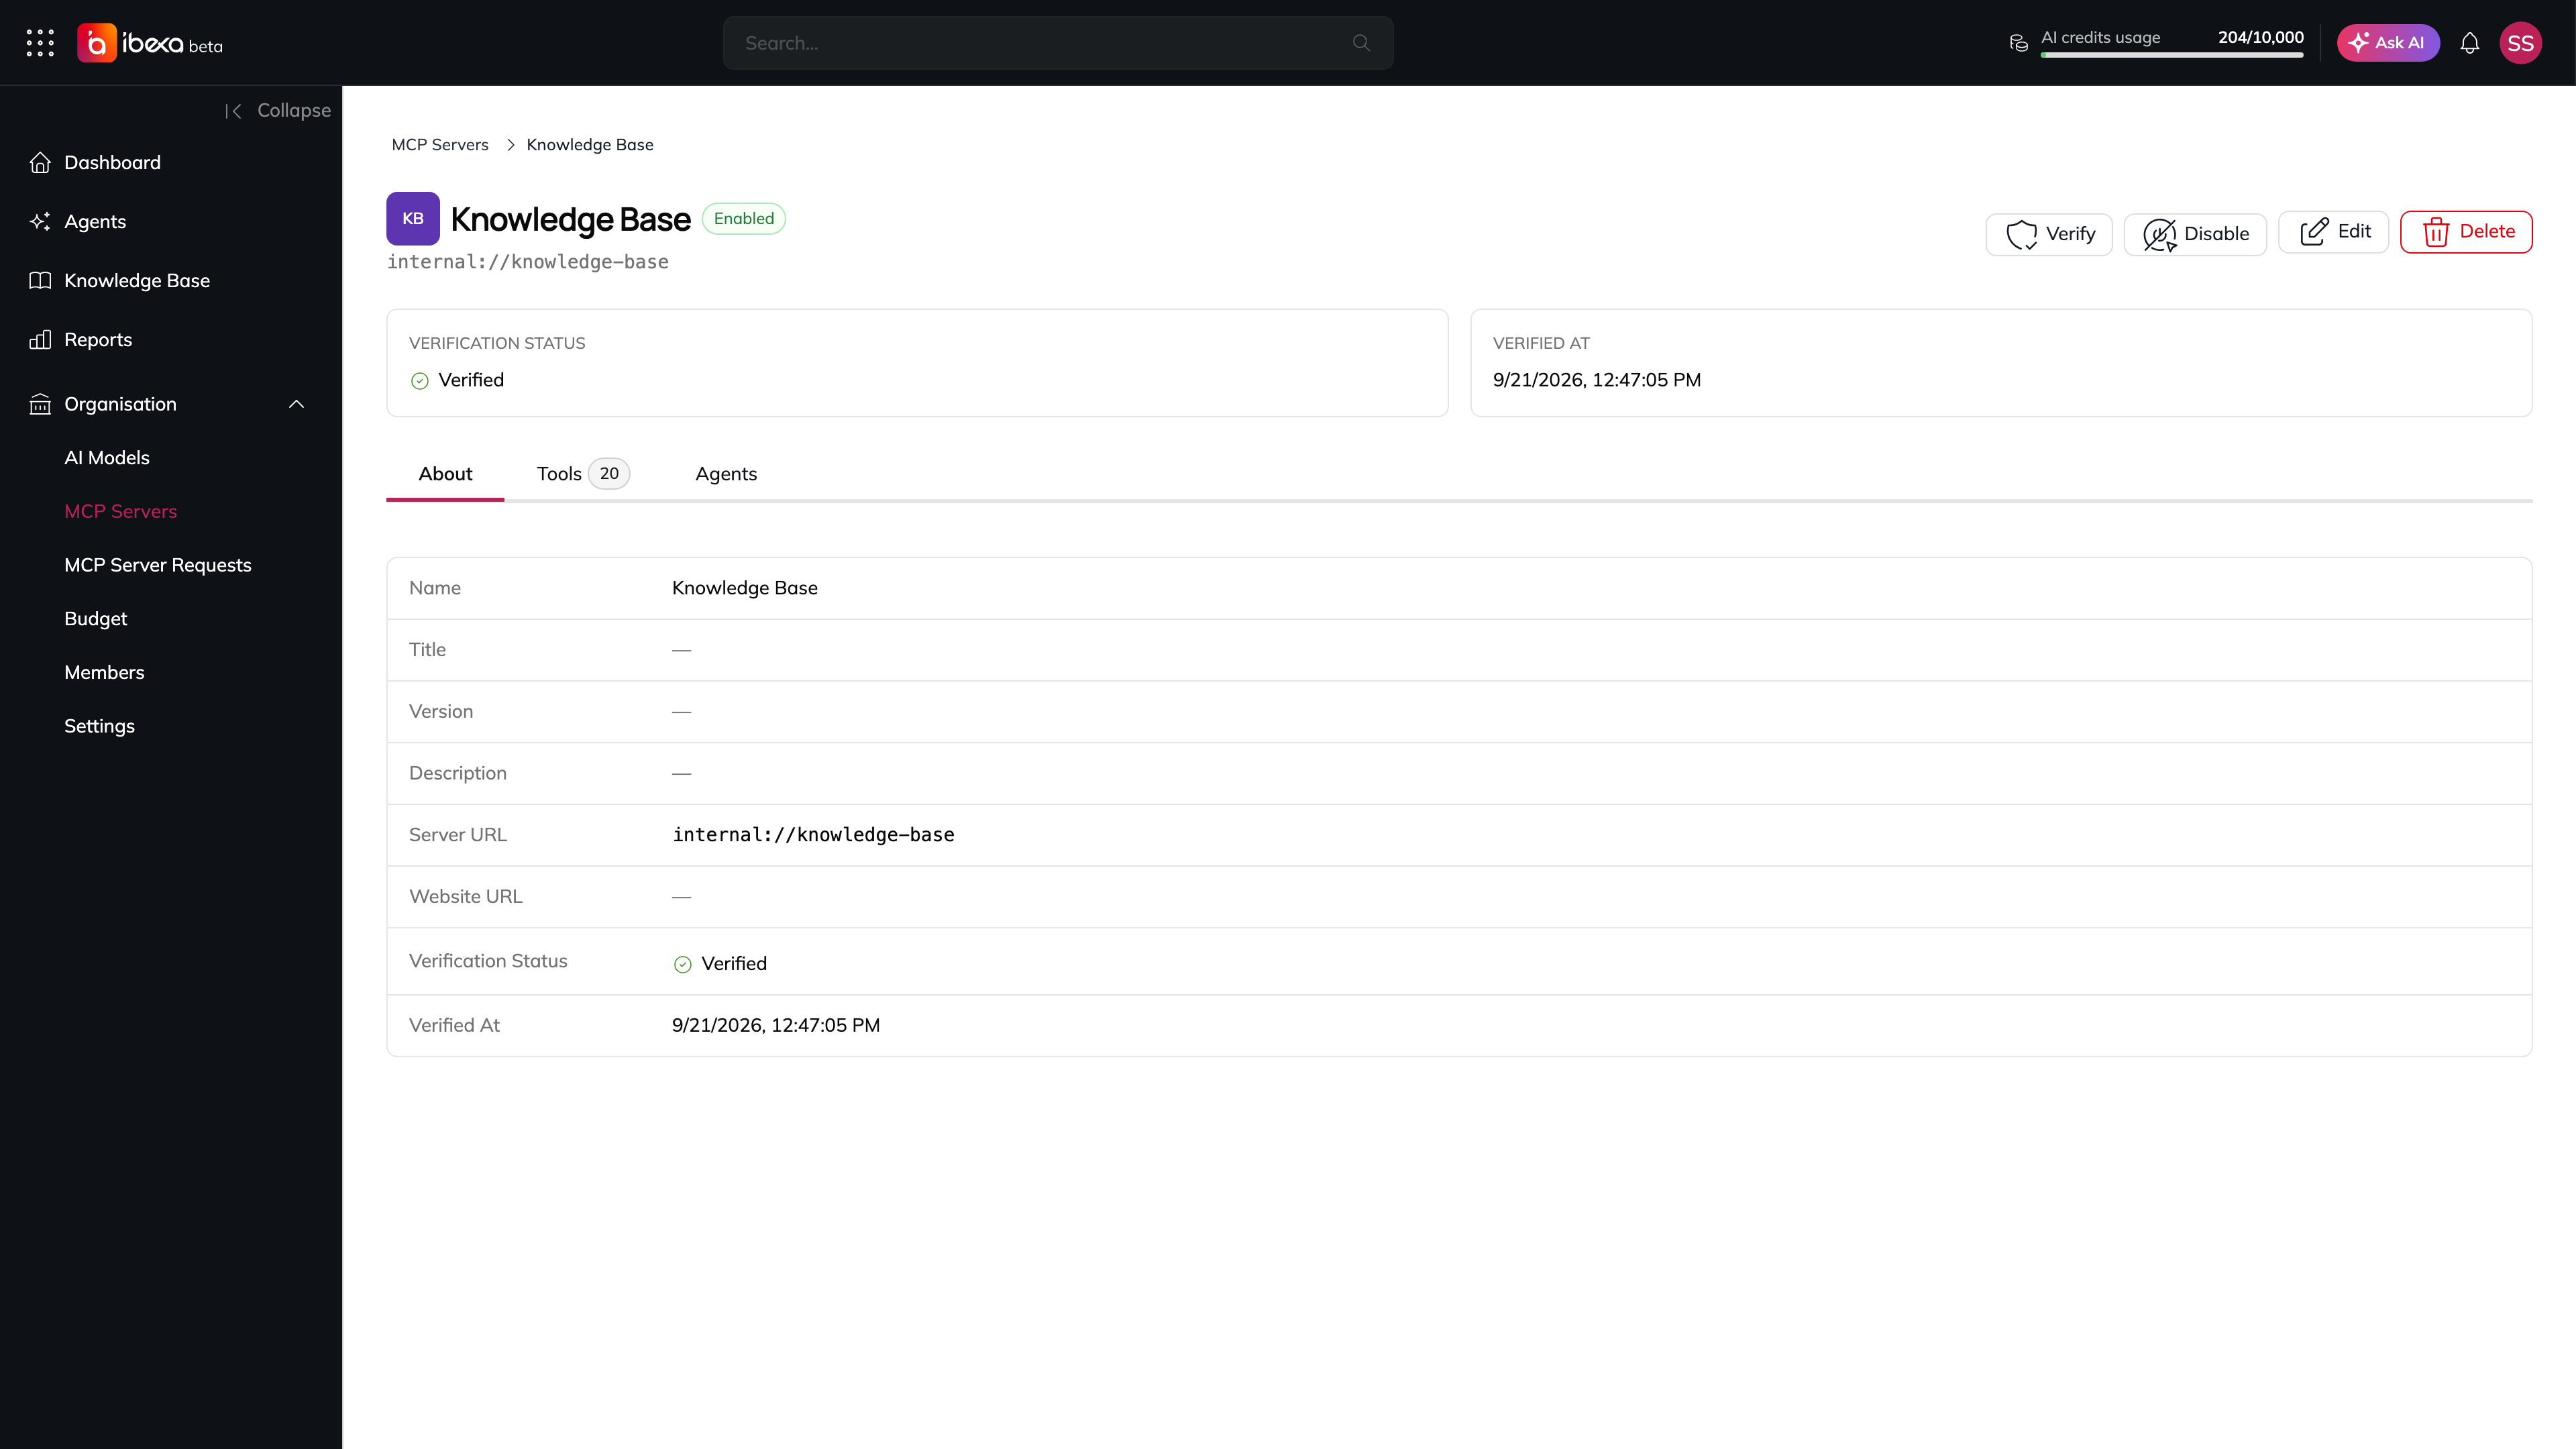
Verification checks whether the server is reachable and reports how many tools it exposes.
### 1. Find the server
In the main menu, go to **MCP Servers** and locate the server you want to verify.
### 2. Run verification
In the server's actions menu, select **Verify**. The platform connects to the server and displays a brief confirmation message with the result, for example:
> *"MCP server verified successfully. Status: ok - 5 tool(s) available."*
If the server is unreachable, an error message will indicate that the server is not available.
An MCP server detail page with its tools
## How to Delete an MCP Server ?
> ⚠️ **This action is permanent and cannot be undone.**
### 1. Find the server
In the main menu, go to **MCP Servers** and locate the server you want to remove.
### 2. Select Delete
In the server's actions menu (or overflow **"…"** menu), select **Delete**.
### 3. Confirm the deletion
A confirmation dialog opens with the message:
> *"This MCP server will be permanently deleted. Are you sure? You will not be able to undo this action."*
Select **Delete** to confirm, or **Cancel** to go back without making any changes.
## MCP Server Requests
Any organisation member can request access to an MCP tool that is not yet available in your organisation, using the **Request for tool** widget on the **Dashboard**: they choose the MCP catalog entry they are interested in, optionally add a message, and select **Send request**.
As an **Owner** or **Administrator**, you can review these requests:
### 1. Go to the MCP Server Requests page
In the main menu, go to **MCP Server Requests**.
### 2. Review the requests
The page lists every request made in your organisation, with the following columns:
| Column | Description |
| ---------------- | -------------------------------------------------------------------------------- |
| **MCP entry** | The catalog entry that was requested. Select it to go to its server detail page. |
| **Requested by** | The member who submitted the request. |
| **Message** | The optional message the requester added, or *"No message provided"*. |
| **Requested at** | The date and time the request was submitted. |
If no one has requested a tool yet, the message *"No requests yet - No one has requested access to an MCP tool yet."* is shown. If the requests cannot be loaded, an error message *"Could not load requests"* is shown - try again later.
> **Note:** This page only lists requests; it does not add or enable a server automatically. Use [How to Add an MCP Server from the Catalog](#how-to-add-an-mcp-server-from-the-catalog-) to act on a request.
## Troubleshooting
| Issue | What to do |
| ------------------------------------------------------- | ---------------------------------------------------------------------------------------------------------------------------------------------------------------- |
| **MCP Servers** is not visible in the main menu | Your account does not have Owner or Admin permissions. Contact your organisation owner. |
| **MCP Server Requests** is not visible in the main menu | Your account does not have Owner or Admin permissions. Any member can still submit a request from the Dashboard's **Request for tool** widget. |
| Verification fails with "Server is not available" | Check that the server URL is correct and the server is running. Verify that the authentication scheme and credentials (or any custom headers) are set correctly. |
| An agent cannot use tools from an enabled server | Ensure the server status shows **Enabled** and that verification succeeds. If the problem persists, contact your platform administrator. |
| Duplicate header name warning appears | Each header name must be unique. Remove or rename the duplicate header row before saving. |
| Credentials are rejected by the server | Confirm you selected the correct authentication scheme and that the credentials (username/password, token, API key, or cookie) are correct and have not expired. |
| The change does not save | Check your internet connection and try again. If the problem persists, refresh the page. |