> For the complete documentation index, see [llms.txt](https://docs.ibexa.ai/llms.txt). Markdown versions of documentation pages are available by appending `.md` to page URLs; this page is available as [Markdown](https://docs.ibexa.ai/manual/organisation/members.md).
# Members
The **Members** page lets Owners and Administrators manage who belongs to the organisation and what role each person holds. Go to **Members** in the main menu to open it. The page is divided into two tabs:
* **Owner and administrators** - shows the organisation owner and all administrators.
* **Members** - shows all regular members, with search and status filtering.
## Member Roles
| Role | Description |
| ---------- | ---------------------------------------------------------------------------------------------------------------- |
| **Owner** | Full control over the organisation. There is exactly one owner. The owner role cannot be changed from this page. |
| **Admin** | Can manage members, settings, AI Models, MCP Servers, and other organisation resources. |
| **Member** | Standard user with access to the organisation's agents and features. |
## Member Statuses
| Status | Meaning |
| ------------ | ------------------------------------------------------------------ |
| **Active** | The user has accepted their invitation and can log in. |
| **Inactive** | The user has been invited but has not yet activated their account. |
| **Blocked** | The user's access has been suspended. |
## Owner and Administrators Tab
### Viewing the Owner
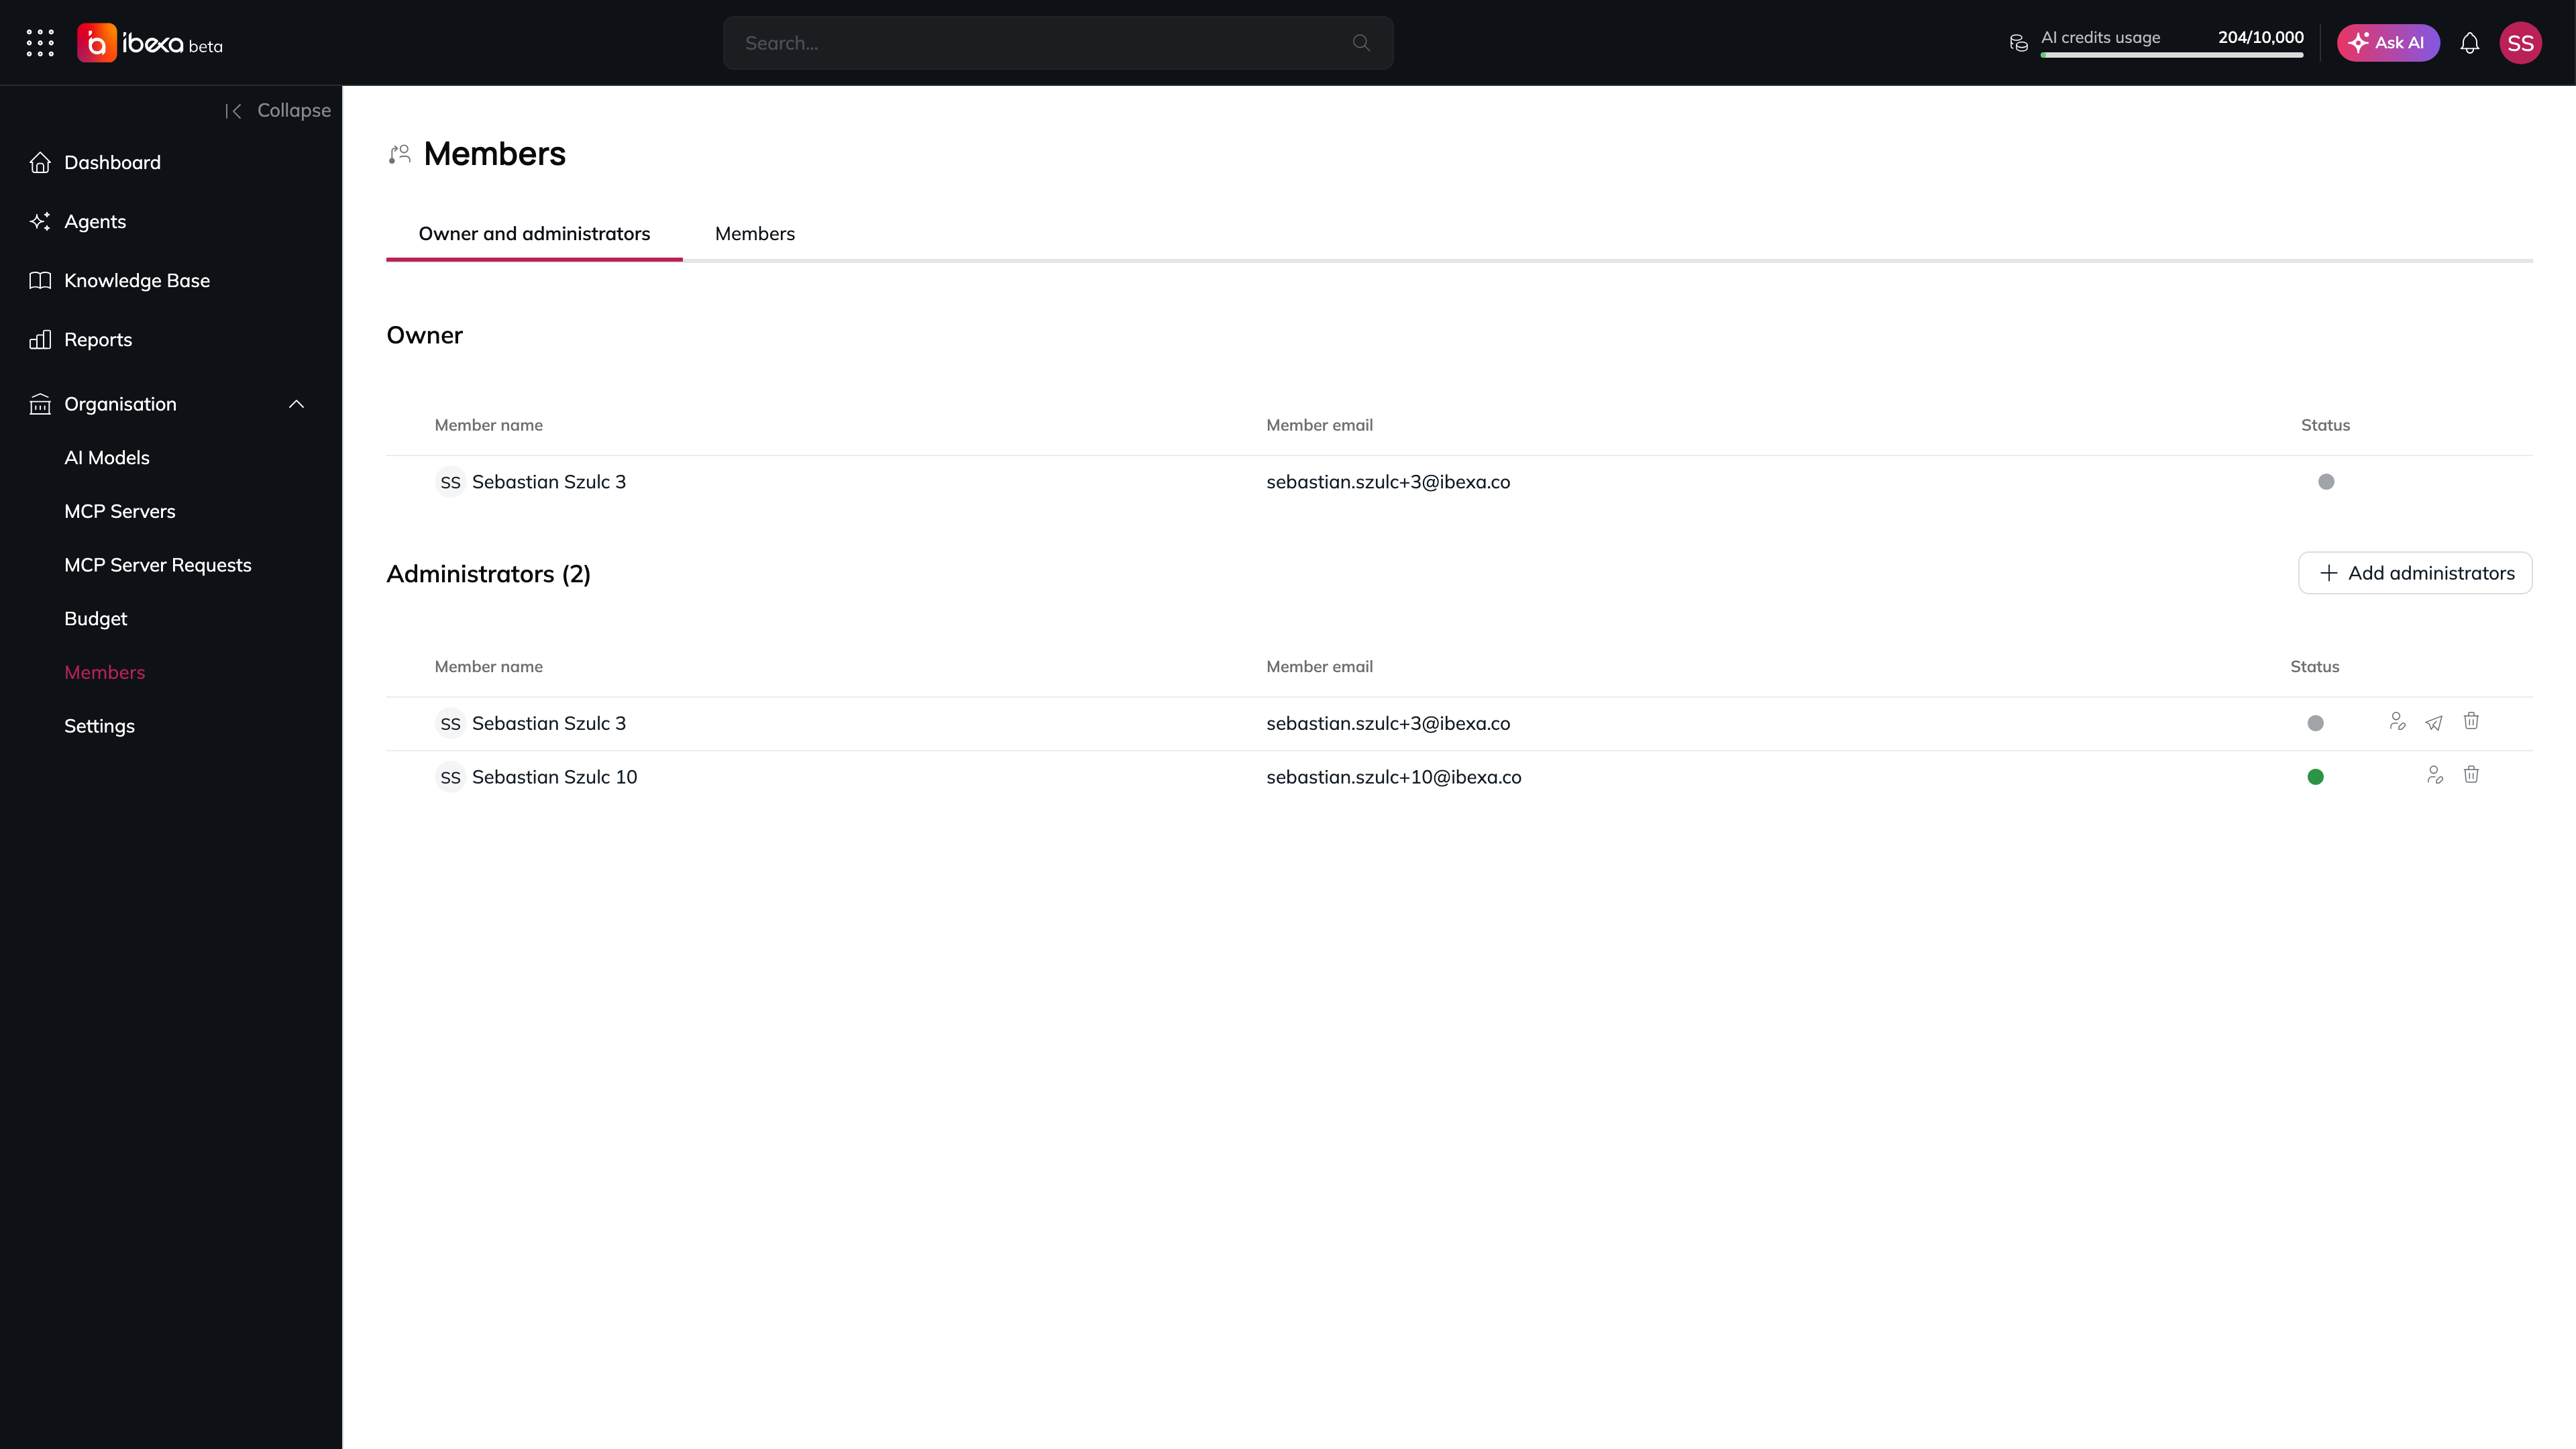
The **Owner** section at the top of the tab displays the organisation owner's name, email, and account status. The owner role cannot be changed from this page.
The Owner and administrators tab
### Adding Administrators
1. Open the **Owner and administrators** tab.
2. Select **Add administrators**.
3. In the dialog, enter the **Name** and **Email** of each person you want to add as an administrator.
* To add more people at once, select **Add another person** to insert a new row.
* To remove a row, select the trash icon next to it.
* To import multiple administrators from a file, see [Importing Members from a File](#importing-members-from-a-file).
4. Select **Add administrators** to send invitation emails. Each invited person receives an email with an activation link. They must confirm the invitation to become an administrator.
## Members Tab
### Viewing Members
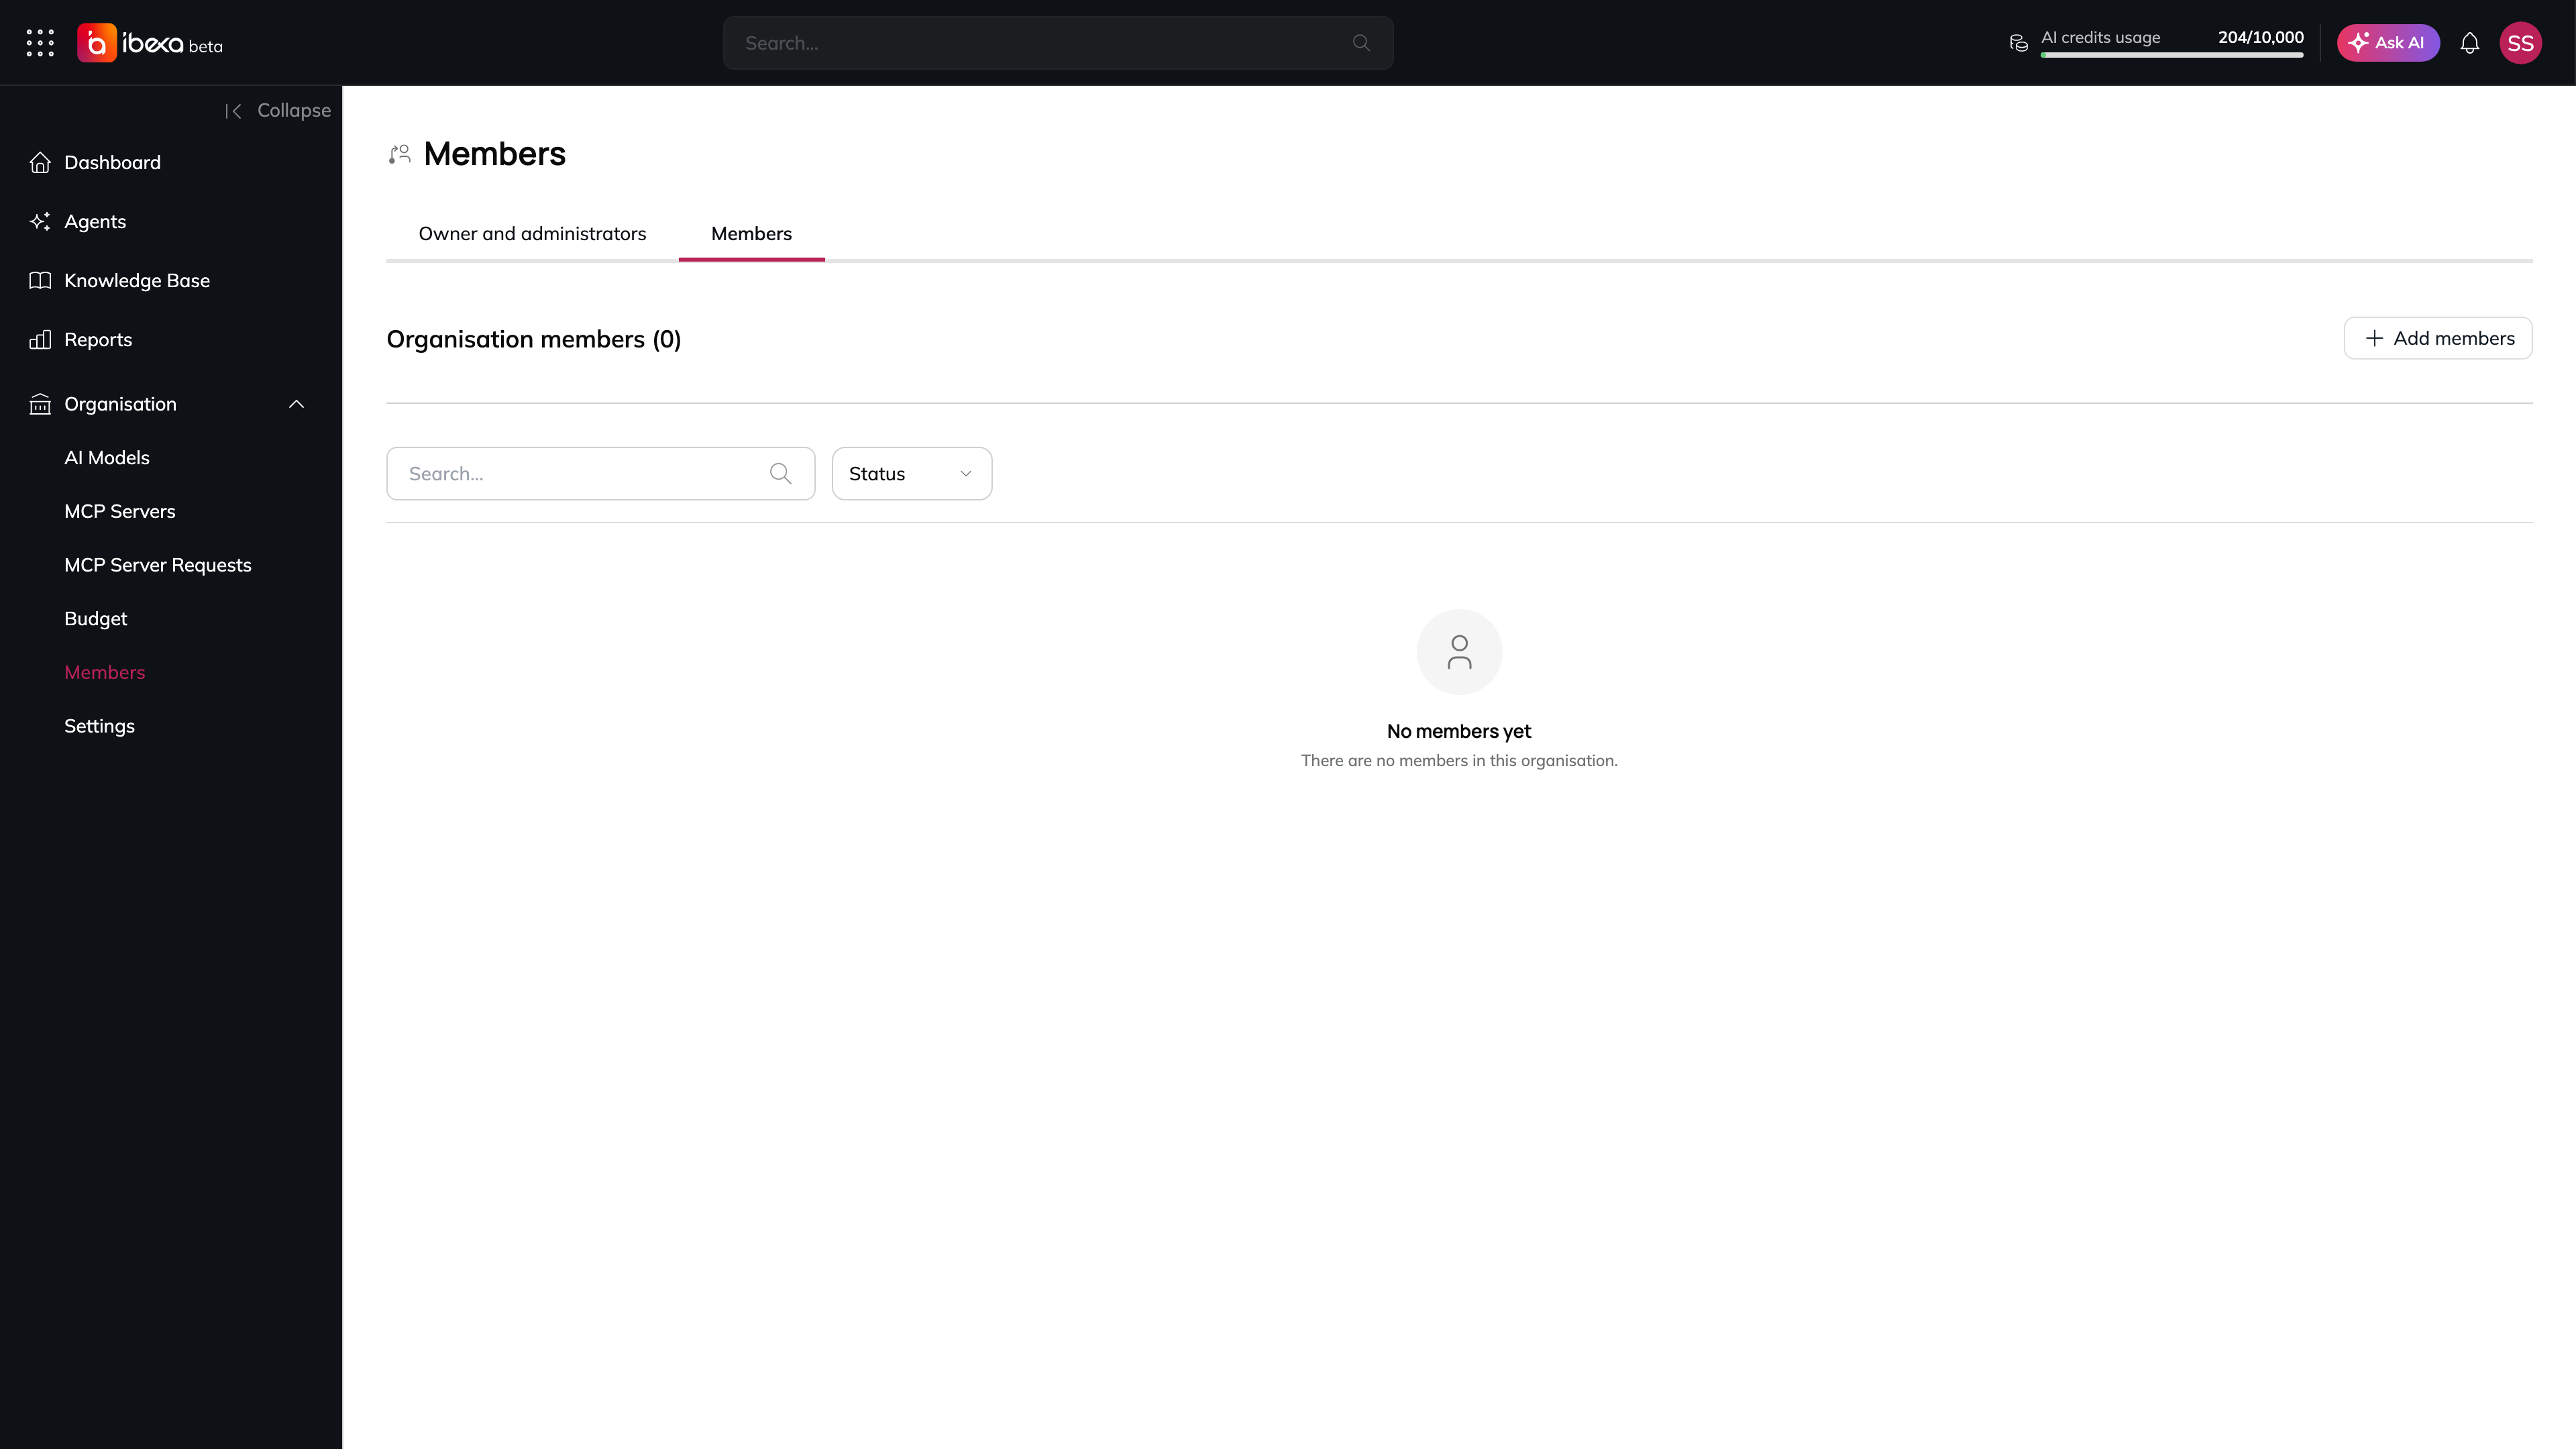
The **Members** tab lists all regular members of the organisation. The total count is shown in the tab heading. You can narrow the list using:
* **Search** - type a name or email address in the search box.
* **Status filter** - filter by **Active**, **Inactive**, or **Blocked**.
The Members tab of an organisation without regular members
### Adding Members
1. Open the **Members** tab.
2. Select **Add members**.
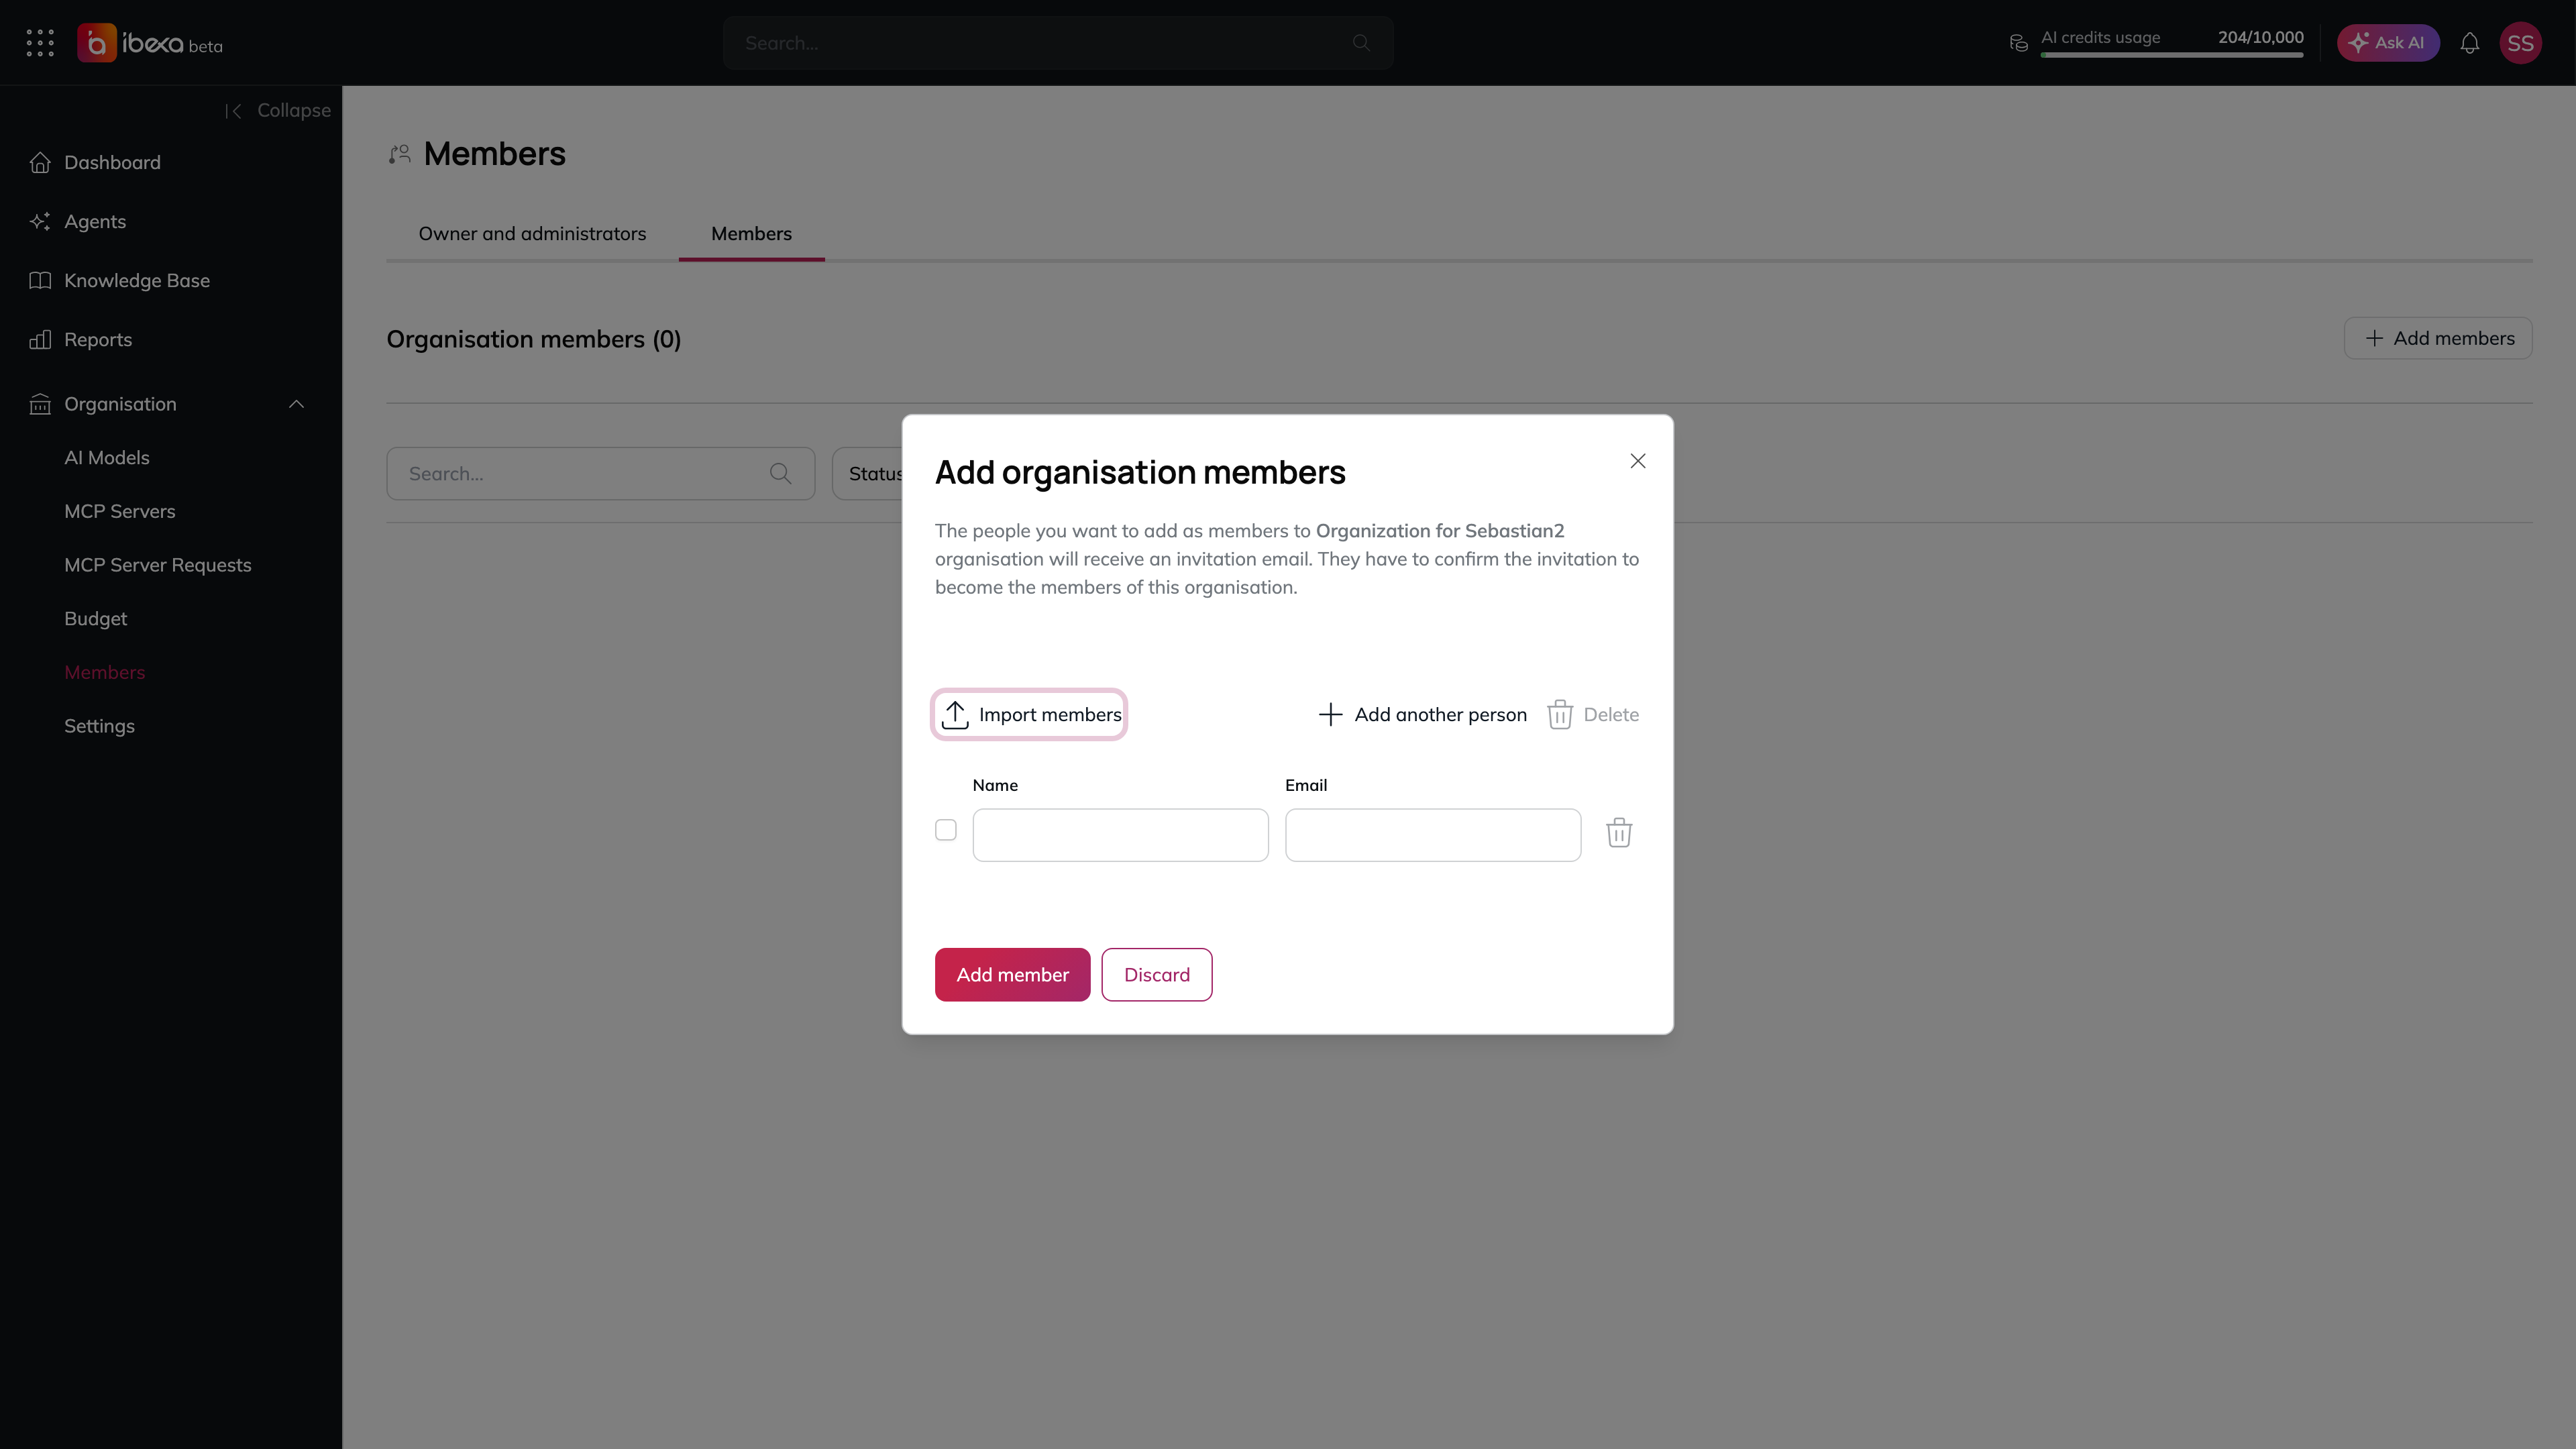
3. In the dialog, enter the **Name** and **Email** of each person you want to add.
* To add more people at once, select **Add another person** to insert a new row.
* To remove a row, select the trash icon next to it.
* To import multiple members from a file, see [Importing Members from a File](#importing-members-from-a-file).
4. Select **Add member** to send invitation emails. Each invited person receives an email with an activation link. They must confirm the invitation to become a member of the organisation.
The Add organisation members dialog
### Importing Members from a File
Both the **Add members** and **Add administrators** dialogs support bulk import via a CSV or XLSX file.
1. In the dialog, select **Import members**.
2. Choose a `.csv` or `.xlsx` file from your computer. **Expected file structure:** The file must contain at least two columns - one for name and one for email. The system recognises the following header names (case-insensitive):
| Column | Accepted header names |
| ------ | ---------------------------------- |
| Name | `name`, `full_name`, `full name` |
| E-mail | `email`, `e-mail`, `email address` |
If no recognised headers are found, the system falls back to positional order: the first column is treated as the name and the second as the email. **Example:**
```
name,email
Jane Smith,jane.smith@example.com
John Doe,john.doe@example.com
```
If the form already contains entries, imported rows are appended. If the form has only one empty row, it is replaced by the imported data.
## Managing Individual Members
Each member row has an actions menu (three-dot overflow button). The available actions depend on the member's current status.
| Action | Available for |
| ----------------------- | ------------------------------------------------------------------------ |
| Change user role | All statuses |
| Resend activation email | Inactive only |
| Block / Unblock | Active (block) or Blocked (unblock). Not available for Inactive members. |
| Delete this user | All statuses |
> **Note:** You cannot perform actions on your own account from the Members page.
### Changing a Member's Role
1. Locate the member in the **Owner and administrators** or **Members** tab.
2. Open the actions menu for that member and select **Change user role**.
3. In the dialog, select the new role from the dropdown - either **Admin** or **Member**.
4. Select **Confirm user role change** to apply the change, or **Discard** to cancel. A confirmation message appears when the role has been updated. The member's row moves to the appropriate tab automatically.
### Resending the Activation Email
This action is available only for **Inactive** members who have not yet activated their account.
1. Locate the inactive member in the **Members** tab (use the **Inactive** status filter if needed).
2. Open the actions menu for that member and select **Resend activation email**.
3. Confirm the action in the dialog. The member receives a new invitation email with an activation link.
### Blocking and Unblocking a Member
**To block an Active member:**
1. Locate the member in the table.
2. Open the actions menu and select **Block**.
3. Confirm the action in the dialog. The member's status changes to **Blocked** and they can no longer log in. **To unblock a Blocked member:**
4. Locate the blocked member (use the **Blocked** status filter if needed).
5. Open the actions menu and select **Unblock**.
6. Confirm the action in the dialog. The member's status returns to **Active**.
### Removing a Member from the Organisation
1. Locate the member in the table.
2. Open the actions menu and select **Delete this user**.
3. Review the confirmation message and select **Delete this user** to proceed, or **Discard** to cancel.
> **Note:** All agents created by the removed member remain available for the organisation to use.