> For the complete documentation index, see [llms.txt](https://docs.ibexa.ai/llms.txt). Markdown versions of documentation pages are available by appending `.md` to page URLs; this page is available as [Markdown](https://docs.ibexa.ai/tutorials/building-an-announcement-generator-agent.md).
# Building an Announcement Generator Agent
Build a brand-aware Announcement Generator agent that drafts on-brand copy by consulting Voice & Tone Guidelines stored in the Knowledge Base.
| **Time to complete** | \~30 minutes |
| -------------------- | ------------------------------------------------------------------------------------------------------------------------ |
| **Who this is for** | Marketing team members and Content Editors who write announcements, updates, or notices on behalf of one or more brands. |
## What You Will Build
By the end of this tutorial you will have a working **Announcement Generator** agent - a Copywriter Agent that drafts announcements from a short brief (a topic, a link, or a few notes) and automatically matches the tone, vocabulary, and structure defined in your brand's **Voice & Tone Guidelines**. Instead of hard-coding one brand's style into the agent's instructions, you will store each brand's guidelines as documents in the **Knowledge Base** and simply point the agent at the right folder - a reusable-context pattern applied here to a concrete, end-to-end example.
To make the difference obvious, you will set up guidelines for **two very different brands** and generate the *same* announcement for both, so you can see the agent adapt its voice while your instructions stay untouched.
## Example Brands: City of Edinburgh Council vs. Mailchimp
{% hint style="info" %}
These two organisations are used purely as **illustrative, real-world examples** of contrasting tone of voice. This tutorial is not affiliated with, endorsed by, or sponsored by either organisation.
{% endhint %}
{% columns %}
{% column %}
### City of Edinburgh Council
A local government body. Its published [Tone of Voice, Accessibility and Key Brand Guidance](https://www.edinburgh.gov.uk/downloads/file/32738/tone-of-voice-accessibility-and-key-brand-guidance) reflects the needs of a public sector communicator writing for a whole city ([Edinburgh](https://www.google.com/maps/place/Edinburgh,+UK/)'s residents, of all ages, backgrounds, and reading levels):
* **Friendly and engaging, not formal** - "sound like real people, not a corporate body," using "we" and "you" and contractions (*we'll*, *you'll*).
* **Clear, plain English** - short sentences and paragraphs, no jargon or unexplained acronyms, written for roughly a reading age of nine.
* **Open, honest, and positive** - state facts directly rather than hiding behind passive or defensive phrasing.
* **Accessible and inclusive** - good colour contrast, legible font sizes, and information available in other formats/languages on request.
* **Scannable structure** - headings, bullet points, short paragraphs, and clear, prominent contact details.
{% endcolumn %}
{% column %}
### Mailchimp
A marketing technology company. Its [Content Style Guide](https://github.com/mailchimp/content-style-guide) is written for a product and marketing audience and reflects a very different set of priorities:
* **Plainspoken and clear** - values clarity above all, avoiding fluffy metaphors and hyperbole; writes in plain English and uses simple words and sentences.
* **Genuine and friendly** - "warm and human" in every piece of content, speaking to readers in a familiar, accessible way rather than "marketing at" them.
* **Dry, subtle humor** - informal tone with an offbeat, straight-faced sense of humor, but "always more important to be clear than entertaining"; never forces a joke.
* **Active and positive** - uses active voice (not passive) and positive rather than negative language.
{% endcolumn %}
{% endcolumns %}
Same underlying facts, two very different voices. That contrast is exactly what an agent should preserve automatically once it has been pointed at the correct Knowledge Base folder - which is what you will build next.
## Legal Notice
{% hint style="warning" %}
**Use your own brand assets in production.** This tutorial downloads and uploads each organisation's own published guidance purely as a working example of two contrasting, publicly available tones of voice. Do not upload third-party brand guidelines to your organisation's Knowledge Base for real production use unless you have the rights or licence to do so - the Mailchimp Content Style Guide, for instance, is published under its own licence on GitHub. When following along for real, replace the example brands with your own organisation's approved Voice & Tone Guidelines.
{% endhint %}
## Prerequisites
Before you start, make sure the following are in place:
* At least one **AI model** has been connected and enabled (**Organisation → AI Models**). If none is available, ask your administrator.
* The built-in **Knowledge Base MCP Server** has been added to your organisation (**Organisation → MCP Servers**). If it is missing, ask your administrator to add it - see [Knowledge Base MCP Server](/manual/organisation/built-in-mcp-servers/knowledge-base-mcp-server.md).
* A default **embedding model** has been configured in **Organisation Settings**, so Knowledge Base search works reliably. Ask your administrator if you are unsure.
* An internet connection to download the brand guidance files used in this tutorial (or your own brand's Voice & Tone materials, ready to upload).
## Overview of the Steps
1. Create a folder structure in the Knowledge Base for your brands.
2. Add each brand's Voice & Tone Guidelines as a published document.
3. Create the Announcement Generator agent and connect it to the Knowledge Base.
4. Generate the same announcement for both brands.
5. Compare the results.
## Step 1: Preparation - Organise Your Brand Materials
Keeping each brand's material in its own folder means you can later point the agent at exactly one brand at a time, instead of mixing voices.
### 1.1 - Create the folder structure
{% stepper %}
{% step %}
### Open the Knowledge Base
Select **Knowledge Base** in the main navigation menu.
{% endstep %}
{% step %}
### Create the parent "Brands" folder
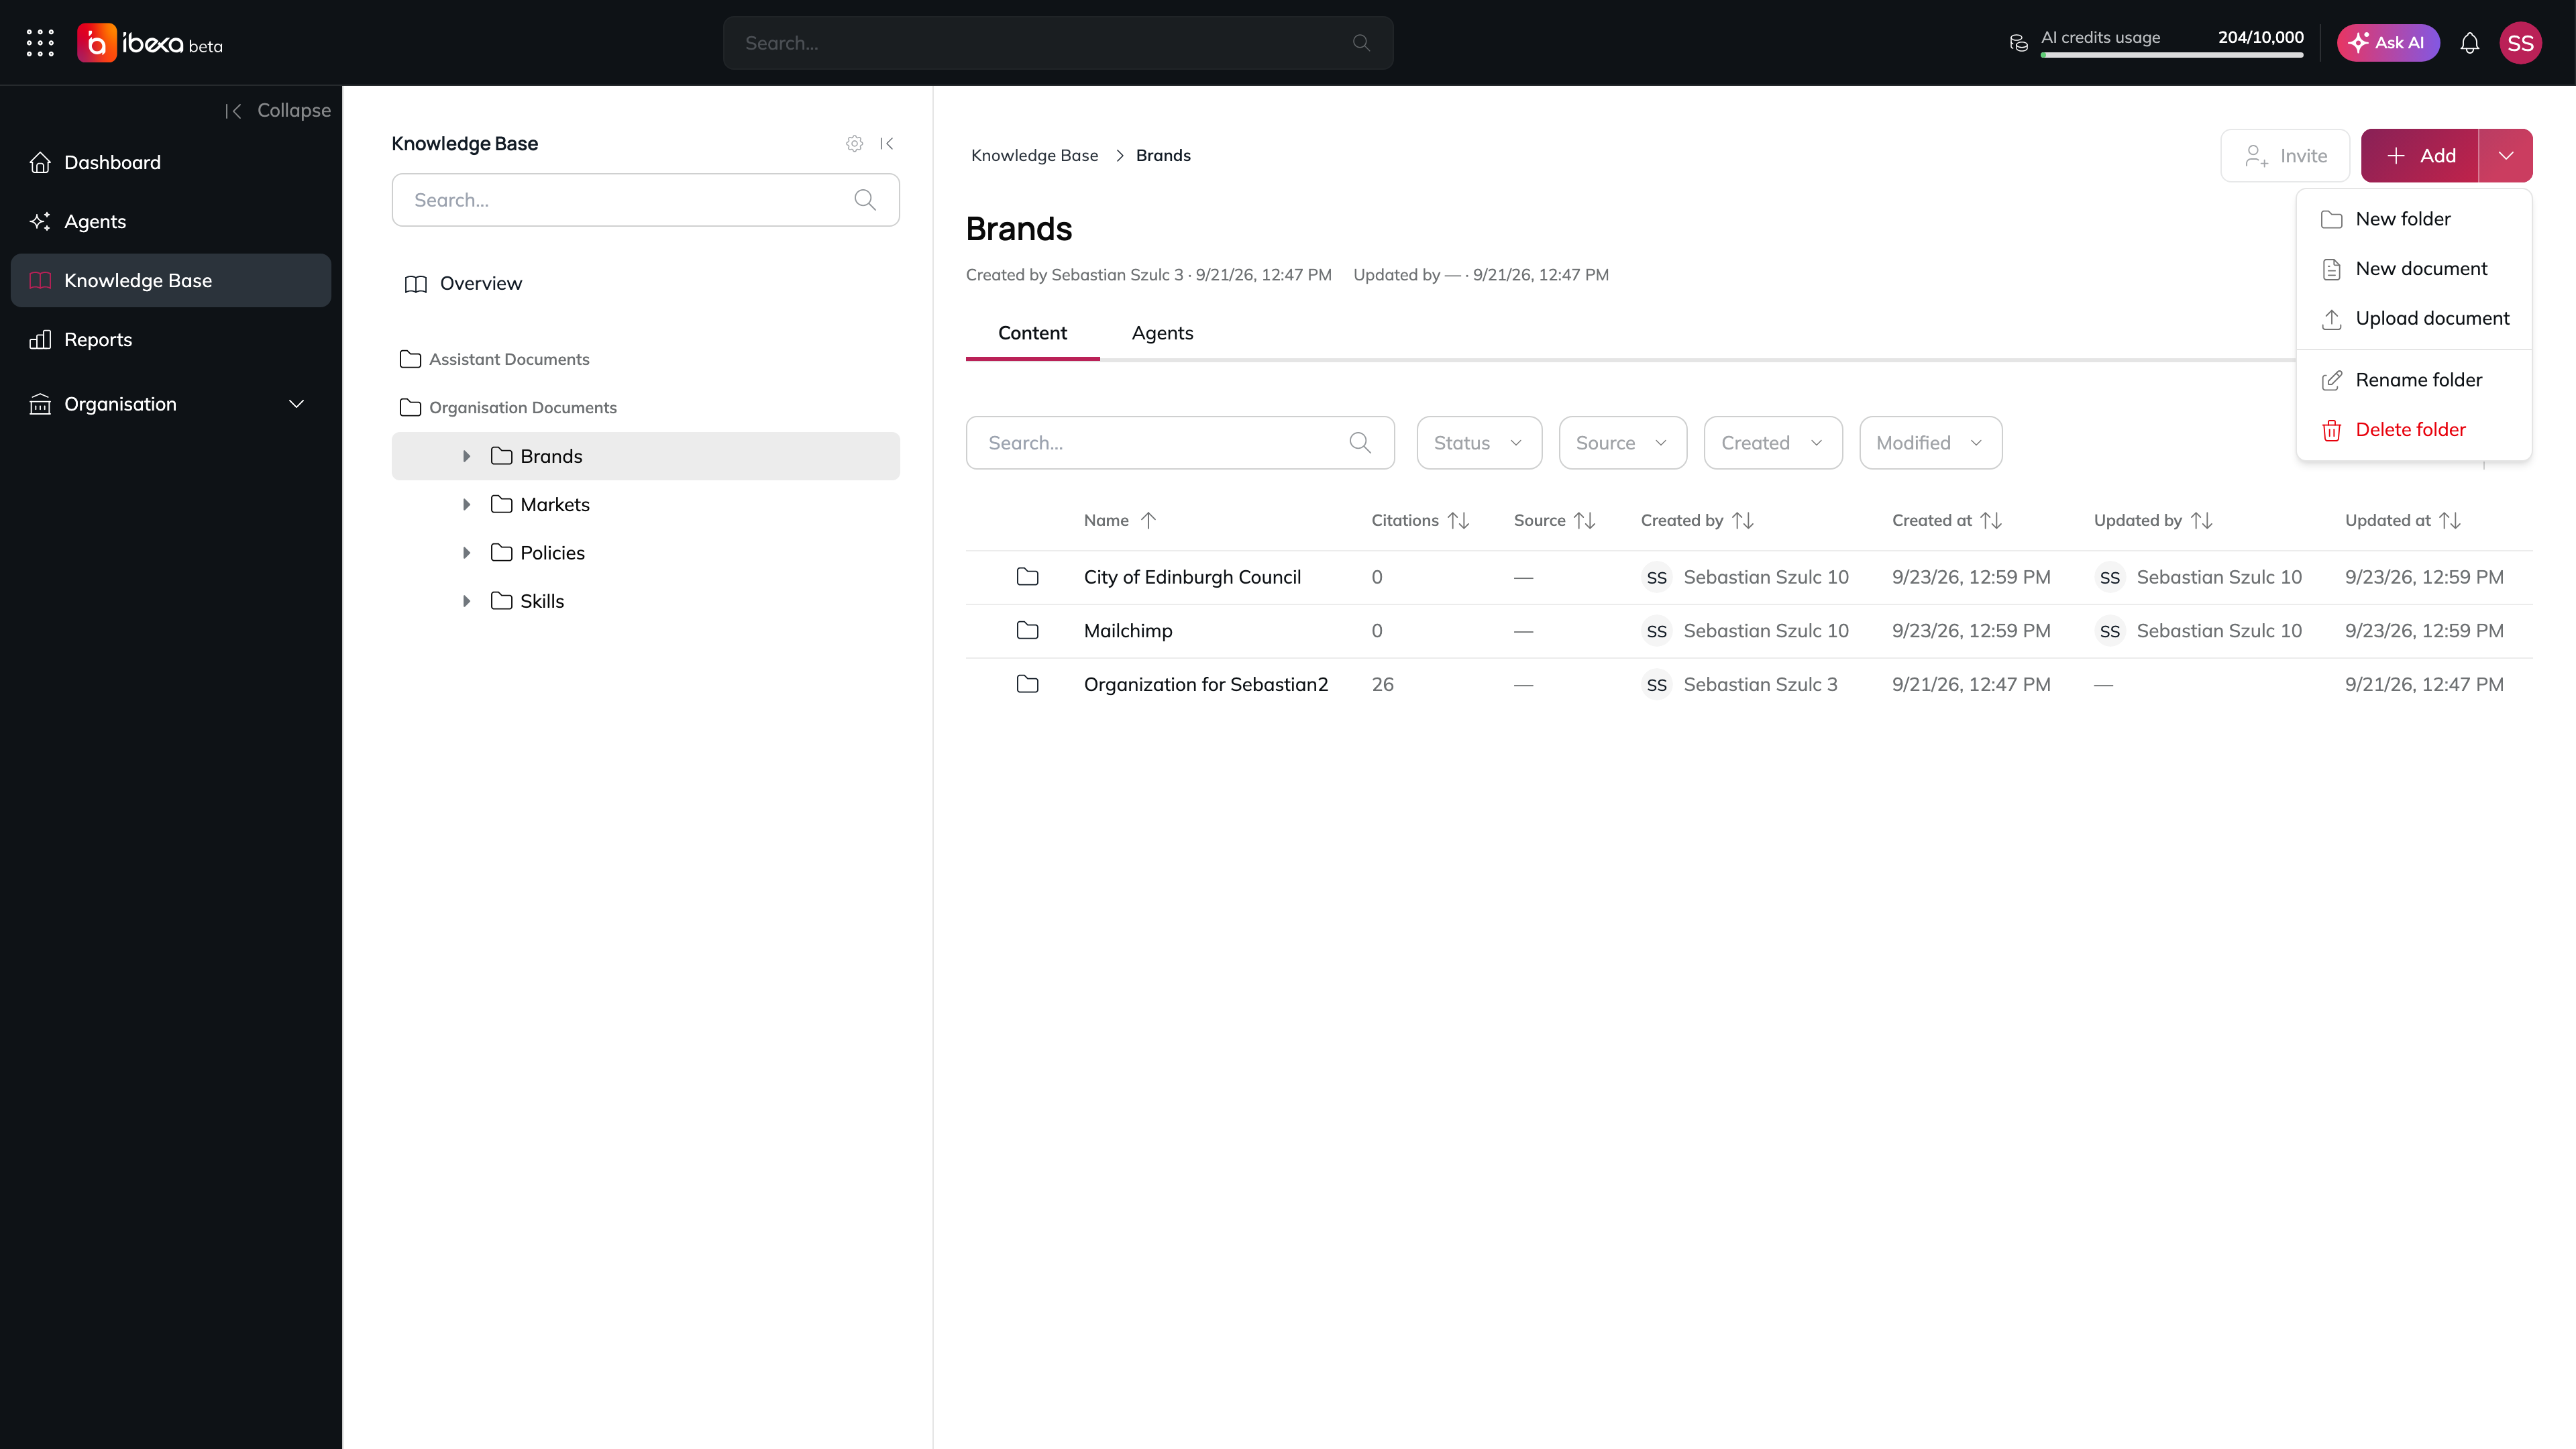
Select the **Organization documents** root, open the **Add** dropdown, and choose **New folder**. Name it **Brands** and press **Enter**.
The Add dropdown
{% endstep %}
{% step %}
### Create one subfolder per brand
Select the new **Brands** folder, then repeat **Add → New folder** to create two subfolders inside it:
* **City of Edinburgh Council**
* **Mailchimp**
You should end up with the following structure:
```
Brands/
City of Edinburgh Council/
Mailchimp/
```
{% endstep %}
{% endstepper %}
> Using one subfolder per brand is what lets you later grant an agent **Selected folders** access to a single brand, so it never sees other brands' guidelines.
### 1.2 - Upload the Voice & Tone Guidelines
For each brand folder, download the brand's official guidance and upload it as-is - no retyping or paraphrasing needed.
{% stepper %}
{% step %}
### Download the City of Edinburgh Council guidance
Download the PDF from [Tone of Voice, Accessibility and Key Brand Guidance](https://www.edinburgh.gov.uk/downloads/file/32738/tone-of-voice-accessibility-and-key-brand-guidance) and save it to your computer.
{% endstep %}
{% step %}
### Upload it to the Knowledge Base
1. Select the **City of Edinburgh Council** folder.
2. Open the **Add** dropdown and select **Upload document**.
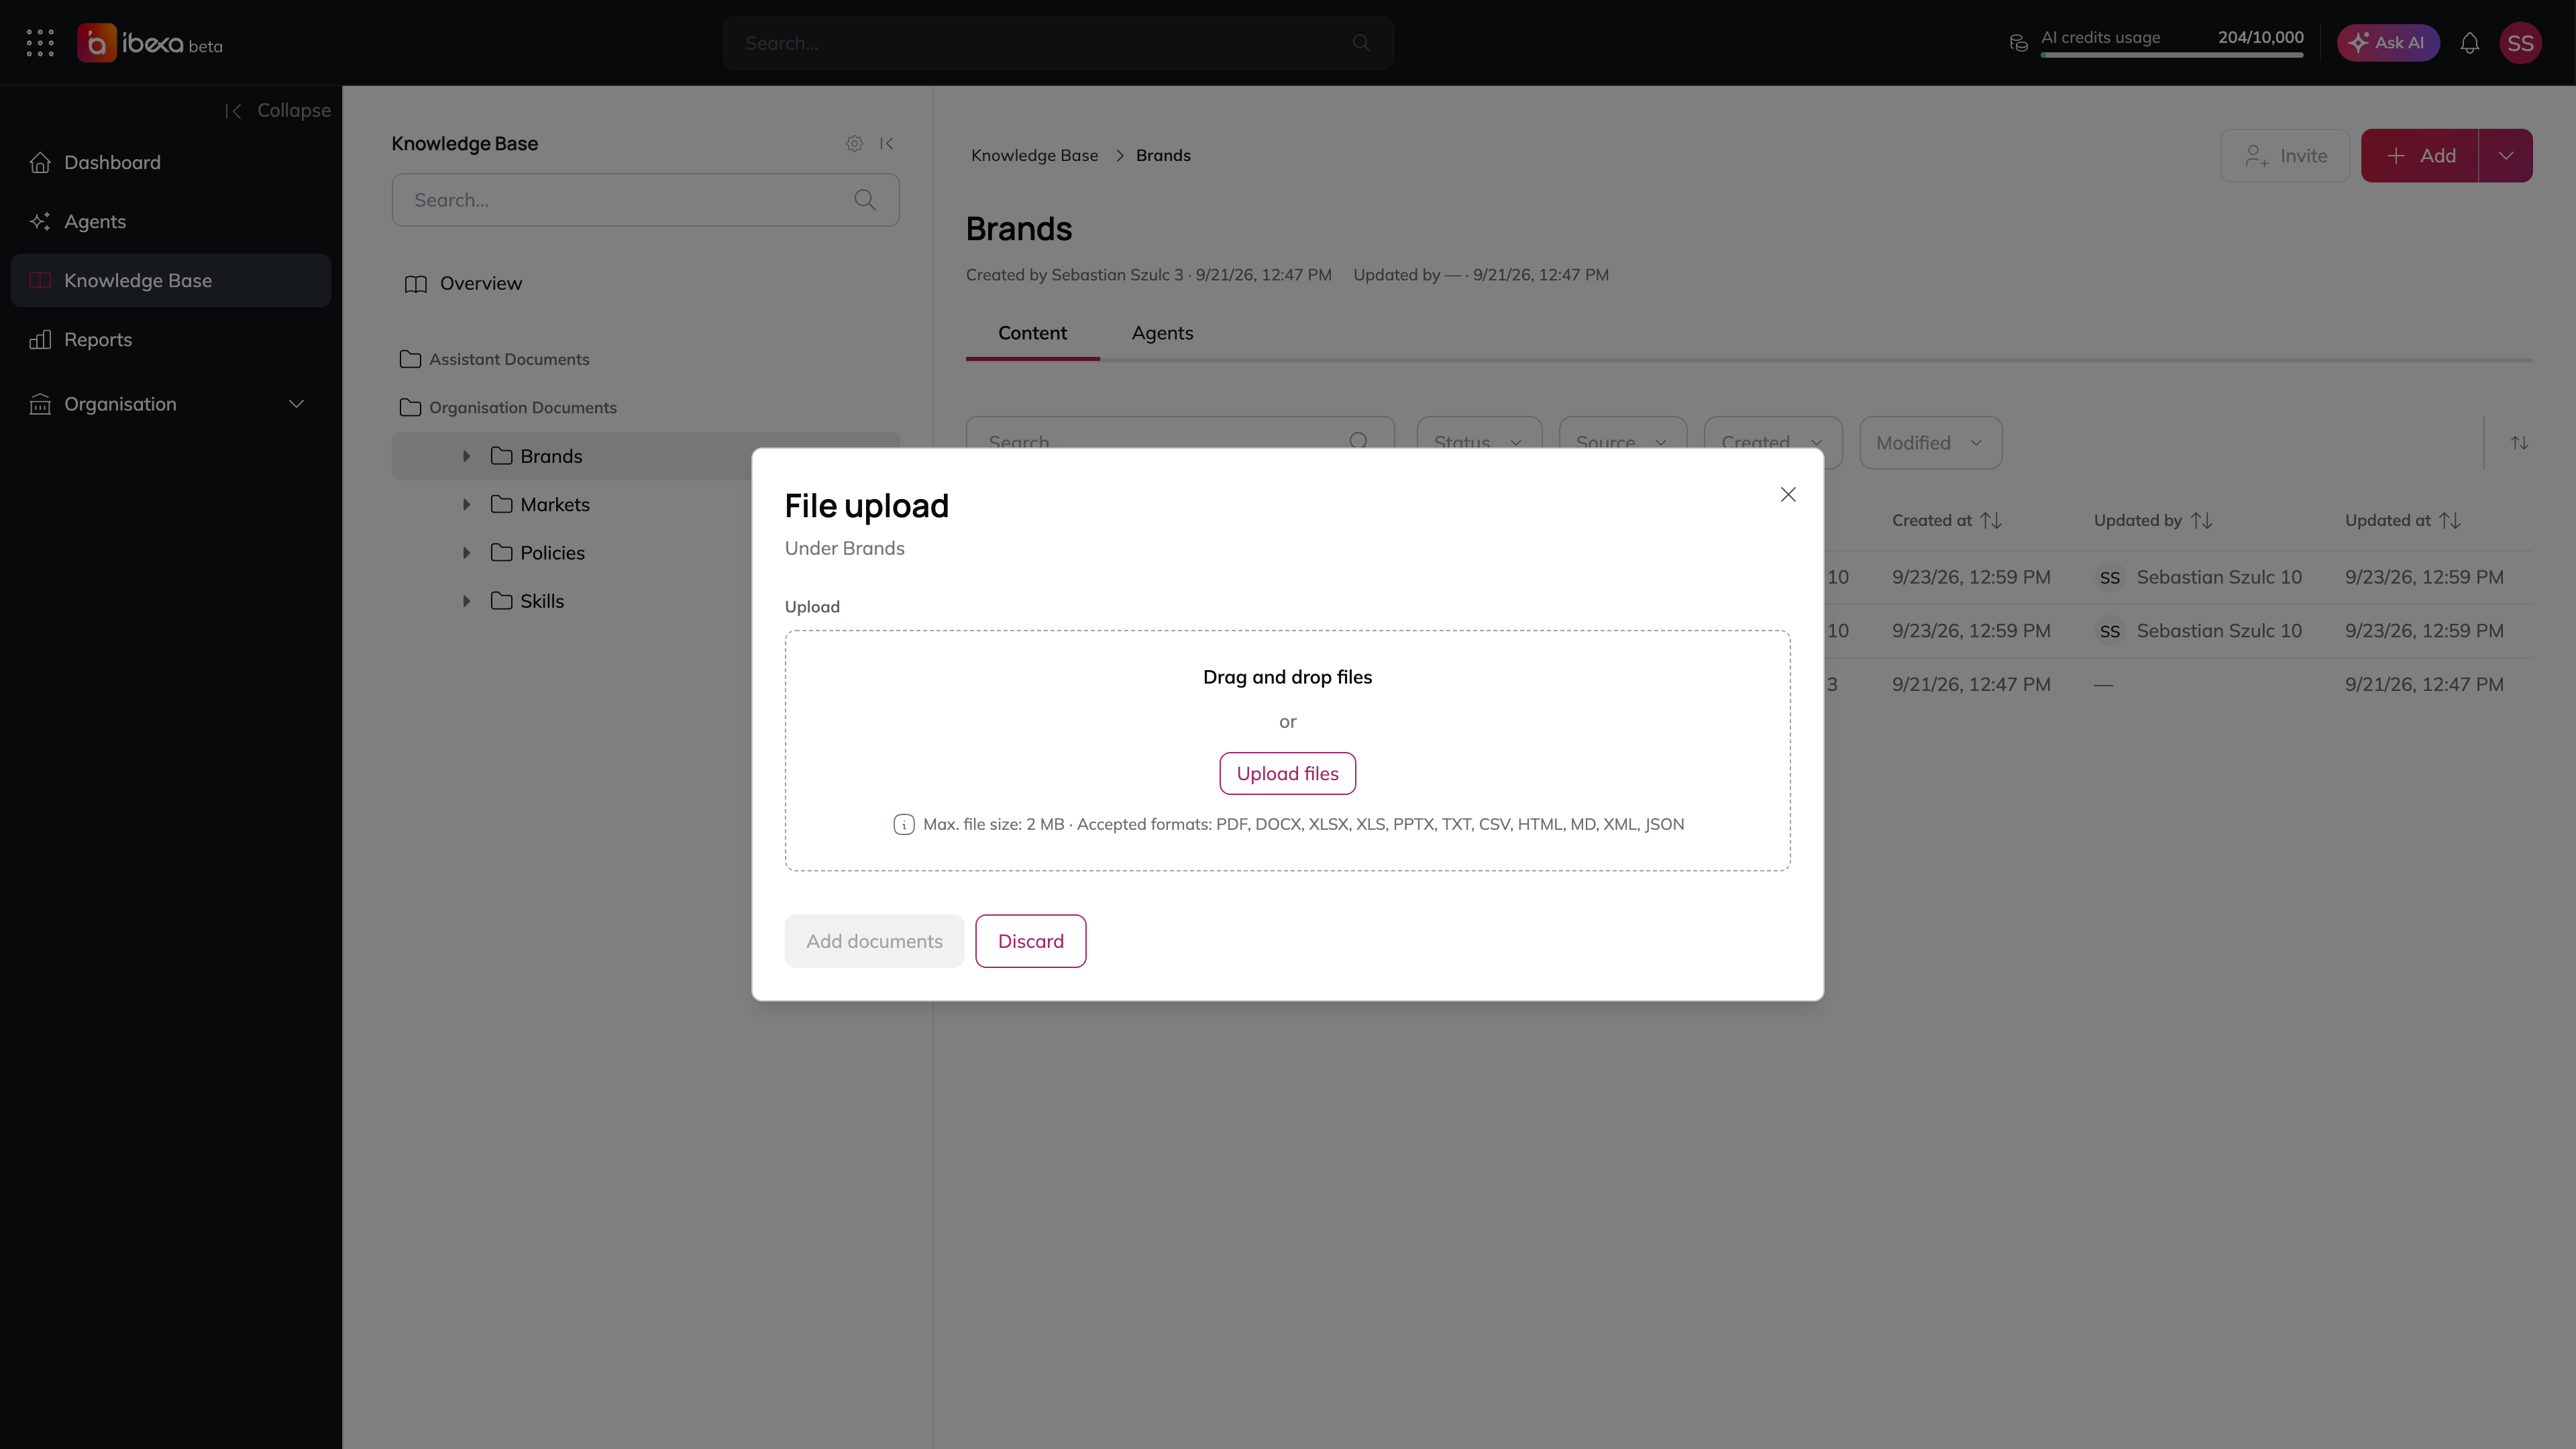
3. Drag and drop the downloaded PDF onto the upload area (or select it to browse your computer).
4. Select **Add documents**. The file is uploaded and created as a new **Draft** - a banner reads *"Still processing this document"* while the platform extracts its content. Wait for this to finish.
The File upload dialog
{% endstep %}
{% step %}
### Publish the draft
Open the document, go to the **Versions** tab, find the **Draft** version, and select **Publish**. The status changes to **Published** and the content becomes retrievable by agents.
{% endstep %}
{% step %}
### Download the Mailchimp guidance
Mailchimp's guidance is published as a set of Markdown files in its [Content Style Guide](https://github.com/mailchimp/content-style-guide) repository on GitHub. Download at least these two files, which cover its writing principles and voice & tone:
* [`01-writing-principles.html.md`](https://raw.githubusercontent.com/mailchimp/content-style-guide/master/01-writing-principles.html.md)
* [`02-voice-and-tone.html.md`](https://raw.githubusercontent.com/mailchimp/content-style-guide/master/02-voice-and-tone.html.md)
Both are plain Markdown files (`.md`), one of the accepted upload formats.
{% endstep %}
{% step %}
### Upload and publish them
1. Select the **Mailchimp** folder.
2. Open the **Add** dropdown and select **Upload document**.
3. Drag and drop both downloaded `.md` files onto the upload area - you can add multiple files in one go.
4. Select **Add documents** and wait for processing to finish for both files.
5. Open each document, go to its **Versions** tab, and **Publish** its draft.
{% endstep %}
{% endstepper %}
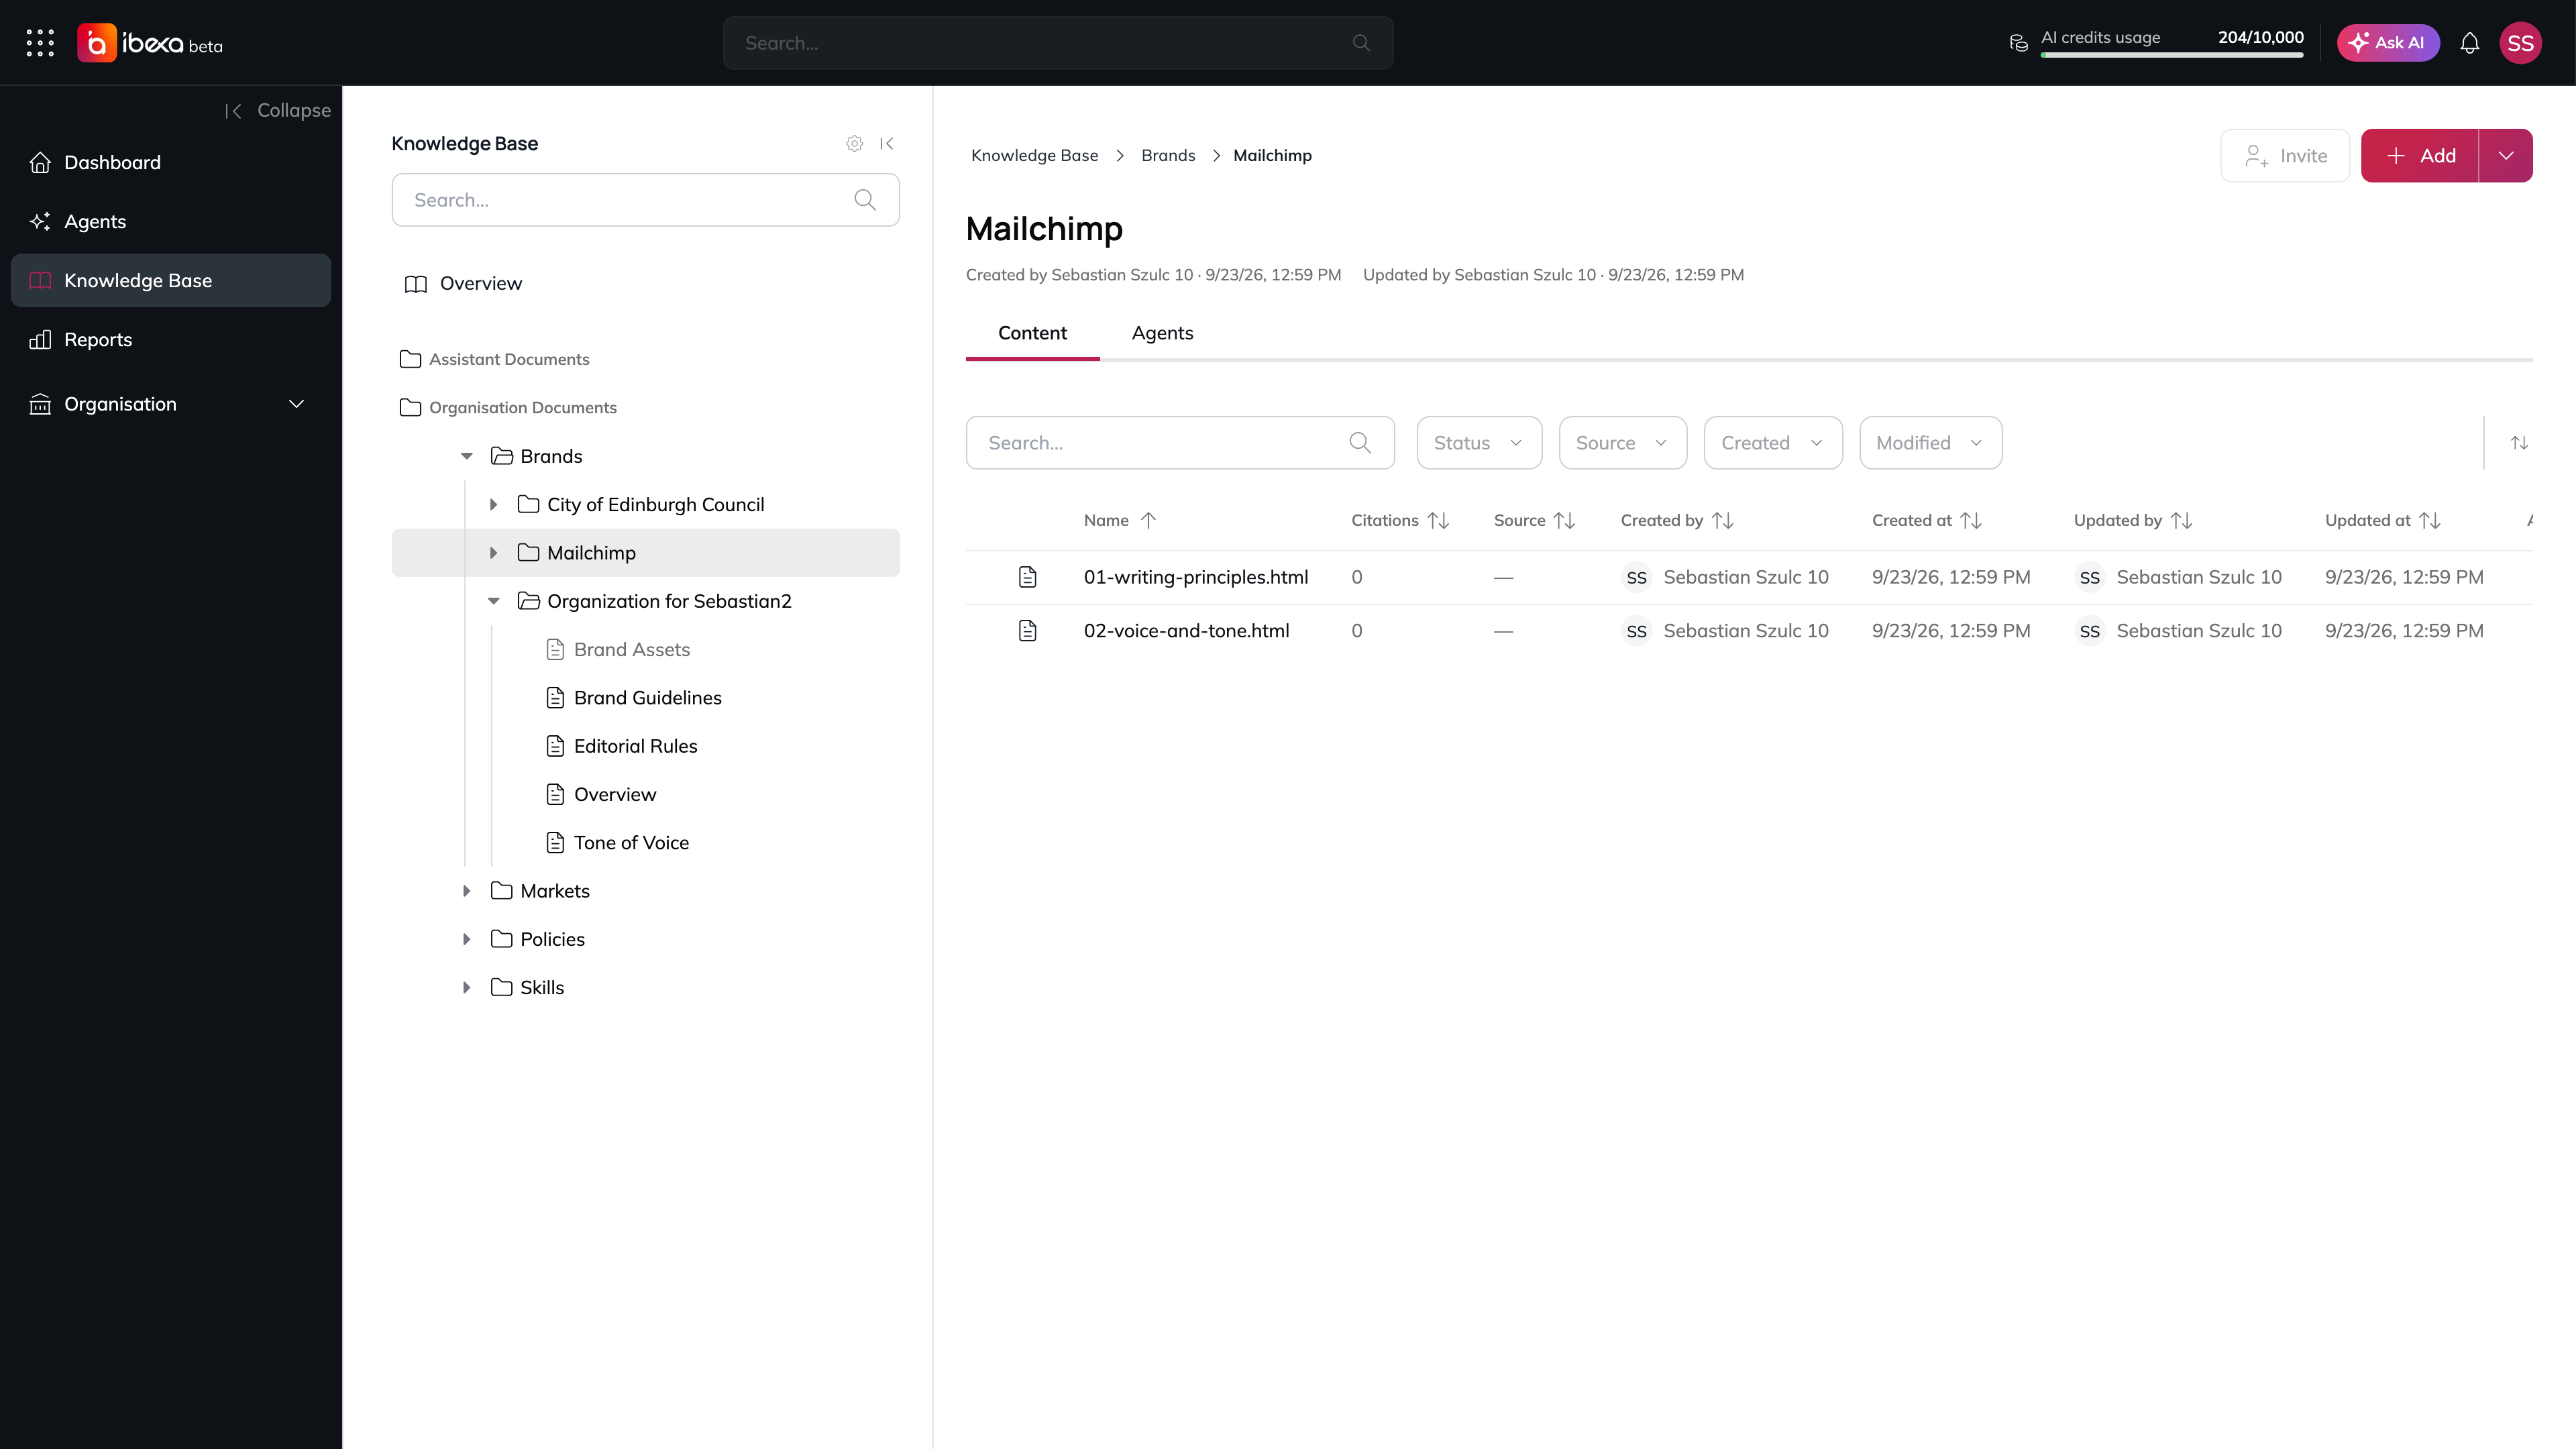
At this point your Knowledge Base looks like this, with all documents **Published**:
```
Brands/
City of Edinburgh Council/
Tone of Voice, Accessibility and Key Brand Guidance [Published]
Mailchimp/
01-writing-principles.html.md [Published]
02-voice-and-tone.html.md [Published]
```
The Mailchimp folder with its uploaded guidelines
## Step 2: Create the Agent Definition
### 2.1 - Open the Add Agent page
Select **Agents** in the main navigation menu, then **Add Agent**. Choose **Add Custom Agent** to start from a blank page.
### 2.2 - Step 1: Instructions
Paste the following into the **Instructions** field:
```
## Role & Objective
Act as an expert Copywriter Agent. Your goal is to draft announcements based on user-provided topics, links, or notes, ensuring full alignment with official brand guidelines.
## Core Workflow & Execution
* Consult Knowledge Base: Before drafting, review all provided Brand Assets. Pay specific attention to the Voice & Tone Guidelines to ensure exact adherence to brand identity.
* **Process Inputs:** Analyze the user's provided notes, links, or key topics to identify core messaging requirements.
* Draft Announcement: Write copy tailored to the target audience while maintaining the required brand persona, formatting, and messaging structure.
## Expected Output
* Always output announcement draft block blockquote
* List used Knowledge Base documents
```
> **Why this matters:** The instructions don't mention any brand-specific tone words at all - the actual voice comes entirely from whichever brand's Knowledge Base folder is linked at execution time. This is what makes the agent reusable across brands without ever touching its instructions.
Select **Next**.
### 2.3 - Step 2: Triggers
Select **Add trigger** and choose **Run Now**, so you and your team can start the agent on demand. Leave the defaults and select **Next**.
### 2.4 - Step 3: Tools - Add the IAMP Knowledge Base
1. Select **Select tools**.
2. Choose the **IAMP Knowledge Base** (built-in MCP server).
3. Enable at least:
* **Search Documents** - to find relevant passages across the linked folder.
* **Get Document** - to retrieve a full guideline document.
4. Confirm your selection and select **Next**.
### 2.5 - Step 4: Knowledge Base - Link the Brand Folder
This is the step that ties the agent to a specific brand.
| Field | What to select |
| ----------- | -------------------------------------- |
| **Access** | **Selected folders** |
| **Folders** | **Brands / City of Edinburgh Council** |
> **Why "Selected folders", and why only one brand folder?** Setting **Selected folders** access to a single brand folder guarantees the agent only ever retrieves *that* brand's guidelines - even if you later add more brands to the Knowledge Base. To generate announcements for a different brand, you have two options: create a second agent scoped to that brand's folder (recommended, since it keeps each agent single-purpose), or edit this agent's Knowledge Base folders before each run. This tutorial uses the second approach in Step 3 to make the tone contrast easy to compare side by side.
Select **Next**.
### 2.6 - Step 5: Quality Metrics
Leave this step empty for now - you can configure quality monitoring later from the agent's **Edit** page. Select **Next**.
### 2.7 - Step 6: General Properties
| Field | Value |
| --------------- | -------------------------------------------------------------------------------------------------------------------- |
| **Name** | `Announcement Generator` |
| **Description** | `Drafts brand-aligned announcements from a topic, link, or notes, using the linked brand's Voice & Tone Guidelines.` |
| **Model** | Your organisation's configured AI model. |
Leave the remaining fields at their defaults and select **Submit**. You're taken to the new agent's detail page.
## Step 3: Generate the Same Announcement for Both Brands
Now put the agent to work with one real-world brief, run against each brand in turn.
### 3.1 - Run the agent against the Edinburgh Council guidelines
The agent should still be scoped to **Brands / City of Edinburgh Council** from Step 2.5. Open the agent's detail page, select **Run test**, and send:
```
Write announcement about the Expected Service Break on Dec 31th 16:00 - 18:00 due to the maintenance.
```
Expect an output shaped like this:
> **Expected service break on 31 December**
>
> We'll be carrying out planned maintenance on 31 December from 4pm to 6pm.
>
> During this time, there will be an expected service break and some online services may be unavailable.
>
> We're sorry for any inconvenience this may cause and thank you for your patience while we complete this work.
>
> If you need to use the service, please do so before 4pm or after 6pm.
Plus a short list of the Knowledge Base documents the agent consulted, for example: *Brands / City of Edinburgh Council / Tone of Voice, Accessibility and Key Brand Guidance*.
### 3.2 - Switch the agent to the Mailchimp guidelines
1. Open the agent's detail page and select **Edit**.
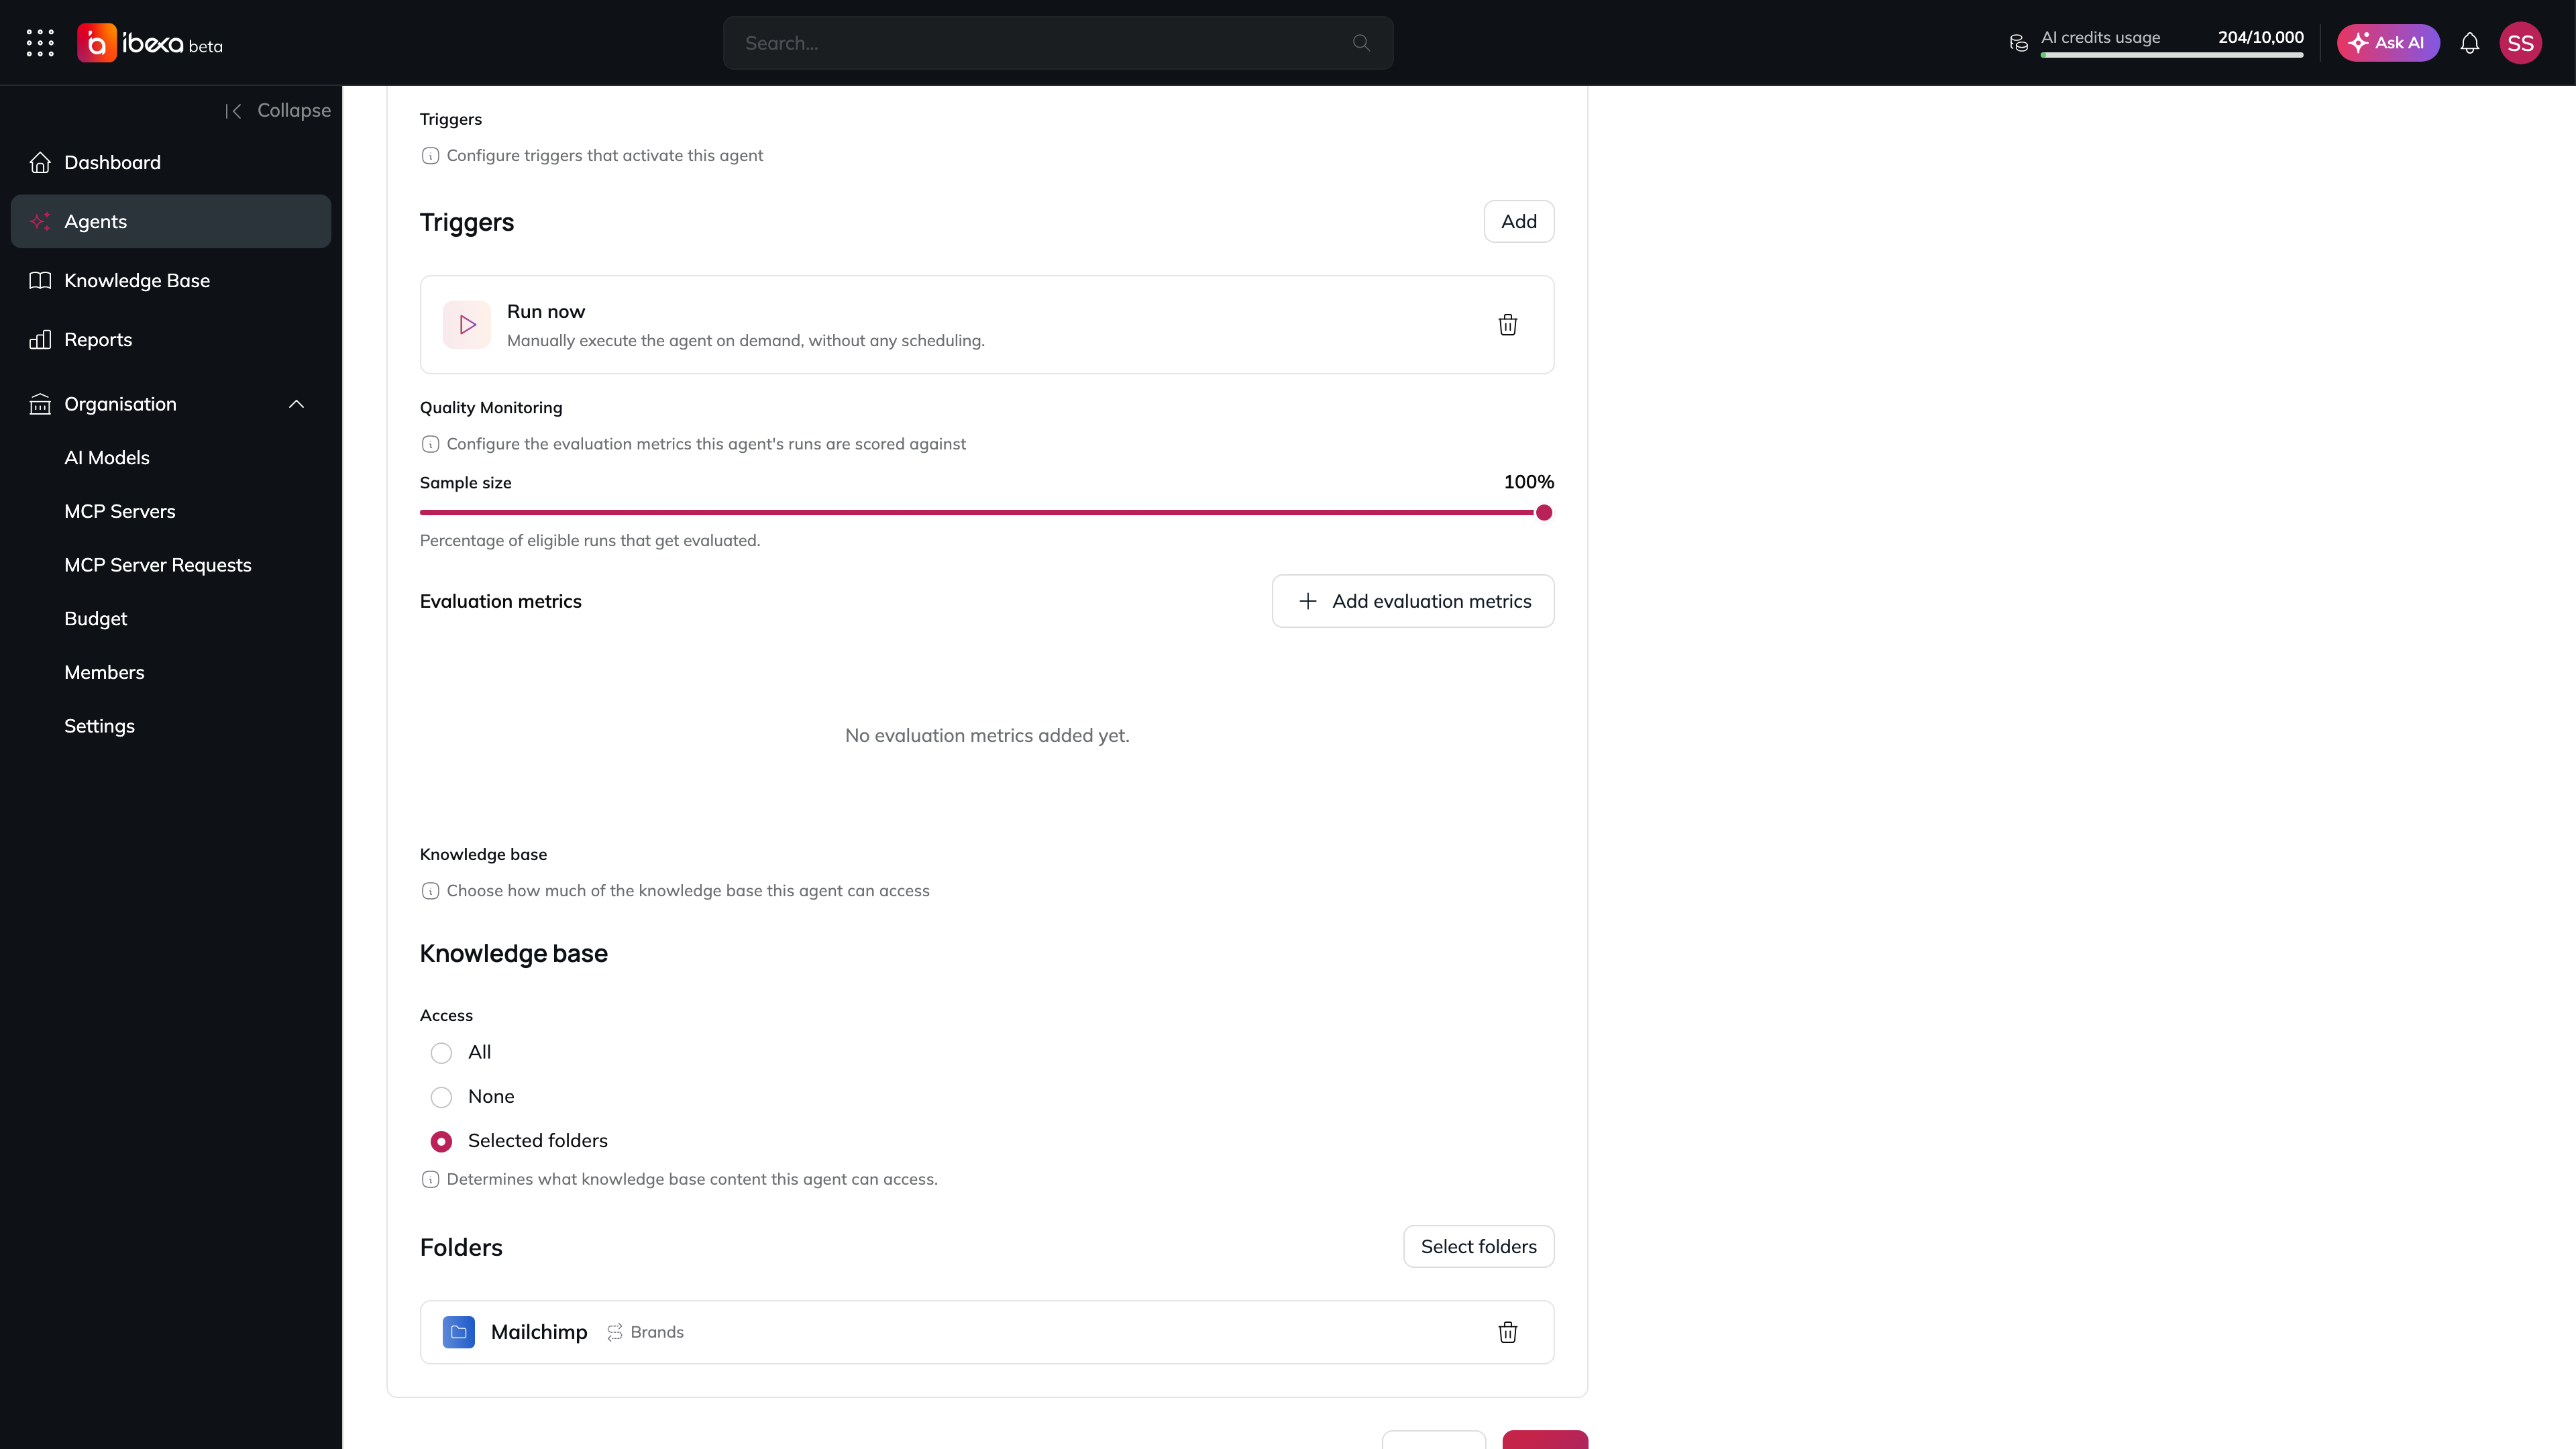
2. In **Step 4: Knowledge Base**, change the selected folder from **Brands / City of Edinburgh Council** to **Brands / Mailchimp**.
3. Select **Submit** to save.
The agent limited to the Mailchimp folder
### 3.3 - Run the same prompt again
Open **Run test** again and send the **exact same prompt** as in step 3.1:
```
Write announcement about the Expected Service Break on Dec 31th 16:00 - 18:00 due to the maintenance.
```
Expect a noticeably different tone, for example:
> **Expected service break on December 31, 4:00 PM–6:00 PM**
>
> We'll be performing scheduled maintenance on December 31 from 4:00 PM to 6:00 PM. During this time, you can expect a temporary service break.
>
> We know interruptions are never ideal, and we're sorry for the inconvenience. This maintenance helps us keep things running smoothly and reliably.
>
> If you're planning work during that window, we recommend wrapping up ahead of time and checking back once maintenance is complete.
>
> Thanks for your patience while we make a few updates behind the scenes.
Again followed by a list of the documents used, this time pointing at *Brands / Mailchimp / 02-voice-and-tone.html.md*.
## Step 4: Compare the Results
{% columns %}
{% column %}
### City of Edinburgh Council output
* Friendly, plain-English register - not stiff or corporate.
* Short sentences and paragraphs, active voice ("we'll be carrying out", "we complete this work").
* Leads with the practical facts (what/when) before any apology or context.
* Positive, appreciative closing rather than a formal sign-off.
{% endcolumn %}
{% column %}
### Mailchimp output
* Warm, genuine register with a touch of empathy ("interruptions are never ideal").
* Practical, actionable advice ("wrap up ahead of time", "check back once maintenance is complete").
* Longer, more explanatory paragraphs than the Council's version.
* Friendly, appreciative closing ("Thanks for your patience...") rather than a formal sign-off.
{% endcolumn %}
{% endcolumns %}
Notice that **the instructions never changed** between the two runs - only the linked Knowledge Base folder did. This is the core benefit of storing brand know-how in the Knowledge Base rather than in the agent's instructions: the same Copywriter Agent logic scales to as many brands, sub-brands, or regional variants as you need, and updating one brand's tone is a matter of editing and publishing one document - not rewriting an agent.
## Summary
You've just built a reusable, brand-aware Announcement Generator. Here's what you did:
1. ✅ Organised two brands' Voice & Tone Guidelines into their own Knowledge Base folders under **Brands**.
2. ✅ Downloaded each brand's official guidance and published it in the Knowledge Base.
3. ✅ Created a Copywriter Agent whose instructions describe *how* to work, without hard-coding any single brand's voice.
4. ✅ Connected the agent to the Knowledge Base and scoped its **Selected folders** access to one brand folder at a time.
5. ✅ Generated the same announcement for two different brands and confirmed the tone adapted automatically. Your marketing and content teams can now maintain one agent per brand (or swap a single agent between brands) and keep every generated announcement aligned with official guidelines - without ever pasting style rules into a prompt again.
## Next Steps
* **Add more brand assets** to each brand folder - logo usage notes, preferred terminology lists, example campaigns - so the agent has richer context to draw on.
* **Create one agent per brand** instead of switching folders, if your team manages several brands in parallel - see the note in [Step 2.5](#25---step-4-knowledge-base---link-the-brand-folder).
* **Add more content-generating agents** (social posts, product descriptions, newsletters) that point to the same brand folders, so every channel stays on-voice.